
系列文章:
用OpenCV实现Photoshop算法(四): 色阶调整用OpenCV实现Photoshop算法(五): 亮度对比度调整
用OpenCV实现Photoshop算法(六): 变为黑白图像
用OpenCV实现Photoshop算法(七): 调整色相饱和度
用OpenCV实现Photoshop算法(九): 高反差保留
二、图像剪切
用OpenCV 写一个图像剪切函数 imageCrop() 如下:
- //图像剪切
- //参数:src为源图像, dst为结果图像, rect为剪切区域
- //返回值:返回0表示成功,否则返回错误代码
- int imageCrop(InputArray src, OutputArray dst, Rect rect)
- {
- Mat input = src.getMat();
- if( input.empty() ) {
- return -1;
- }
-
- //计算剪切区域: 剪切Rect与源图像所在Rect的交集
- Rect srcRect(0, 0, input.cols, input.rows);
- rect = rect & srcRect;
- if ( rect.width <= 0 || rect.height <= 0 ) return -2;
-
- //创建结果图像
- dst.create(Size(rect.width, rect.height), src.type());
- Mat output = dst.getMat();
- if ( output.empty() ) return -1;
-
- try {
- //复制源图像的剪切区域 到结果图像
- input(rect).copyTo( output );
- return 0;
- } catch (...) {
- return -3;
- }
- }

然后,编写测试程序如下:
- #include
- #include "opencv2/core.hpp"
- #include "opencv2/imgproc.hpp"
- #include "opencv2/highgui.hpp"
-
- using namespace std;
- using namespace cv;
-
-
- //图像剪切
- //参数:src为源图像, dst为结果图像, rect为剪切区域
- //返回值:返回0表示成功,否则返回错误代码
- int imageCrop(InputArray src, OutputArray dst, Rect rect)
- {
- Mat input = src.getMat();
- if( input.empty() ) {
- return -1;
- }
-
- //计算剪切区域: 剪切Rect与源图像所在Rect的交集
- Rect srcRect(0, 0, input.cols, input.rows);
- rect = rect & srcRect;
- if ( rect.width <= 0 || rect.height <= 0 ) return -2;
-
- //创建结果图像
- dst.create(Size(rect.width, rect.height), src.type());
- Mat output = dst.getMat();
- if ( output.empty() ) return -1;
-
- try {
- //复制源图像的剪切区域 到结果图像
- input(rect).copyTo( output );
- return 0;
- } catch (...) {
- return -3;
- }
- }
-
- //======================== 主程序开始 ==========================
-
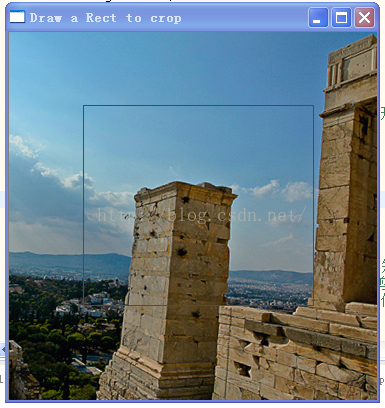
- static string window_name = "Draw a Rect to crop";
- static Mat src; //源图片
- bool isDrag = false;
- Point point1; //矩形的第一个点
- Point point2; //矩形的第二个点
-
- static void callbackMouseEvent(int mouseEvent, int x, int y, int flags, void* param)
- {
- switch(mouseEvent) {
-
- case CV_EVENT_LBUTTONDOWN:
- point1 = Point(x,y);
- point2 = Point(x,y);
- isDrag = true;
- break;
-
- case CV_EVENT_MOUSEMOVE:
- if ( isDrag ) {
- point2 = Point(x,y);
- Mat dst = src.clone();
- Rect rect (point1, point2); //得到矩形
- rectangle(dst, rect, Scalar(0,0,255));//画矩形
- imshow(window_name, dst); //显示图像
- }
- break;
-
- case CV_EVENT_LBUTTONUP:
- if (isDrag) {
- isDrag = false;
- Rect rect (point1, point2); //得到矩形
- imageCrop(src, src, rect); //图像剪切
- imshow(window_name, src); //显示图像
- }
- break;
-
- }
-
- return;
- }
-
-
- int main()
- {
- //read image file
- src = imread("building.jpg");
- if ( !src.data ) {
- cout << "error read image" << endl;
- return -1;
- }
-
- //create window
- namedWindow(window_name);
- imshow(window_name, src);
-
- //set mouse event call back
- setMouseCallback(window_name, callbackMouseEvent, NULL );
-
- waitKey();
-
- return 0;
-
- }
运行结果,画一个框后,切下,OK
评论记录:
回复评论: