事件传递中的父子关系:
在事件传递中,父子关系也很重要。事件通常从父对象传递到子对象,父对象可以拦截事件,也可以选择传递给子对象处理。 bool MyObject :: event ( QEvent * event) {
if ( event-> type ( ) == QEvent:: KeyPress) {
return true ;
}
return QObject :: event ( event) ;
}
class="hljs-button signin active" data-title="登录复制" data-report-click="{"spm":"1001.2101.3001.4334"}">
通过建立父子关系,Qt能够有效地管理对象的生命周期,简化内存管理的复杂性。这种关系也使得事件的传递和处理更加方便和灵活。
在Qt中,有两种主要的坐标系:窗口坐标系(或者称为客户区坐标系)和屏幕坐标系。理解这两种坐标系非常重要,因为它们在窗口绘制、事件处理和布局等方面有着重要作用。
窗口坐标系是相对于窗口的左上角而言的。窗口坐标系用于描述窗口内部的位置和大小。在窗口坐标系中,窗口的左上角是原点(0, 0)。当你绘制窗口的内容、布局控件或者处理鼠标事件时,通常会使用窗口坐标系。
Qt中的大部分坐标系统默认使用窗口坐标系。
屏幕坐标系是相对于屏幕左上角而言的,用于描述整个屏幕上的位置和大小。在屏幕坐标系中,屏幕的左上角是原点(0, 0)。当你需要获取鼠标在屏幕上的位置、进行截图、或者进行窗口的全屏和移动等操作时,通常会使用屏幕坐标系。
在Qt中,你可以使用QWidget类的成员函数进行窗口坐标系和屏幕坐标系之间的转换。例如:
QWidget::mapToGlobal(const QPoint &):将窗口坐标转换为屏幕坐标。QWidget::mapFromGlobal(const QPoint &):将屏幕坐标转换为窗口坐标。这些函数允许你在不同坐标系之间进行转换,使得你可以在需要时轻松地在窗口和屏幕坐标系之间切换。
Qt中的对象树模型是一种管理QObject及其派生类对象关系的模型。对象树模型用于管理对象的父子关系,即一个QObject对象可以有一个父对象和多个子对象。Qt的对象树模型是一种递归的结构,其中一个对象可以拥有多个子对象,而每个子对象又可以拥有自己的子对象,以此类推。
在对象树模型中,父对象的销毁会导致所有子对象的自动销毁。当一个QObject对象被销毁时,它的所有子对象也会被递归地销毁。这种自动内存管理机制使得在Qt中不需要手动管理对象的生命周期,提高了代码的简洁性和可维护性。
以下是Qt对象树模型的关键概念和特点:
QObject及其子类的继承关系:
所有使用Qt对象模型的类都必须继承自QObject类,包括QWidget、QMainWindow等。 父子关系的建立:
通过在对象的构造函数中传递父对象的指针,可以建立父子关系。 父对象的销毁会导致所有子对象的自动销毁。 MyChildClass :: MyChildClass ( QObject * parent)
: QObject ( parent) {
}
class="hljs-button signin active" data-title="登录复制" data-report-click="{"spm":"1001.2101.3001.4334"}"> parent()函数:
通过parent()函数可以获取对象的父对象指针。 QObject * parent = myObject-> parent ( ) ;
class="hljs-button signin active" data-title="登录复制" data-report-click="{"spm":"1001.2101.3001.4334"}"> 对象树的遍历:
通过children()函数可以获取对象的所有子对象,从而实现对象树的遍历。 QList< QObject * > children = parentObject-> children ( ) ;
class="hljs-button signin active" data-title="登录复制" data-report-click="{"spm":"1001.2101.3001.4334"}"> QObject的findChild和findChildren函数:
通过findChild函数可以在父对象的子对象中查找特定名称的子对象。 通过findChildren函数可以获取符合特定条件的所有子对象。 QObject * childObject = parentObject-> findChild < QObject* > ( "childObjectName" ) ;
QList< QObject * > children = parentObject-> findChildren < QObject* > ( "childObjectName" ) ;
class="hljs-button signin active" data-title="登录复制" data-report-click="{"spm":"1001.2101.3001.4334"}"> 事件传递中的父子关系:
在事件传递中,父子关系也很重要。事件通常从父对象传递到子对象,父对象可以拦截事件,也可以选择传递给子对象处理。 bool MyObject :: event ( QEvent * event) {
if ( event-> type ( ) == QEvent:: KeyPress) {
return true ;
}
return QObject :: event ( event) ;
}
class="hljs-button signin active" data-title="登录复制" data-report-click="{"spm":"1001.2101.3001.4334"}"> Qt的对象树模型提供了一种方便的方式来管理对象的生命周期和组织对象的关系,特别适用于GUI编程和事件处理。
在Qt中,可以使用默认信号和槽的机制,它允许QPushButton的点击事件等。
默认信号和槽的连接:
对于某些Qt组件,比如QPushButton,它们内置了一些默认的信号和槽,无需手动声明,可以直接连接它们的信号和槽。 示例:
QPushButton * button = new QPushButton ( "Click Me" ) ;
QObject :: connect ( button, & QPushButton:: clicked, [ = ] ( ) {
qDebug ( ) << "Button Clicked!" ;
} ) ;
class="hljs-button signin active" data-title="登录复制" data-report-click="{"spm":"1001.2101.3001.4334"}">在这个例子中,QPushButton的clicked信号与lambda表达式连接,当按钮被点击时,lambda表达式内的代码会执行。
其他组件的默认信号和槽:
其他一些组件也有默认的信号和槽,例如QLineEdit的textChanged信号。 示例:
QLineEdit * lineEdit = new QLineEdit ( ) ;
QObject :: connect ( lineEdit, & QLineEdit:: textChanged, [ = ] ( const QString & text) {
qDebug ( ) << "Text Changed: " << text;
} ) ;
class="hljs-button signin active" data-title="登录复制" data-report-click="{"spm":"1001.2101.3001.4334"}">这里,QLineEdit的textChanged信号与lambda表达式连接,当文本内容发生变化时,lambda表达式内的代码会执行。
以下是一个完整的示例,演示了如何使用默认信号和槽的机制连接QPushButton和QLineEdit的信号与槽:
# include # include # include # include int main ( int argc, char * argv[ ] ) {
QApplication app ( argc, argv) ;
QPushButton * button = new QPushButton ( "Click Me" ) ;
QObject :: connect ( button, & QPushButton:: clicked, [ = ] ( ) {
qInfo ( ) << "Button Clicked!" ;
} ) ;
QLineEdit * lineEdit = new QLineEdit ( ) ;
QObject :: connect ( lineEdit, & QLineEdit:: textChanged, [ = ] ( const QString & text) {
qInfo ( ) << "Text Changed: " << text;
} ) ;
button-> show ( ) ;
lineEdit-> show ( ) ;
return app. exec ( ) ;
}
class="hljs-button signin active" data-title="登录复制" data-report-click="{"spm":"1001.2101.3001.4334"}">1 2 3 4 5 6 7 8 9 10 11 12 13 14 15 16 17 18 19 20 21 22 23 24 25 26 在这个示例中,当按钮被点击或文本框的文本发生变化时,对应的信号和槽会自动触发。这种方式简化了信号和槽的连接过程,使得代码更加简洁和易读。
在Qt中,你可以自定义信号和槽,使得不同对象之间可以进行自定义的事件通信。自定义信号和槽的使用步骤如下:
在类的声明中声明信号: signals关键字声明信号。信号可以带参数,参数类型可以是任何Qt支持的数据类型。
示例:
class MyObject : public QObject {
Q_OBJECT
public :
MyObject ( ) { }
signals:
void mySignal ( int value) ;
} ;
class="hljs-button signin active" data-title="登录复制" data-report-click="{"spm":"1001.2101.3001.4334"}"> 在类的声明中声明槽: slots关键字声明槽。槽函数可以是任何成员函数,用于处理信号触发时的操作。
示例:
class MyObject : public QObject {
Q_OBJECT
public :
MyObject ( ) { }
public slots:
void mySlot ( int value) {
qDebug ( ) << "Received value: " << value;
}
} ;
class="hljs-button signin active" data-title="登录复制" data-report-click="{"spm":"1001.2101.3001.4334"}"> 在类的实现中使用信号: emit关键字来触发信号。当槽函数与信号连接后,信号被触发时,连接的槽函数将被调用。
示例:
class MyObject : public QObject {
Q_OBJECT
public :
MyObject ( ) { }
signals:
void mySignal ( int value) ;
public slots:
void triggerSignal ( ) {
emit mySignal ( 42 ) ;
}
} ;
class="hljs-button signin active" data-title="登录复制" data-report-click="{"spm":"1001.2101.3001.4334"}"> 信号与槽的连接: QObject::connect()函数将信号与槽连接起来。连接成功后,当信号被触发时,与之连接的槽函数将被调用。
示例:
MyObject * obj = new MyObject ( ) ;
QObject :: connect ( obj, & MyObject:: mySignal, obj, & MyObject:: mySlot) ;
obj-> triggerSignal ( ) ;
class="hljs-button signin active" data-title="登录复制" data-report-click="{"spm":"1001.2101.3001.4334"}"> 在上述示例中,MyObject类中定义了一个自定义信号mySignal和一个自定义槽函数mySlot。然后,使用connect()函数将mySignal和mySlot连接起来。当triggerSignal()函数被调用时,mySignal信号被触发,随后连接的槽函数mySlot将被执行,输出"Received value: 42"。
这种自定义信号和槽的机制使得不同对象能够在特定事件发生时进行通信,是Qt中事件驱动编程的核心机制之一。
Lambda表达式在Qt中非常常用,特别是在信号与槽的连接、算法和STL容器的使用等方面。以下是与Qt相关的Lambda表达式知识点:
Lambda表达式基本语法:
[捕获列表](参数列表) -> 返回类型 { 函数体 } 捕获列表:
[=]:以传值方式捕获所有局部变量。[&]:以引用方式捕获所有局部变量。[变量]:捕获特定变量,可以使用=或&指定捕获方式。 Lambda表达式作为匿名函数:
可以在需要函数的地方使用Lambda表达式,不需要显示地声明函数。 Lambda表达式用于信号与槽的连接:
在Qt5中,可以使用Lambda表达式连接信号与槽,提供了一种更为简洁的语法。 QObject :: connect ( sender, & SenderClass:: signalName, [ = ] ( ) {
} ) ;
class="hljs-button signin active" data-title="登录复制" data-report-click="{"spm":"1001.2101.3001.4334"}"> Lambda表达式用于STL算法:
Lambda表达式可以用于STL算法,例如std::for_each、std::transform等,提供了一种方便的操作方式。 std:: vector< int > numbers = { 1 , 2 , 3 , 4 , 5 } ;
std:: for_each ( numbers. begin ( ) , numbers. end ( ) , [ ] ( int number) {
qDebug ( ) << number;
} ) ;
class="hljs-button signin active" data-title="登录复制" data-report-click="{"spm":"1001.2101.3001.4334"}"> Lambda表达式用于STL容器的排序:
Lambda表达式可以用于STL容器的排序,提供了一种灵活的比较方式。 std:: vector< int > numbers = { 5 , 2 , 8 , 1 , 3 } ;
std:: sort ( numbers. begin ( ) , numbers. end ( ) , [ ] ( int a, int b) {
return a < b;
} ) ;
class="hljs-button signin active" data-title="登录复制" data-report-click="{"spm":"1001.2101.3001.4334"}"> Lambda表达式用于Qt算法:
Qt提供了一些基于Lambda表达式的算法,例如QtConcurrent::map、QtConcurrent::filter等。 QVector< int > numbers = { 1 , 2 , 3 , 4 , 5 } ;
QVector< int > result = QtConcurrent :: blockingMapped ( numbers, [ ] ( int number) {
return number * 2 ;
} ) ;
class="hljs-button signin active" data-title="登录复制" data-report-click="{"spm":"1001.2101.3001.4334"}"> 以上是Lambda表达式在Qt中的一些常见用法,它提供了一种简洁而强大的编程方式,使得代码更具可读性和灵活性。
QMainWindow 是Qt框架中的一个核心类,用于创建应用程序的主窗口。它提供了一个标准的应用程序主窗口结构,包括菜单栏、工具栏、状态栏等,并且可以容纳各种自定义的用户界面组件。以下是QMainWindow 的一些主要特性和用法:
菜单栏(Menu Bar): QMenuBar 对象用于创建菜单栏,菜单栏通常包含一个或多个菜单,每个菜单包含若干个菜单项。
工具栏(Tool Bar): QToolBar 对象用于创建工具栏,工具栏通常包含一组快捷操作按钮,用于执行常用的功能。
状态栏(Status Bar): QStatusBar 对象用于创建状态栏,用于显示应用程序的状态信息、提示信息等。
中央部件(Central Widget): 通常是一个自定义的QWidget派生类,作为主窗口的中央区域,用于放置应用程序的主要内容。
Dock窗口(Dock Widgets): QDockWidget 对象用于创建可停靠的面板,用户可以拖动和停靠这些面板。
文档模型/视图架构(Document-View Architecture): QMainWindow 支持文档-视图架构,可以通过多文档界面(MDI)或单文档界面(SDI)的方式管理多个文档。
布局管理(Layout Management): QMainWindow 支持布局管理,可以方便地安排各种子组件的位置和大小。
setMenuBar(QMenuBar *menuBar):addToolBar(QToolBar *toolbar):setStatusBar(QStatusBar *statusBar):setCentralWidget(QWidget *widget):addDockWidget(Qt::DockWidgetArea area, QDockWidget *dockwidget):在Qt中,菜单栏是由QMenuBar 控件管理的。菜单栏通常包含一个或多个菜单,每个菜单包含若干个菜单项(QAction)。可以通过QMenuBar、QMenu 和 QAction 类来创建和管理菜单栏及其菜单项。
创建一个菜单栏:
QMenuBar * menuBar = new QMenuBar ( this ) ;
setMenuBar ( menuBar) ;
class="hljs-button signin active" data-title="登录复制" data-report-click="{"spm":"1001.2101.3001.4334"}"> 在菜单栏上添加一个菜单:
QMenu * fileMenu = menuBar-> addMenu ( tr ( "File" ) ) ;
class="hljs-button signin active" data-title="登录复制" data-report-click="{"spm":"1001.2101.3001.4334"}"> 在菜单中添加菜单项:
QAction * openAction = new QAction ( tr ( "Open" ) , this ) ;
fileMenu-> addAction ( openAction) ;
connect ( openAction, SIGNAL ( triggered ( ) ) , this , SLOT ( openFile ( ) ) ) ;
class="hljs-button signin active" data-title="登录复制" data-report-click="{"spm":"1001.2101.3001.4334"}">这里,openFile() 是一个槽函数,当菜单项被点击时执行相应操作。
假设我们要创建一个简单的Qt应用程序,其中有一个主窗口,带有一个菜单栏,菜单栏上有一个"File"菜单,包含一个"Open"菜单项。点击"Open"菜单项时,弹出一个文件选择对话框,选择文件后在控制台输出文件的路径。
# include # include # include # include # include # include # include class MainWindow : public QMainWindow {
Q_OBJECT
public :
MainWindow ( QWidget * parent = nullptr ) ;
~ MainWindow ( ) { }
private slots:
void openFile ( ) {
QString filePath = QFileDialog :: getOpenFileName ( this , tr ( "Open File" ) , "" , tr ( "All Files (*)" ) ) ;
if ( ! filePath. isEmpty ( ) ) {
qDebug ( ) << "Selected file: " << filePath;
}
}
} ;
MainWindow :: MainWindow ( QWidget * parent)
: QMainWindow ( parent)
{
QMenuBar * menuBar = new QMenuBar ( this ) ;
QMenu * fileMenu = menuBar-> addMenu ( tr ( "File" ) ) ;
QAction * openAction = new QAction ( tr ( "Open" ) , this ) ;
fileMenu-> addAction ( openAction) ;
connect ( openAction, SIGNAL ( triggered ( ) ) , this , SLOT ( openFile ( ) ) ) ;
setMenuBar ( menuBar) ;
}
# include "main.moc" int main ( int argc, char * argv[ ] )
{
QApplication a ( argc, argv) ;
MainWindow w;
w. show ( ) ;
return a. exec ( ) ;
}
class="hljs-button signin active" data-title="登录复制" data-report-click="{"spm":"1001.2101.3001.4334"}">1 2 3 4 5 6 7 8 9 10 11 12 13 14 15 16 17 18 19 20 21 22 23 24 25 26 27 28 29 30 31 32 33 34 35 36 37 38 39 40 41 42 43 在这个例子中,当用户点击菜单栏中的"Open"菜单项时,会弹出一个文件选择对话框。选择文件后,文件的路径会被输出到控制台。这个简单的示例演示了如何在QMainWindow 中使用菜单栏和菜单项。
在QMainWindow中,工具栏(Tool Bar)用于提供快速访问应用程序的一些常用功能。工具栏通常包含了一系列按钮、工具和操作,用户可以通过单击这些按钮来执行相应的操作。以下是如何在QMainWindow中使用工具栏的说明和一个简单的实例讲解。
在QMainWindow中,你可以通过以下步骤在工具栏上添加按钮和其他控件:
创建一个工具栏:
QToolBar * toolBar = new QToolBar ( "MyToolBar" , this ) ;
addToolBar ( toolBar) ;
class="hljs-button signin active" data-title="登录复制" data-report-click="{"spm":"1001.2101.3001.4334"}">这里,“MyToolBar” 是工具栏的名称。
在工具栏上添加按钮:
QAction * openAction = new QAction ( QIcon ( "open.png" ) , "Open" , this ) ;
connect ( openAction, SIGNAL ( triggered ( ) ) , this , SLOT ( openFile ( ) ) ) ;
toolBar-> addAction ( openAction) ;
class="hljs-button signin active" data-title="登录复制" data-report-click="{"spm":"1001.2101.3001.4334"}">这里,open.png 是按钮的图标文件。openFile() 是一个槽函数,当按钮被点击时执行相应的操作。
以下是一个简单的Qt应用程序,演示了如何在QMainWindow中使用工具栏。在这个例子中,单击工具栏上的按钮将打开一个文件选择对话框,选择文件后将文件路径显示在状态栏上。
# include # include # include # include # include # include class MainWindow : public QMainWindow {
Q_OBJECT
public :
MainWindow ( QWidget * parent = nullptr ) ;
~ MainWindow ( ) { }
private slots:
void openFile ( ) {
QString filePath = QFileDialog :: getOpenFileName ( this , tr ( "Open File" ) , "" , tr ( "All Files (*)" ) ) ;
if ( ! filePath. isEmpty ( ) ) {
statusBarLabel-> setText ( "Selected file: " + filePath) ;
}
}
private :
QLabel * statusBarLabel;
} ;
MainWindow :: MainWindow ( QWidget * parent )
: QMainWindow ( parent) {
QToolBar * toolBar = new QToolBar ( "MyToolBar" , this ) ;
addToolBar ( toolBar) ;
QAction * openAction = new QAction ( "Open" , this ) ;
connect ( openAction, SIGNAL ( triggered ( ) ) , this , SLOT ( openFile ( ) ) ) ;
toolBar-> addAction ( openAction) ;
statusBarLabel = new QLabel ( this ) ;
statusBar ( ) -> addWidget ( statusBarLabel) ;
} ;
# include "main.moc" int main ( int argc, char * argv[ ] ) {
QApplication app ( argc, argv) ;
MainWindow mainWindow;
mainWindow. show ( ) ;
return app. exec ( ) ;
}
class="hljs-button signin active" data-title="登录复制" data-report-click="{"spm":"1001.2101.3001.4334"}">1 2 3 4 5 6 7 8 9 10 11 12 13 14 15 16 17 18 19 20 21 22 23 24 25 26 27 28 29 30 31 32 33 34 35 36 37 38 39 40 41 42 43 44 45 46 当用户点击工具栏上的按钮时,将会弹出一个文件选择对话框,选择文件后,文件的路径将会显示在状态栏上。
在 QMainWindow 中,状态栏(Status Bar)是一个用于显示应用程序状态信息、提示信息和用户交互的底部区域。状态栏通常用于向用户提供反馈、进度信息或一般性的应用程序状态。以下是如何在 QMainWindow 中使用状态栏的说明和一个简单的实例讲解。
在 QMainWindow 中,你可以通过以下步骤在状态栏上添加标签、消息和控件:
创建状态栏:
QStatusBar 类通常已经作为 QMainWindow 的一部分存在,你可以使用 statusBar() 函数来获取当前的状态栏对象。
添加标签或消息到状态栏:
statusBar ( ) -> showMessage ( "Ready" , 3000 ) ;
class="hljs-button signin active" data-title="登录复制" data-report-click="{"spm":"1001.2101.3001.4334"}"> 在状态栏上添加控件:
QLabel * statusLabel = new QLabel ( "Status Label" , this ) ;
statusBar ( ) -> addPermanentWidget ( statusLabel) ;
class="hljs-button signin active" data-title="登录复制" data-report-click="{"spm":"1001.2101.3001.4334"}">这将在状态栏的最右侧添加一个标签。
以下是一个简单的Qt应用程序,演示了如何在 QMainWindow 中使用状态栏。在这个示例中,状态栏会在应用程序启动时显示"Ready"消息,然后在用户点击按钮时显示相应的消息。
# include # include # include # include # include class MainWindow : public QMainWindow {
Q_OBJECT
public :
MainWindow ( QWidget * parent = nullptr ) : QMainWindow ( parent) {
statusLabel = new QLabel ( "Ready" , this ) ;
statusBar ( ) -> addWidget ( statusLabel) ;
QPushButton * button = new QPushButton ( "Show Message" , this ) ;
connect ( button, SIGNAL ( clicked ( ) ) , this , SLOT ( showMessage ( ) ) ) ;
setCentralWidget ( button) ;
}
private slots:
void showMessage ( ) {
statusBar ( ) -> showMessage ( "Button clicked" , 3000 ) ;
}
private :
QLabel * statusLabel;
} ;
# include "main.moc" int main ( int argc, char * argv[ ] ) {
QApplication app ( argc, argv) ;
MainWindow mainWindow;
mainWindow. show ( ) ;
return app. exec ( ) ;
}
class="hljs-button signin active" data-title="登录复制" data-report-click="{"spm":"1001.2101.3001.4334"}">1 2 3 4 5 6 7 8 9 10 11 12 13 14 15 16 17 18 19 20 21 22 23 24 25 26 27 28 29 30 31 32 33 34 35 36 37 38 39 在这个示例中,当应用程序启动时,状态栏会显示"Ready"消息。当用户点击"Show Message"按钮时,状态栏会显示"Button clicked"消息,并在3秒后清除。这个示例演示了如何在 QMainWindow 中使用状态栏来提供应用程序的状态信息。
在 QMainWindow 中,停靠部件(Dock Widgets)是指可以在主窗口中停靠、浮动和关闭的窗口部件。这些停靠部件通常用于显示工具、属性编辑器、文件导航器等,为用户提供更丰富的交互体验。以下是如何在 QMainWindow 中使用停靠部件的说明和一个简单的实例讲解。
创建停靠部件:
QDockWidget * dockWidget = new QDockWidget ( "Dock Widget" , this ) ;
class="hljs-button signin active" data-title="登录复制" data-report-click="{"spm":"1001.2101.3001.4334"}">这里,“Dock Widget” 是停靠部件的标题。
设置停靠部件的内容:
QWidget * dockWidgetContent = new QWidget ( dockWidget) ;
dockWidget-> setWidget ( dockWidgetContent) ;
class="hljs-button signin active" data-title="登录复制" data-report-click="{"spm":"1001.2101.3001.4334"}">在 dockWidgetContent 中添加你需要的控件,例如按钮、标签等。
将停靠部件添加到主窗口:
addDockWidget ( Qt:: LeftDockWidgetArea, dockWidget) ;
class="hljs-button signin active" data-title="登录复制" data-report-click="{"spm":"1001.2101.3001.4334"}">Qt::LeftDockWidgetArea 指定了停靠部件的默认位置,你也可以选择其他位置,例如 Qt::RightDockWidgetArea、Qt::TopDockWidgetArea 或 Qt::BottomDockWidgetArea。
以下是一个简单的Qt应用程序,演示了如何在 QMainWindow 中使用停靠部件。在这个示例中,主窗口中包含一个按钮,点击按钮后会在左侧停靠一个带有标签的窗口。
# include # include # include # include class MainWindow : public QMainWindow {
Q_OBJECT
public :
MainWindow ( QWidget * parent = nullptr ) : QMainWindow ( parent) {
QPushButton * button = new QPushButton ( "Show Dock Widget" , this ) ;
connect ( button, SIGNAL ( clicked ( ) ) , this , SLOT ( showDockWidget ( ) ) ) ;
setCentralWidget ( button) ;
}
private slots:
void showDockWidget ( ) {
QDockWidget * dockWidget = new QDockWidget ( "Dock Widget" , this ) ;
QLabel * label = new QLabel ( "This is a dock widget" , dockWidget) ;
dockWidget-> setWidget ( label) ;
addDockWidget ( Qt:: LeftDockWidgetArea, dockWidget) ;
}
} ;
# include # include "main.moc" int main ( int argc, char * argv[ ] ) {
QApplication app ( argc, argv) ;
MainWindow mainWindow;
mainWindow. show ( ) ;
return app. exec ( ) ;
}
class="hljs-button signin active" data-title="登录复制" data-report-click="{"spm":"1001.2101.3001.4334"}">1 2 3 4 5 6 7 8 9 10 11 12 13 14 15 16 17 18 19 20 21 22 23 24 25 26 27 28 29 30 31 32 33 34 35 36 37 38 39 在这个示例中,当用户点击"Show Dock Widget"按钮时,一个带有标签的停靠部件会从左侧停靠。你可以将停靠部件放置在不同的停靠区域,并且可以通过用户界面手动调整它们的位置。这个示例演示了如何在 QMainWindow 中使用停靠部件提供额外的功能。
在 QMainWindow 中,中心部件(Central Widget)是主窗口的中间区域,通常用于显示应用程序的主要内容,例如绘图区域、文本编辑器、图形视图等。中心部件通常是一个继承自 QWidget 的自定义部件,但也可以是其他 QWidget 派生类的实例。以下是如何在 QMainWindow 中使用中心部件的说明和一个简单的实例讲解。
创建中心部件:
QWidget * centralWidget = new QWidget ( this ) ;
setCentralWidget ( centralWidget) ;
class="hljs-button signin active" data-title="登录复制" data-report-click="{"spm":"1001.2101.3001.4334"}">这里,centralWidget 是一个继承自 QWidget 的自定义部件,或者是其他 QWidget 派生类的实例。
将控件添加到中心部件:
QVBoxLayout * layout = new QVBoxLayout ( centralWidget) ;
QLabel * label = new QLabel ( "This is the central widget content" , centralWidget) ;
layout-> addWidget ( label) ;
class="hljs-button signin active" data-title="登录复制" data-report-click="{"spm":"1001.2101.3001.4334"}">在这个示例中,我们创建了一个垂直布局管理器,并将一个标签添加到其中。这个布局将会显示在中心部件的中间区域。
以下是一个简单的Qt应用程序,演示了如何在 QMainWindow 中使用中心部件。在这个示例中,主窗口的中心部件包含一个标签,显示一条消息。
# include # include # include # include class MainWindow : public QMainWindow {
Q_OBJECT
public :
MainWindow ( QWidget * parent = nullptr ) : QMainWindow ( parent) {
QWidget * centralWidget = new QWidget ( this ) ;
setCentralWidget ( centralWidget) ;
QVBoxLayout * layout = new QVBoxLayout ( centralWidget) ;
QLabel * label = new QLabel ( "This is the central widget content" , centralWidget) ;
layout-> addWidget ( label) ;
}
} ;
# include int main ( int argc, char * argv[ ] ) {
QApplication app ( argc, argv) ;
MainWindow mainWindow;
mainWindow. show ( ) ;
return app. exec ( ) ;
}
class="hljs-button signin active" data-title="登录复制" data-report-click="{"spm":"1001.2101.3001.4334"}">1 2 3 4 5 6 7 8 9 10 11 12 13 14 15 16 17 18 19 20 21 22 23 24 25 26 27 28 29 30 31 在这个示例中,主窗口的中心部件包含一个标签,标签显示文本"This is the central widget content"。你可以将任何需要显示的控件添加到中心部件中,从而在主窗口的中心区域显示应用程序的主要内容。
QDialog 是Qt框架中的一个类,用于创建对话框窗口。对话框是一种与用户进行简短交互、提供特定信息或执行特定任务的窗口。QDialog 提供了一种方便的方式来创建标准对话框,例如消息框、输入框、文件选择框等。
以下是QDialog的一些基本概念和特点:
模态和非模态: QDialog 可以是模态(Modal)或非模态(Modeless)。模态对话框阻止用户与应用程序的其他部分进行交互,直到对话框关闭。非模态对话框允许用户同时与应用程序的其他部分进行交互。
布局管理: 可以使用布局管理器(如QVBoxLayout、QHBoxLayout等)来组织对话框中的控件。
内建按钮: QDialog 可以包含内建的标准按钮,例如“确定”、“取消”、“应用”等。这些按钮通常用于执行常见的操作。
自定义控件: 可以将自定义的控件(例如标签、文本框、按钮等)添加到对话框中,以满足特定需求。
创建对话框:
QDialog * dialog = new QDialog ( parent) ;
class="hljs-button signin active" data-title="登录复制" data-report-click="{"spm":"1001.2101.3001.4334"}">这里,parent 是可选的,表示对话框的父窗口。
设置对话框的标题:
dialog-> setWindowTitle ( "Dialog Title" ) ;
class="hljs-button signin active" data-title="登录复制" data-report-click="{"spm":"1001.2101.3001.4334"}"> 添加控件到对话框:
QVBoxLayout * layout = new QVBoxLayout ( dialog) ;
QLabel * label = new QLabel ( "Dialog Content" , dialog) ;
layout-> addWidget ( label) ;
class="hljs-button signin active" data-title="登录复制" data-report-click="{"spm":"1001.2101.3001.4334"}"> 显示对话框:
dialog-> exec ( ) ;
dialog-> show ( ) ;
class="hljs-button signin active" data-title="登录复制" data-report-click="{"spm":"1001.2101.3001.4334"}"> 以下是一个简单的Qt应用程序,演示了如何创建一个模态对话框。在这个示例中,点击按钮将会弹出一个对话框。
# include # include # include # include # include int main ( int argc, char * argv[ ] ) {
QApplication app ( argc, argv) ;
QDialog dialog;
dialog. setWindowTitle ( "Dialog Example" ) ;
QVBoxLayout * layout = new QVBoxLayout ( & dialog) ;
QLabel * label = new QLabel ( "This is a dialog" , & dialog) ;
layout-> addWidget ( label) ;
QPushButton * button = new QPushButton ( "Close" , & dialog) ;
layout-> addWidget ( button) ;
QObject :: connect ( button, & QPushButton:: clicked, [ & dialog] ( ) {
dialog. close ( ) ;
} ) ;
dialog. exec ( ) ;
return app. exec ( ) ;
}
class="hljs-button signin active" data-title="登录复制" data-report-click="{"spm":"1001.2101.3001.4334"}">1 2 3 4 5 6 7 8 9 10 11 12 13 14 15 16 17 18 19 20 21 22 23 24 25 26 27 在这个示例中,点击按钮将会弹出一个包含标签和按钮的对话框。这个对话框是模态的,阻塞用户与主窗口的交互,直到对话框关闭。
在Qt中,QDialog 是一个用于创建对话框的类。模态对话框(Modal Dialog)是一种阻塞式对话框,当用户与对话框交互时,阻止用户与应用程序的其他部分进行交互。在用户关闭模态对话框之前,主窗口和其他窗口将无法响应用户输入。
以下是如何创建和使用模态对话框的基本步骤:
创建QDialog对象:
QDialog * dialog = new QDialog ( parent) ;
class="hljs-button signin active" data-title="登录复制" data-report-click="{"spm":"1001.2101.3001.4334"}">这里,parent 是可选的,表示对话框的父窗口。
设置对话框的标题和内容:
dialog-> setWindowTitle ( "Modal Dialog Example" ) ;
QLabel * label = new QLabel ( "This is a modal dialog." , dialog) ;
class="hljs-button signin active" data-title="登录复制" data-report-click="{"spm":"1001.2101.3001.4334"}"> 添加按钮或其他控件:
QPushButton * okButton = new QPushButton ( "OK" , dialog) ;
class="hljs-button signin active" data-title="登录复制" data-report-click="{"spm":"1001.2101.3001.4334"}">你可以连接按钮的点击信号(clicked()信号)到一个槽函数,以便在用户点击按钮时执行相应的操作。
显示对话框:
int result = dialog-> exec ( ) ;
class="hljs-button signin active" data-title="登录复制" data-report-click="{"spm":"1001.2101.3001.4334"}">exec() 函数是一个阻塞函数,当对话框关闭时,它返回 QDialog::Accepted 或 QDialog::Rejected,分别表示用户点击了“确定”按钮或“取消”按钮。
以下是一个完整的Qt应用程序,演示了如何创建一个简单的模态对话框:
# include # include # include # include # include # include int main ( int argc, char * argv[ ] ) {
QApplication app ( argc, argv) ;
QDialog dialog;
dialog. setWindowTitle ( "Modal Dialog Example" ) ;
QVBoxLayout * layout = new QVBoxLayout ( & dialog) ;
QLabel * label = new QLabel ( "This is a modal dialog." , & dialog) ;
layout-> addWidget ( label) ;
QPushButton * okButton = new QPushButton ( "OK" , & dialog) ;
layout-> addWidget ( okButton) ;
QPushButton * closeButton = new QPushButton ( "close" , & dialog) ;
layout-> addWidget ( closeButton) ;
QObject :: connect ( okButton, & QPushButton:: clicked, [ & dialog] ( ) {
dialog. accept ( ) ;
} ) ;
QObject :: connect ( closeButton, & QPushButton:: clicked, [ & dialog] ( ) {
dialog. reject ( ) ;
} ) ;
int result = dialog. exec ( ) ;
if ( result == QDialog:: Accepted) {
qInfo ( ) << "User clicked OK." ;
} else {
qInfo ( ) << "User closed the dialog." ;
}
return app. exec ( ) ;
}
class="hljs-button signin active" data-title="登录复制" data-report-click="{"spm":"1001.2101.3001.4334"}">1 2 3 4 5 6 7 8 9 10 11 12 13 14 15 16 17 18 19 20 21 22 23 24 25 26 27 28 29 30 31 32 33 34 35 36 37 38 39 40 41 在这个示例中,当用户点击“OK”按钮时,对话框将关闭,dialog.exec() 函数将返回 QDialog::Accepted,并输出"User clicked OK.“。如果用户关闭对话框,dialog.exec() 将返回 QDialog::Rejected,并输出"User closed the dialog.”。
Qt提供了一些标准对话框(Standard Dialogs)来执行常见的任务,例如文件选择、颜色选择、字体选择等。这些标准对话框大大简化了与用户的交互,因为它们遵循操作系统的外观和行为,并提供了一致的用户体验。
以下是一些常见的标准对话框的使用方法:
文件对话框允许用户选择文件或文件夹。
# include = QFileDialog :: getOpenFileName ( this , "Open File" , "" , "Text Files (*.txt);;All Files (*)" ) ;
class="hljs-button signin active" data-title="登录复制" data-report-click="{"spm":"1001.2101.3001.4334"}">这个代码将打开一个文件选择对话框,允许用户选择文本文件。
颜色对话框允许用户选择颜色。
# include = QColorDialog :: getColor ( Qt:: red, this , "Choose Color" ) ;
class="hljs-button signin active" data-title="登录复制" data-report-click="{"spm":"1001.2101.3001.4334"}">这个代码将打开一个颜色选择对话框,默认颜色为红色。
字体对话框允许用户选择字体。
# include = QFontDialog :: getFont ( nullptr , this ) ;
class="hljs-button signin active" data-title="登录复制" data-report-click="{"spm":"1001.2101.3001.4334"}">这个代码将打开一个字体选择对话框。
消息框用于显示简单的消息,例如信息、警告、错误等。
# include QMessageBox :: information ( this , "Information" , "This is an information message." ) ;
QMessageBox :: warning ( this , "Warning" , "This is a warning message." ) ;
QMessageBox :: critical ( this , "Error" , "This is an error message." ) ;
class="hljs-button signin active" data-title="登录复制" data-report-click="{"spm":"1001.2101.3001.4334"}">以上代码将分别显示信息框、警告框和错误框。
输入对话框用于获取用户输入。
# include = QInputDialog :: getText ( this , "Input" , "Enter your name:" ) ;
class="hljs-button signin active" data-title="登录复制" data-report-click="{"spm":"1001.2101.3001.4334"}">以上代码将打开一个输入对话框,获取用户输入的文本。
这些标准对话框提供了一种简便的方法,可根据需要在你的应用程序中集成用户交互。不同的对话框类型可以满足不同的需求,从而提供更好的用户体验。
在Qt中,你可以创建自定义对话框(Custom Dialog)来满足特定需求,这允许你设计一个完全符合应用程序风格的对话框。通常,自定义对话框是通过创建一个继承自QDialog的自定义类,并在这个类中定义对话框的外观和行为。
以下是如何创建自定义对话框的基本步骤:
创建一个自定义对话框类:
# include class CustomDialog : public QDialog {
Q_OBJECT
public :
CustomDialog ( QWidget * parent = nullptr ) ;
} ;
class="hljs-button signin active" data-title="登录复制" data-report-click="{"spm":"1001.2101.3001.4334"}"> 在自定义对话框类的实现中,设置对话框的外观和行为:
# include "customdialog.h" # include # include # include CustomDialog :: CustomDialog ( QWidget * parent) : QDialog ( parent) {
QVBoxLayout * layout = new QVBoxLayout ( this ) ;
QLabel * label = new QLabel ( "This is a custom dialog." , this ) ;
layout-> addWidget ( label) ;
QPushButton * okButton = new QPushButton ( "OK" , this ) ;
layout-> addWidget ( okButton) ;
connect ( okButton, SIGNAL ( clicked ( ) ) , this , SLOT ( accept ( ) ) ) ;
}
class="hljs-button signin active" data-title="登录复制" data-report-click="{"spm":"1001.2101.3001.4334"}">在这个例子中,我们创建了一个包含标签和“OK”按钮的自定义对话框。
在应用程序中使用自定义对话框:
CustomDialog dialog;
dialog. exec ( ) ;
class="hljs-button signin active" data-title="登录复制" data-report-click="{"spm":"1001.2101.3001.4334"}">这个代码将创建自定义对话框的实例,并显示它。
这是一个非常基本的例子,你可以根据需要在自定义对话框中添加更多的控件和逻辑。
以下是一个完整的Qt应用程序,演示了如何创建一个简单的自定义对话框:
# include # include # include # include # include class CustomDialog : public QDialog {
Q_OBJECT
public :
CustomDialog ( QWidget * parent = nullptr ) ;
~ CustomDialog ( ) { }
} ;
CustomDialog :: CustomDialog ( QWidget * parent ) : QDialog ( parent) {
QVBoxLayout * layout = new QVBoxLayout ( this ) ;
QLabel * label = new QLabel ( "This is a custom dialog." , this ) ;
layout-> addWidget ( label) ;
QPushButton * okButton = new QPushButton ( "OK" , this ) ;
layout-> addWidget ( okButton) ;
connect ( okButton, SIGNAL ( clicked ( ) ) , this , SLOT ( accept ( ) ) ) ;
} ;
int main ( int argc, char * argv[ ] ) {
QApplication app ( argc, argv) ;
CustomDialog dialog;
dialog. exec ( ) ;
return app. exec ( ) ;
}
# include "main.moc" 1 2 3 4 5 6 7 8 9 10 11 12 13 14 15 16 17 18 19 20 21 22 23 24 25 26 27 28 29 30 31 32 33 34 35 36 在这个示例中,当你运行应用程序时,它将显示一个自定义对话框,包含一个标签和一个“OK”按钮。当用户点击“OK”按钮时,对话框将关闭。你可以根据自己的需求进一步扩展和定制自定义对话框。
在Qt中,布局(Layout)用于自动安排窗口部件(例如按钮、文本框、标签等)的位置和大小,以便在不同尺寸的窗口中保持良好的外观和用户体验。Qt提供了几种常见的布局管理器,用于在窗口中创建各种复杂的布局。以下是一些常用的布局管理器:
在Qt中,水平布局(QHBoxLayout)是一种常用的布局管理器,用于将窗口部件水平排列。以下是如何使用水平布局的基本步骤:
# include * widget = new QWidget ( ) ;
QHBoxLayout * layout = new QHBoxLayout ( widget) ;
class="hljs-button signin active" data-title="登录复制" data-report-click="{"spm":"1001.2101.3001.4334"}">在这个例子中,我们创建了一个QWidget实例,然后为这个窗口部件设置了一个水平布局。
QPushButton * button1 = new QPushButton ( "Button 1" ) ;
QPushButton * button2 = new QPushButton ( "Button 2" ) ;
layout-> addWidget ( button1) ;
layout-> addWidget ( button2) ;
class="hljs-button signin active" data-title="登录复制" data-report-click="{"spm":"1001.2101.3001.4334"}">使用addWidget函数,将按钮button1和button2添加到水平布局中。这些按钮将会水平排列,从左到右。
widget-> setLayout ( layout) ;
class="hljs-button signin active" data-title="登录复制" data-report-click="{"spm":"1001.2101.3001.4334"}">将水平布局设置为widget窗口部件的布局管理器。
完整的示例代码如下:
# include # include # include # include int main ( int argc, char * argv[ ] ) {
QApplication app ( argc, argv) ;
QWidget * widget = new QWidget ( ) ;
QHBoxLayout * layout = new QHBoxLayout ( widget) ;
QPushButton * button1 = new QPushButton ( "Button 1" ) ;
QPushButton * button2 = new QPushButton ( "Button 2" ) ;
layout-> addWidget ( button1) ;
layout-> addWidget ( button2) ;
widget-> setLayout ( layout) ;
widget-> show ( ) ;
return app. exec ( ) ;
}
class="hljs-button signin active" data-title="登录复制" data-report-click="{"spm":"1001.2101.3001.4334"}">1 2 3 4 5 6 7 8 9 10 11 12 13 14 15 16 17 18 19 20 21 22
在这个示例中,两个按钮Button 1和Button 2水平排列在窗口中。你可以根据需要在水平布局中添加更多的窗口部件,它们将会从左到右水平排列。
在Qt中,垂直布局(QVBoxLayout)是一种常用的布局管理器,用于将窗口部件垂直排列。以下是如何使用垂直布局的基本步骤:
# include * widget = new QWidget ( ) ;
QVBoxLayout * layout = new QVBoxLayout ( widget) ;
class="hljs-button signin active" data-title="登录复制" data-report-click="{"spm":"1001.2101.3001.4334"}">在这个例子中,我们创建了一个QWidget实例,然后为这个窗口部件设置了一个垂直布局。
QPushButton * button1 = new QPushButton ( "Button 1" ) ;
QPushButton * button2 = new QPushButton ( "Button 2" ) ;
layout-> addWidget ( button1) ;
layout-> addWidget ( button2) ;
class="hljs-button signin active" data-title="登录复制" data-report-click="{"spm":"1001.2101.3001.4334"}">使用addWidget函数,将按钮button1和button2添加到垂直布局中。这些按钮将会垂直排列,从上到下。
widget-> setLayout ( layout) ;
class="hljs-button signin active" data-title="登录复制" data-report-click="{"spm":"1001.2101.3001.4334"}">将垂直布局设置为widget窗口部件的布局管理器。
完整的示例代码如下:
# include # include # include # include int main ( int argc, char * argv[ ] ) {
QApplication app ( argc, argv) ;
QWidget * widget = new QWidget ( ) ;
QVBoxLayout * layout = new QVBoxLayout ( widget) ;
QPushButton * button1 = new QPushButton ( "Button 1" ) ;
QPushButton * button2 = new QPushButton ( "Button 2" ) ;
layout-> addWidget ( button1) ;
layout-> addWidget ( button2) ;
widget-> setLayout ( layout) ;
widget-> show ( ) ;
return app. exec ( ) ;
}
class="hljs-button signin active" data-title="登录复制" data-report-click="{"spm":"1001.2101.3001.4334"}">1 2 3 4 5 6 7 8 9 10 11 12 13 14 15 16 17 18 19 20 21 22
在这个示例中,两个按钮Button 1和Button 2垂直排列在窗口中。你可以根据需要在垂直布局中添加更多的窗口部件,它们将会从上到下垂直排列。
在Qt中,网格布局(QGridLayout)是一种常用的布局管理器,用于将窗口部件按行和列排列在一个二维网格中。以下是如何使用网格布局的基本步骤:
# include * widget = new QWidget ( ) ;
QGridLayout * layout = new QGridLayout ( widget) ;
class="hljs-button signin active" data-title="登录复制" data-report-click="{"spm":"1001.2101.3001.4334"}">在这个例子中,我们创建了一个QWidget实例,然后为这个窗口部件设置了一个网格布局。
QPushButton * button1 = new QPushButton ( "Button 1" ) ;
QPushButton * button2 = new QPushButton ( "Button 2" ) ;
QPushButton * button3 = new QPushButton ( "Button 3" ) ;
layout-> addWidget ( button1, 0 , 0 ) ;
layout-> addWidget ( button2, 0 , 1 ) ;
layout-> addWidget ( button3, 1 , 0 , 1 , 2 ) ;
class="hljs-button signin active" data-title="登录复制" data-report-click="{"spm":"1001.2101.3001.4334"}">使用addWidget函数,将按钮button1、button2和button3添加到网格布局中。这些按钮将会在网格的相应位置上排列。
widget-> setLayout ( layout) ;
class="hljs-button signin active" data-title="登录复制" data-report-click="{"spm":"1001.2101.3001.4334"}">将网格布局设置为widget窗口部件的布局管理器。
完整的示例代码如下:
# include # include # include # include int main ( int argc, char * argv[ ] ) {
QApplication app ( argc, argv) ;
QWidget * widget = new QWidget ( ) ;
QGridLayout * layout = new QGridLayout ( widget) ;
QPushButton * button1 = new QPushButton ( "Button 1" ) ;
QPushButton * button2 = new QPushButton ( "Button 2" ) ;
QPushButton * button3 = new QPushButton ( "Button 3" ) ;
layout-> addWidget ( button1, 0 , 0 ) ;
layout-> addWidget ( button2, 0 , 1 ) ;
layout-> addWidget ( button3, 1 , 0 , 1 , 2 ) ;
widget-> setLayout ( layout) ;
widget-> show ( ) ;
return app. exec ( ) ;
}
class="hljs-button signin active" data-title="登录复制" data-report-click="{"spm":"1001.2101.3001.4334"}">1 2 3 4 5 6 7 8 9 10 11 12 13 14 15 16 17 18 19 20 21 22 23 24
在这个示例中,三个按钮按照网格布局排列在窗口中。你可以根据需要在网格布局中添加更多的窗口部件,它们将会在网格的相应位置上排列。
在Qt中,栈布局(QStackedLayout)是一种布局管理器,用于在同一个位置上显示一次只一个窗口部件。只有当前可见的窗口部件会被显示,其他的窗口部件会被隐藏。栈布局类似于堆栈的行为,允许你在同一区域快速切换不同的窗口内容。
以下是如何使用栈布局的基本步骤:
# include * widget = new QWidget ( ) ;
QStackedLayout * layout = new QStackedLayout ( widget) ;
class="hljs-button signin active" data-title="登录复制" data-report-click="{"spm":"1001.2101.3001.4334"}">在这个例子中,我们创建了一个QWidget实例,然后为这个窗口部件设置了一个栈布局。
QPushButton * button1 = new QPushButton ( "Page 1" ) ;
QPushButton * button2 = new QPushButton ( "Page 2" ) ;
QPushButton * button3 = new QPushButton ( "Page 3" ) ;
layout-> addWidget ( button1) ;
layout-> addWidget ( button2) ;
layout-> addWidget ( button3) ;
class="hljs-button signin active" data-title="登录复制" data-report-click="{"spm":"1001.2101.3001.4334"}">使用addWidget函数,将按钮button1、button2和button3添加到栈布局中。它们将会成为栈布局的页面。
layout-> setCurrentIndex ( 1 ) ;
class="hljs-button signin active" data-title="登录复制" data-report-click="{"spm":"1001.2101.3001.4334"}">使用setCurrentIndex函数,你可以指定要显示的窗口部件的索引。在这个例子中,它将会显示第二个窗口部件。
widget-> setLayout ( layout) ;
class="hljs-button signin active" data-title="登录复制" data-report-click="{"spm":"1001.2101.3001.4334"}">将栈布局设置为widget窗口部件的布局管理器。
完整的示例代码如下:
# include # include # include # include int main ( int argc, char * argv[ ] ) {
QApplication app ( argc, argv) ;
QWidget * widget = new QWidget ( ) ;
QStackedLayout * layout = new QStackedLayout ( widget) ;
QPushButton * button1 = new QPushButton ( "Page 1" ) ;
QPushButton * button2 = new QPushButton ( "Page 2" ) ;
QPushButton * button3 = new QPushButton ( "Page 3" ) ;
layout-> addWidget ( button1) ;
layout-> addWidget ( button2) ;
layout-> addWidget ( button3) ;
layout-> setCurrentIndex ( 1 ) ;
widget-> setLayout ( layout) ;
widget-> show ( ) ;
return app. exec ( ) ;
}
class="hljs-button signin active" data-title="登录复制" data-report-click="{"spm":"1001.2101.3001.4334"}">1 2 3 4 5 6 7 8 9 10 11 12 13 14 15 16 17 18 19 20 21 22 23 24 25 26
在这个示例中,按钮Page 1、Page 2和Page 3成为栈布局的页面,初始时显示第二个页面(索引为1)。你可以通过调用setCurrentIndex来切换显示不同的页面。
在Qt中,表单布局(QFormLayout)是一种常用的布局管理器,用于创建标签-字段的布局。表单布局通常用于显示标签和与之相关联的输入字段,提供一种简洁且易于阅读的界面设计。
以下是如何使用表单布局的基本步骤:
# include * widget = new QWidget ( ) ;
QFormLayout * layout = new QFormLayout ( widget) ;
class="hljs-button signin active" data-title="登录复制" data-report-click="{"spm":"1001.2101.3001.4334"}">在这个例子中,我们创建了一个QWidget实例,然后为这个窗口部件设置了一个表单布局。
QLabel * label1 = new QLabel ( "Label 1:" ) ;
QLineEdit * lineEdit1 = new QLineEdit ( ) ;
QLabel * label2 = new QLabel ( "Label 2:" ) ;
QLineEdit * lineEdit2 = new QLineEdit ( ) ;
layout-> addRow ( label1, lineEdit1) ;
layout-> addRow ( label2, lineEdit2) ;
class="hljs-button signin active" data-title="登录复制" data-report-click="{"spm":"1001.2101.3001.4334"}">使用addRow函数,将标签和输入字段作为一行添加到表单布局中。每一行的第一个参数是标签,第二个参数是相应的输入字段(例如文本框、下拉框等)。
widget-> setLayout ( layout) ;
class="hljs-button signin active" data-title="登录复制" data-report-click="{"spm":"1001.2101.3001.4334"}">将表单布局设置为widget窗口部件的布局管理器。
完整的示例代码如下:
# include # include # include # include # include int main ( int argc, char * argv[ ] ) {
QApplication app ( argc, argv) ;
QWidget * widget = new QWidget ( ) ;
QFormLayout * layout = new QFormLayout ( widget) ;
QLabel * label1 = new QLabel ( "Label 1:" ) ;
QLineEdit * lineEdit1 = new QLineEdit ( ) ;
QLabel * label2 = new QLabel ( "Label 2:" ) ;
QLineEdit * lineEdit2 = new QLineEdit ( ) ;
layout-> addRow ( label1, lineEdit1) ;
layout-> addRow ( label2, lineEdit2) ;
widget-> setLayout ( layout) ;
widget-> show ( ) ;
return app. exec ( ) ;
}
class="hljs-button signin active" data-title="登录复制" data-report-click="{"spm":"1001.2101.3001.4334"}">1 2 3 4 5 6 7 8 9 10 11 12 13 14 15 16 17 18 19 20 21 22 23 24 25 26 在这个示例中,标签和输入字段被组织成为一个简单的表单布局。你可以根据需要添加更多的标签和输入字段,它们将会以表单的形式显示在窗口中。
Qt 提供了丰富的控件(Widgets)库,可以用于构建各种不同类型的应用程序界面。以下是一些常用的 Qt 控件:
QPushButton 是 Qt 中用于创建按钮的类。它允许用户触发特定的操作或者执行功能。下面是如何使用 QPushButton 的说明和一个简单的示例:
创建 QPushButton 对象:
# include 初始化 QPushButton:
QPushButton * button = new QPushButton ( "Click Me" , this ) ;
class="hljs-button signin active" data-title="登录复制" data-report-click="{"spm":"1001.2101.3001.4334"}">这里创建了一个按钮,按钮上的文字是 “Click Me”。
连接按钮的点击事件到槽函数:
connect ( button, SIGNAL ( clicked ( ) ) , this , SLOT ( onButtonClicked ( ) ) ) ;
class="hljs-button signin active" data-title="登录复制" data-report-click="{"spm":"1001.2101.3001.4334"}">这里使用 connect() 函数将按钮的 clicked() 信号连接到一个槽函数 onButtonClicked()。当按钮被点击时,onButtonClicked() 函数将会被调用。
实现槽函数:
void MyClass :: onButtonClicked ( ) {
qDebug ( ) << "Button Clicked!" ;
}
class="hljs-button signin active" data-title="登录复制" data-report-click="{"spm":"1001.2101.3001.4334"}">这是一个槽函数的示例,当按钮被点击时,这个函数将会被调用,输出 “Button Clicked!”。
显示按钮:
button-> show ( ) ;
class="hljs-button signin active" data-title="登录复制" data-report-click="{"spm":"1001.2101.3001.4334"}">最后,记得要将按钮显示在窗口上。
下面是一个完整的例子,演示了如何创建一个窗口,包含一个按钮,当按钮被点击时,输出一条信息。
# include # include # include # include class MyWidget : public QWidget {
Q_OBJECT
public :
MyWidget ( QWidget * parent = nullptr ) : QWidget ( parent) {
QPushButton * button = new QPushButton ( "Click Me" , this ) ;
connect ( button, SIGNAL ( clicked ( ) ) , this , SLOT ( onButtonClicked ( ) ) ) ;
}
private slots:
void onButtonClicked ( ) {
qDebug ( ) << "Button Clicked!" ;
}
} ;
# include "main.moc" int main ( int argc, char * argv[ ] ) {
QApplication app ( argc, argv) ;
MyWidget widget;
widget. show ( ) ;
return app. exec ( ) ;
}
class="hljs-button signin active" data-title="登录复制" data-report-click="{"spm":"1001.2101.3001.4334"}">1 2 3 4 5 6 7 8 9 10 11 12 13 14 15 16 17 18 19 20 21 22 23 24 25 26 27 28 29 在这个示例中,创建了一个 MyWidget 类,它继承自 QWidget。在构造函数中,创建了一个按钮并将其点击信号连接到了 onButtonClicked() 槽函数。当按钮被点击时,槽函数将会被调用,输出 “Button Clicked!”。最后,widget.show() 显示了窗口和按钮。
在你的实际应用程序中,你可以将按钮的点击事件连接到任何你需要执行的函数,使得按钮的点击触发相关的操作。
QLabel 是 Qt 中用于显示文本或图像的控件。它可以显示纯文本、HTML 格式的文本,或者显示图像。下面是如何使用 QLabel 的说明和一个简单的示例:
创建 QLabel 对象:
# include 初始化 QLabel:
QLabel * label = new QLabel ( "Hello, World!" , this ) ;
class="hljs-button signin active" data-title="登录复制" data-report-click="{"spm":"1001.2101.3001.4334"}">这里创建了一个 QLabel,显示文本 “Hello, World!”。
设置文本:
label-> setText ( "New Text" ) ;
class="hljs-button signin active" data-title="登录复制" data-report-click="{"spm":"1001.2101.3001.4334"}">你可以使用 setText() 函数设置 QLabel 的文本内容。
显示图像:
label-> setPixmap ( QPixmap ( "path/to/your/image.png" ) ) ;
class="hljs-button signin active" data-title="登录复制" data-report-click="{"spm":"1001.2101.3001.4334"}">如果你想显示图像,你可以使用 setPixmap() 函数,传入一个 QPixmap 对象或者一个图像文件的路径。
显示 HTML 格式的文本:
label-> setText ( "Bold Text " ) ;
class="hljs-button signin active" data-title="登录复制" data-report-click="{"spm":"1001.2101.3001.4334"}">你可以使用 HTML 标签来设置 QLabel 的文本,这使得你可以显示粗体、斜体等样式。
自动换行:
label-> setWordWrap ( true ) ;
class="hljs-button signin active" data-title="登录复制" data-report-click="{"spm":"1001.2101.3001.4334"}">如果文本内容过长,你可以启用自动换行,使得文本在 QLabel 内自动换行显示。
设置对齐方式:
label-> setAlignment ( Qt:: AlignCenter) ;
class="hljs-button signin active" data-title="登录复制" data-report-click="{"spm":"1001.2101.3001.4334"}">你可以使用 setAlignment() 函数设置文本的对齐方式,例如居中对齐。
设置链接:
label-> setText ( "Click Here " ) ;
label-> setOpenExternalLinks ( true ) ;
class="hljs-button signin active" data-title="登录复制" data-report-click="{"spm":"1001.2101.3001.4334"}">你可以将文本设置为一个超链接,当用户点击时,会在默认的浏览器中打开链接。
下面是一个完整的例子,演示了如何创建一个窗口,包含一个 QLabel,并设置文本和图像:
# include # include # include # include # include int main ( int argc, char * argv[ ] ) {
QApplication app ( argc, argv) ;
QWidget * window = new QWidget ( ) ;
window-> setWindowTitle ( "QLabel Example" ) ;
window-> setMinimumSize ( 500 , 500 ) ;
QLabel * label1 = new QLabel ( window) ;
label1-> setText ( "Hello, World! " ) ;
label1-> setAlignment ( Qt:: AlignCenter) ;
label1-> setWordWrap ( true ) ;
QLabel * label2 = new QLabel ( window) ;
label2-> setPixmap ( QPixmap ( ":/pikaqiu.jpeg" ) ) ;
QVBoxLayout * layout = new QVBoxLayout ( window) ;
layout-> addWidget ( label1) ;
layout-> addWidget ( label2) ;
window-> setLayout ( layout) ;
window-> show ( ) ;
return app. exec ( ) ;
}
class="hljs-button signin active" data-title="登录复制" data-report-click="{"spm":"1001.2101.3001.4334"}">1 2 3 4 5 6 7 8 9 10 11 12 13 14 15 16 17 18 19 20 21 22 23 24 25 26 27 28 在这个示例中,创建了一个窗口 window 和一个 QLabel 控件 label。label 显示了加粗的文本和一个图像。你可以根据需要修改文本内容和图像路径。
QLineEdit 是 Qt 中用于单行文本输入的控件。它允许用户在单行中输入和编辑文本。以下是如何使用 QLineEdit 的说明和一个简单的示例:
创建 QLineEdit 对象:
# include 初始化 QLineEdit:
QLineEdit * lineEdit = new QLineEdit ( this ) ;
class="hljs-button signin active" data-title="登录复制" data-report-click="{"spm":"1001.2101.3001.4334"}">这里创建了一个 QLineEdit 控件。
设置默认文本:
lineEdit-> setText ( "Default Text" ) ;
class="hljs-button signin active" data-title="登录复制" data-report-click="{"spm":"1001.2101.3001.4334"}">你可以使用 setText() 函数设置 QLineEdit 的默认文本。
获取文本内容:
QString text = lineEdit-> text ( ) ;
class="hljs-button signin active" data-title="登录复制" data-report-click="{"spm":"1001.2101.3001.4334"}">使用 text() 函数可以获取 QLineEdit 中的文本内容。
设置输入掩码(例如,只允许输入数字):
lineEdit-> setInputMask ( "999" ) ;
class="hljs-button signin active" data-title="登录复制" data-report-click="{"spm":"1001.2101.3001.4334"}">使用 setInputMask() 函数可以限制输入的格式。
设置占位符文本(Placeholder Text):
lineEdit-> setPlaceholderText ( "Enter your text here" ) ;
class="hljs-button signin active" data-title="登录复制" data-report-click="{"spm":"1001.2101.3001.4334"}">使用 setPlaceholderText() 函数可以在 QLineEdit 中显示一个占位符文本,当没有输入时显示。
设置输入限制(例如,最大长度):
lineEdit-> setMaxLength ( 10 ) ;
class="hljs-button signin active" data-title="登录复制" data-report-click="{"spm":"1001.2101.3001.4334"}">使用 setMaxLength() 函数可以限制输入的最大长度。
密码模式:
lineEdit-> setEchoMode ( QLineEdit:: Password) ;
class="hljs-button signin active" data-title="登录复制" data-report-click="{"spm":"1001.2101.3001.4334"}">使用 setEchoMode() 函数可以将输入内容显示为密码字符,以保护敏感信息。
下面是一个完整的例子,演示了如何创建一个窗口,包含一个 QLineEdit 控件:
# include # include # include int main ( int argc, char * argv[ ] ) {
QApplication app ( argc, argv) ;
QWidget window;
window. setWindowTitle ( "QLineEdit Example" ) ;
window. setMinimumSize ( 500 , 500 ) ;
QLineEdit * lineEdit = new QLineEdit ( & window) ;
lineEdit-> setPlaceholderText ( "Enter your text here" ) ;
lineEdit-> setMaxLength ( 10 ) ;
window. show ( ) ;
return app. exec ( ) ;
}
class="hljs-button signin active" data-title="登录复制" data-report-click="{"spm":"1001.2101.3001.4334"}">1 2 3 4 5 6 7 8 9 10 11 12 13 14 15 16 17 在这个示例中,创建了一个窗口 window 和一个 QLineEdit 控件 lineEdit。lineEdit 设置了占位符文本(“Enter your text here”)并且限制了最大输入长度为10个字符。你可以根据需要修改占位符文本和最大输入长度。
QTextEdit 是 Qt 中用于多行文本输入和显示的控件,允许用户输入和编辑多行文本。以下是如何使用 QTextEdit 的说明和一个简单的示例:
使用说明:
创建 QTextEdit 对象:
# include 初始化 QTextEdit:
QTextEdit * textEdit = new QTextEdit ( this ) ;
class="hljs-button signin active" data-title="登录复制" data-report-click="{"spm":"1001.2101.3001.4334"}">这里创建了一个 QTextEdit 控件。
设置文本内容:
textEdit-> setText ( "Default Text" ) ;
class="hljs-button signin active" data-title="登录复制" data-report-click="{"spm":"1001.2101.3001.4334"}">使用 setText() 函数可以设置 QTextEdit 的默认文本内容。
获取文本内容:
QString text = textEdit-> toPlainText ( ) ;
class="hljs-button signin active" data-title="登录复制" data-report-click="{"spm":"1001.2101.3001.4334"}">使用 toPlainText() 函数可以获取 QTextEdit 中的文本内容。
添加文本内容:
textEdit-> append ( "New Line" ) ;
class="hljs-button signin active" data-title="登录复制" data-report-click="{"spm":"1001.2101.3001.4334"}">使用 append() 函数可以在现有文本的末尾添加新的文本行。
清空文本内容:
textEdit-> clear ( ) ;
class="hljs-button signin active" data-title="登录复制" data-report-click="{"spm":"1001.2101.3001.4334"}">使用 clear() 函数可以清空 QTextEdit 中的文本内容。
插入文本:
textEdit-> insertPlainText ( "Inserted Text" ) ;
class="hljs-button signin active" data-title="登录复制" data-report-click="{"spm":"1001.2101.3001.4334"}">使用 insertPlainText() 函数可以在当前光标位置插入文本。
字体和格式设置:
QTextCursor cursor = textEdit-> textCursor ( ) ;
QTextCharFormat format;
format. setFontWeight ( QFont:: Bold) ;
cursor. mergeCharFormat ( format) ;
class="hljs-button signin active" data-title="登录复制" data-report-click="{"spm":"1001.2101.3001.4334"}">使用 QTextCursor 可以进行更高级的文本格式化,例如设置字体、颜色、加粗等。
示例代码:
下面是一个简单的示例,演示了如何创建一个窗口,包含一个 QTextEdit 控件:
# include # include # include int main ( int argc, char * argv[ ] ) {
QApplication app ( argc, argv) ;
QWidget window;
window. setWindowTitle ( "QTextEdit Example" ) ;
window. setMinimumSize ( 400 , 400 ) ;
QTextEdit * textEdit = new QTextEdit ( & window) ;
textEdit-> setText ( "Default Text" ) ;
window. show ( ) ;
return app. exec ( ) ;
}
class="hljs-button signin active" data-title="登录复制" data-report-click="{"spm":"1001.2101.3001.4334"}">1 2 3 4 5 6 7 8 9 10 11 12 13 14 15 16 17 在这个示例中,创建了一个窗口 window 和一个 QTextEdit 控件 textEdit。textEdit 设置了默认文本内容为 “Default Text”。你可以在 QTextEdit 中输入新的文本,也可以使用 setText()、append()、clear() 等函数来操作文本内容。
QSpinBox 是 Qt 中用于输入整数值的控件,用户可以通过上下箭头或手动输入的方式选择整数值。以下是如何使用 QSpinBox 的说明和一个简单的示例:
使用说明:
创建 QSpinBox 对象:
# include 初始化 QSpinBox:
QSpinBox * spinBox = new QSpinBox ( this ) ;
class="hljs-button signin active" data-title="登录复制" data-report-click="{"spm":"1001.2101.3001.4334"}">这里创建了一个 QSpinBox 控件。
设置范围:
spinBox-> setMinimum ( 0 ) ;
spinBox-> setMaximum ( 100 ) ;
class="hljs-button signin active" data-title="登录复制" data-report-click="{"spm":"1001.2101.3001.4334"}">使用 setMinimum() 和 setMaximum() 函数可以设置 QSpinBox 允许的最小和最大值。
获取当前值:
int value = spinBox-> value ( ) ;
class="hljs-button signin active" data-title="登录复制" data-report-click="{"spm":"1001.2101.3001.4334"}">使用 value() 函数可以获取 QSpinBox 中的当前值。
设置步长:
spinBox-> setSingleStep ( 1 ) ;
class="hljs-button signin active" data-title="登录复制" data-report-click="{"spm":"1001.2101.3001.4334"}">使用 setSingleStep() 函数可以设置每次点击上下箭头时增减的步长值。
示例代码:
下面是一个简单的示例,演示了如何创建一个窗口,包含一个 QSpinBox 控件:
# include # include # include # include int main ( int argc, char * argv[ ] ) {
QApplication app ( argc, argv) ;
QWidget window;
window. setWindowTitle ( "QSpinBox Example" ) ;
QVBoxLayout * layout = new QVBoxLayout ( & window) ;
QSpinBox * spinBox = new QSpinBox ( & window) ;
spinBox-> setRange ( 0 , 100 ) ;
spinBox-> setSingleStep ( 1 ) ;
layout-> addWidget ( spinBox) ;
window. setLayout ( layout) ;
window. show ( ) ;
return app. exec ( ) ;
}
class="hljs-button signin active" data-title="登录复制" data-report-click="{"spm":"1001.2101.3001.4334"}">1 2 3 4 5 6 7 8 9 10 11 12 13 14 15 16 17 18 19 20 21 22 23 在这个示例中,创建了一个窗口 window 和一个 QSpinBox 控件 spinBox。spinBox 设置了范围为 0 到 100,步长为 1。你可以通过上下箭头或手动输入的方式选择整数值。
QDoubleSpinBox 是 Qt 中用于输入双精度浮点数(即小数)的控件。它允许用户通过上下箭头或手动输入的方式选择浮点数值。以下是如何使用 QDoubleSpinBox 的说明和一个简单的示例:
使用说明:
创建 QDoubleSpinBox 对象:
# include 初始化 QDoubleSpinBox:
QDoubleSpinBox * doubleSpinBox = new QDoubleSpinBox ( this ) ;
class="hljs-button signin active" data-title="登录复制" data-report-click="{"spm":"1001.2101.3001.4334"}">这里创建了一个 QDoubleSpinBox 控件。
设置范围和精度:
doubleSpinBox-> setMinimum ( 0.0 ) ;
doubleSpinBox-> setMaximum ( 100.0 ) ;
doubleSpinBox-> setSingleStep ( 0.1 ) ;
doubleSpinBox-> setDecimals ( 2 ) ;
class="hljs-button signin active" data-title="登录复制" data-report-click="{"spm":"1001.2101.3001.4334"}">使用 setMinimum() 和 setMaximum() 函数可以设置 QDoubleSpinBox 允许的最小和最大值。setSingleStep() 函数设置了步长,setDecimals() 函数设置了显示的小数点后的位数。
获取当前值:
double value = doubleSpinBox-> value ( ) ;
class="hljs-button signin active" data-title="登录复制" data-report-click="{"spm":"1001.2101.3001.4334"}">使用 value() 函数可以获取 QDoubleSpinBox 中的当前值。
示例代码:
下面是一个简单的示例,演示了如何创建一个窗口,包含一个 QDoubleSpinBox 控件:
# include # include # include # include int main ( int argc, char * argv[ ] ) {
QApplication app ( argc, argv) ;
QWidget window;
window. setWindowTitle ( "QDoubleSpinBox Example" ) ;
QVBoxLayout * layout = new QVBoxLayout ( & window) ;
QDoubleSpinBox * doubleSpinBox = new QDoubleSpinBox ( & window) ;
doubleSpinBox-> setRange ( 0.0 , 100.0 ) ;
doubleSpinBox-> setSingleStep ( 0.1 ) ;
doubleSpinBox-> setDecimals ( 2 ) ;
layout-> addWidget ( doubleSpinBox) ;
window. setLayout ( layout) ;
window. show ( ) ;
return app. exec ( ) ;
}
class="hljs-button signin active" data-title="登录复制" data-report-click="{"spm":"1001.2101.3001.4334"}">1 2 3 4 5 6 7 8 9 10 11 12 13 14 15 16 17 18 19 20 21 22 23 24 在这个示例中,创建了一个窗口 window 和一个 QDoubleSpinBox 控件 doubleSpinBox。doubleSpinBox 设置了范围为 0 到 100,步长为 0.1,小数点后保留两位。你可以通过上下箭头或手动输入的方式选择浮点数值。
QComboBox 是 Qt 中用于显示下拉菜单的控件,用户可以从预定义的选项中选择一个。以下是如何使用 QComboBox 的说明和一个简单的示例:
使用说明:
创建 QComboBox 对象:
# include 初始化 QComboBox:
QComboBox * comboBox = new QComboBox ( this ) ;
class="hljs-button signin active" data-title="登录复制" data-report-click="{"spm":"1001.2101.3001.4334"}">这里创建了一个 QComboBox 控件。
添加选项:
comboBox-> addItem ( "Option 1" ) ;
comboBox-> addItem ( "Option 2" ) ;
class="hljs-button signin active" data-title="登录复制" data-report-click="{"spm":"1001.2101.3001.4334"}">使用 addItem() 函数可以添加选项。你也可以使用 addItems() 函数同时添加多个选项。
获取当前选中的文本或索引:
QString selectedText = comboBox-> currentText ( ) ;
int selectedIndex = comboBox-> currentIndex ( ) ;
class="hljs-button signin active" data-title="登录复制" data-report-click="{"spm":"1001.2101.3001.4334"}">使用 currentText() 函数可以获取当前选中的文本,currentIndex() 函数可以获取当前选中的索引。
设置默认选中的选项:
comboBox-> setCurrentIndex ( 1 ) ;
class="hljs-button signin active" data-title="登录复制" data-report-click="{"spm":"1001.2101.3001.4334"}">使用 setCurrentIndex() 函数可以设置默认选中的选项索引。
处理选中事件:
connect ( comboBox, SIGNAL ( currentIndexChanged ( int ) ) , this , SLOT ( onComboBoxIndexChanged ( int ) ) ) ;
class="hljs-button signin active" data-title="登录复制" data-report-click="{"spm":"1001.2101.3001.4334"}">使用 currentIndexChanged(int) 信号可以捕获选项改变的事件,将其连接到一个槽函数中以处理选中事件。
示例代码:
下面是一个简单的示例,演示了如何创建一个窗口,包含一个 QComboBox 控件:
# include # include # include # include # include class MyWidget : public QWidget {
Q_OBJECT
public :
MyWidget ( QWidget * parent = nullptr ) : QWidget ( parent) {
QVBoxLayout * layout = new QVBoxLayout ( this ) ;
QComboBox * comboBox = new QComboBox ( this ) ;
comboBox-> addItem ( "Option 1" ) ;
comboBox-> addItem ( "Option 2" ) ;
comboBox-> addItem ( "Option 3" ) ;
connect ( comboBox, SIGNAL ( currentIndexChanged ( int ) ) , this , SLOT ( onComboBoxIndexChanged ( int ) ) ) ;
layout-> addWidget ( comboBox) ;
setLayout ( layout) ;
}
private slots:
void onComboBoxIndexChanged ( int index) {
qDebug ( ) << "Selected Option:" << index;
}
} ;
# include "main.moc" int main ( int argc, char * argv[ ] ) {
QApplication app ( argc, argv) ;
MyWidget widget;
widget. setWindowTitle ( "QComboBox Example" ) ;
widget. show ( ) ;
return app. exec ( ) ;
}
class="hljs-button signin active" data-title="登录复制" data-report-click="{"spm":"1001.2101.3001.4334"}">1 2 3 4 5 6 7 8 9 10 11 12 13 14 15 16 17 18 19 20 21 22 23 24 25 26 27 28 29 30 31 32 33 34 35 36 37 38 39 40 在这个示例中,创建了一个窗口 widget 和一个 QComboBox 控件 comboBox。comboBox 添加了三个选项。当用户选择不同的选项时,onComboBoxIndexChanged(int index) 槽函数将会被调用,输出选中的选项索引。
QCheckBox 是 Qt 中用于表示两种状态(选中和未选中)的复选框控件。它允许用户选择或取消选择一个选项。以下是如何使用 QCheckBox 的说明和一个简单的示例:
使用说明:
创建 QCheckBox 对象:
# include 初始化 QCheckBox:
QCheckBox * checkBox = new QCheckBox ( "Check Box Text" , this ) ;
class="hljs-button signin active" data-title="登录复制" data-report-click="{"spm":"1001.2101.3001.4334"}">这里创建了一个 QCheckBox 控件,同时可以指定显示的文本。
获取复选框的状态:
bool isChecked = checkBox-> isChecked ( ) ;
class="hljs-button signin active" data-title="登录复制" data-report-click="{"spm":"1001.2101.3001.4334"}">使用 isChecked() 函数可以获取 QCheckBox 的当前状态,返回 true 表示选中,false 表示未选中。
处理状态变化事件:
connect ( checkBox, SIGNAL ( stateChanged ( int ) ) , this , SLOT ( onCheckBoxStateChanged ( int ) ) ) ;
class="hljs-button signin active" data-title="登录复制" data-report-click="{"spm":"1001.2101.3001.4334"}">使用 stateChanged(int) 信号可以捕获复选框状态的变化,将其连接到一个槽函数中以处理状态变化事件。
示例代码:
下面是一个简单的示例,演示了如何创建一个窗口,包含一个 QCheckBox 控件:
# include # include # include # include # include class MyWidget : public QWidget {
Q_OBJECT
public :
MyWidget ( QWidget * parent = nullptr ) : QWidget ( parent) {
QVBoxLayout * layout = new QVBoxLayout ( this ) ;
QCheckBox * checkBox = new QCheckBox ( "Enable Option" , this ) ;
connect ( checkBox, SIGNAL ( stateChanged ( int ) ) , this , SLOT ( onCheckBoxStateChanged ( int ) ) ) ;
layout-> addWidget ( checkBox) ;
setLayout ( layout) ;
}
private slots:
void onCheckBoxStateChanged ( int state) {
if ( state == Qt:: Checked) {
qDebug ( ) << "Option Enabled" ;
} else {
qDebug ( ) << "Option Disabled" ;
}
}
} ;
int main ( int argc, char * argv[ ] ) {
QApplication app ( argc, argv) ;
MyWidget widget;
widget. setWindowTitle ( "QCheckBox Example" ) ;
widget. show ( ) ;
return app. exec ( ) ;
}
# include "main.moc" 1 2 3 4 5 6 7 8 9 10 11 12 13 14 15 16 17 18 19 20 21 22 23 24 25 26 27 28 29 30 31 32 33 34 35 36 37 38 39 40 41 在这个示例中,创建了一个窗口 widget 和一个 QCheckBox 控件 checkBox。当用户选中或取消选中复选框时,onCheckBoxStateChanged(int state) 槽函数将会被调用,输出相应的状态信息。
QRadioButton 是 Qt 中用于表示一组互斥的选项的单选按钮控件。它允许用户在一组选项中选择一个。以下是如何使用 QRadioButton 的说明和一个简单的示例:
使用说明:
创建 QRadioButton 对象:
# include 初始化 QRadioButton:
QRadioButton * radioButton1 = new QRadioButton ( "Option 1" , this ) ;
QRadioButton * radioButton2 = new QRadioButton ( "Option 2" , this ) ;
class="hljs-button signin active" data-title="登录复制" data-report-click="{"spm":"1001.2101.3001.4334"}">这里创建了两个 QRadioButton 控件,表示两个不同的选项。
获取单选按钮的状态:
bool isChecked = radioButton1-> isChecked ( ) ;
class="hljs-button signin active" data-title="登录复制" data-report-click="{"spm":"1001.2101.3001.4334"}">使用 isChecked() 函数可以获取 QRadioButton 的当前状态,返回 true 表示选中,false 表示未选中。
处理状态变化事件:
connect ( radioButton1, SIGNAL ( clicked ( ) ) , this , SLOT ( onRadioButtonClicked ( ) ) ) ;
class="hljs-button signin active" data-title="登录复制" data-report-click="{"spm":"1001.2101.3001.4334"}">使用 clicked() 信号可以捕获单选按钮的点击事件,将其连接到一个槽函数中以处理状态变化事件。
示例代码:
下面是一个简单的示例,演示了如何创建一个窗口,包含两个互斥的 QRadioButton 控件:
# include # include # include # include # include class MyWidget : public QWidget {
Q_OBJECT
public :
MyWidget ( QWidget * parent = nullptr ) : QWidget ( parent) {
QVBoxLayout * layout = new QVBoxLayout ( this ) ;
QRadioButton * radioButton1 = new QRadioButton ( "Option 1" , this ) ;
QRadioButton * radioButton2 = new QRadioButton ( "Option 2" , this ) ;
connect ( radioButton1, SIGNAL ( clicked ( ) ) , this , SLOT ( onRadioButtonClicked ( ) ) ) ;
connect ( radioButton2, SIGNAL ( clicked ( ) ) , this , SLOT ( onRadioButtonClicked ( ) ) ) ;
layout-> addWidget ( radioButton1) ;
layout-> addWidget ( radioButton2) ;
setLayout ( layout) ;
}
private slots:
void onRadioButtonClicked ( ) {
QRadioButton * radioButton = qobject_cast < QRadioButton* > ( sender ( ) ) ;
if ( radioButton) {
qDebug ( ) << "Selected Option:" << radioButton-> text ( ) ;
}
}
} ;
int main ( int argc, char * argv[ ] ) {
QApplication app ( argc, argv) ;
MyWidget widget;
widget. setWindowTitle ( "QRadioButton Example" ) ;
widget. show ( ) ;
return app. exec ( ) ;
}
# include "main.moc" 1 2 3 4 5 6 7 8 9 10 11 12 13 14 15 16 17 18 19 20 21 22 23 24 25 26 27 28 29 30 31 32 33 34 35 36 37 38 39 40 41 42 43 44 在这个示例中,创建了一个窗口 widget 和两个 QRadioButton 控件 radioButton1 和 radioButton2。当用户点击其中一个单选按钮时,onRadioButtonClicked() 槽函数将会被调用,输出被选中的选项文本。
QSlider 是 Qt 中用于选择一个数值范围内的整数值的滑动条控件。它允许用户在一个范围内滑动滑块,选择一个整数值。以下是如何使用 QSlider 的说明和一个简单的示例:
使用说明:
创建 QSlider 对象:
# include 初始化 QSlider:
QSlider * slider = new QSlider ( Qt:: Horizontal, this ) ;
class="hljs-button signin active" data-title="登录复制" data-report-click="{"spm":"1001.2101.3001.4334"}">这里创建了一个 QSlider 控件,可以选择水平或垂直方向的滑动条。
设置范围和步长:
slider-> setMinimum ( 0 ) ;
slider-> setMaximum ( 100 ) ;
slider-> setSingleStep ( 1 ) ;
class="hljs-button signin active" data-title="登录复制" data-report-click="{"spm":"1001.2101.3001.4334"}">使用 setMinimum() 和 setMaximum() 函数可以设置滑动条的最小和最大值。使用 setSingleStep() 函数可以设置滑动条的步长。
获取当前值:
int value = slider-> value ( ) ;
class="hljs-button signin active" data-title="登录复制" data-report-click="{"spm":"1001.2101.3001.4334"}">使用 value() 函数可以获取 QSlider 中的当前值。
处理值变化事件:
connect ( slider, SIGNAL ( valueChanged ( int ) ) , this , SLOT ( onSliderValueChanged ( int ) ) ) ;
class="hljs-button signin active" data-title="登录复制" data-report-click="{"spm":"1001.2101.3001.4334"}">使用 valueChanged(int) 信号可以捕获滑动条值的变化,将其连接到一个槽函数中以处理值变化事件。
示例代码:
下面是一个简单的示例,演示了如何创建一个窗口,包含一个水平的 QSlider 控件:
# include # include # include # include # include class MyWidget : public QWidget {
Q_OBJECT
public :
MyWidget ( QWidget * parent = nullptr ) : QWidget ( parent) {
QVBoxLayout * layout = new QVBoxLayout ( this ) ;
QSlider * slider = new QSlider ( Qt:: Horizontal, this ) ;
slider-> setRange ( 0 , 100 ) ;
slider-> setSingleStep ( 1 ) ;
connect ( slider, SIGNAL ( valueChanged ( int ) ) , this , SLOT ( onSliderValueChanged ( int ) ) ) ;
layout-> addWidget ( slider) ;
setLayout ( layout) ;
}
private slots:
void onSliderValueChanged ( int value) {
qDebug ( ) << "Slider Value:" << value;
}
} ;
int main ( int argc, char * argv[ ] ) {
QApplication app ( argc, argv) ;
MyWidget widget;
widget. setWindowTitle ( "QSlider Example" ) ;
widget. show ( ) ;
return app. exec ( ) ;
}
# include "main.moc" 1 2 3 4 5 6 7 8 9 10 11 12 13 14 15 16 17 18 19 20 21 22 23 24 25 26 27 28 29 30 31 32 33 34 35 36 37 38 39 40 在这个示例中,创建了一个窗口 widget 和一个水平的 QSlider 控件 slider。当用户滑动滑块时,onSliderValueChanged(int value) 槽函数将会被调用,输出滑块的当前值。
QProgressBar 是 Qt 中用于显示任务进度的控件,它可以用来展示任务的完成百分比或进度。以下是如何使用 QProgressBar 的说明和一个简单的示例:
使用说明:
创建 QProgressBar 对象:
# include 初始化 QProgressBar:
QProgressBar * progressBar = new QProgressBar ( this ) ;
class="hljs-button signin active" data-title="登录复制" data-report-click="{"spm":"1001.2101.3001.4334"}">这里创建了一个 QProgressBar 控件。
设置范围和当前值:
progressBar-> setRange ( 0 , 100 ) ;
progressBar-> setValue ( 50 ) ;
class="hljs-button signin active" data-title="登录复制" data-report-click="{"spm":"1001.2101.3001.4334"}">使用 setRange() 函数可以设置进度条的范围,setValue() 函数可以设置当前的进度值。
更新进度:
progressBar-> setValue ( newValue) ;
class="hljs-button signin active" data-title="登录复制" data-report-click="{"spm":"1001.2101.3001.4334"}">使用 setValue() 函数可以更新进度条的值,以反映任务的当前进度。
示例代码:
下面是一个简单的示例,演示了如何创建一个窗口,包含一个 QProgressBar 控件:
# include # include # include # include # include class MyWidget : public QWidget {
Q_OBJECT
public :
MyWidget ( QWidget * parent = nullptr ) : QWidget ( parent) {
QVBoxLayout * layout = new QVBoxLayout ( this ) ;
QProgressBar * progressBar = new QProgressBar ( this ) ;
progressBar-> setRange ( 0 , 100 ) ;
progressBar-> setValue ( 0 ) ;
layout-> addWidget ( progressBar) ;
setLayout ( layout) ;
QTimer * timer = new QTimer ( this ) ;
connect ( timer, SIGNAL ( timeout ( ) ) , this , SLOT ( updateProgress ( ) ) ) ;
timer-> start ( 1000 ) ;
}
private slots:
void updateProgress ( ) {
QProgressBar * progressBar = findChild < QProgressBar* > ( ) ;
if ( progressBar) {
int currentValue = progressBar-> value ( ) ;
if ( currentValue < 100 ) {
progressBar-> setValue ( currentValue + 10 ) ;
}
}
}
} ;
int main ( int argc, char * argv[ ] ) {
QApplication app ( argc, argv) ;
MyWidget widget;
widget. setWindowTitle ( "QProgressBar Example" ) ;
widget. show ( ) ;
return app. exec ( ) ;
}
# include "main.moc" 1 2 3 4 5 6 7 8 9 10 11 12 13 14 15 16 17 18 19 20 21 22 23 24 25 26 27 28 29 30 31 32 33 34 35 36 37 38 39 40 41 42 43 44 45 46 47 48 在这个示例中,创建了一个窗口 widget 和一个 QProgressBar 控件 progressBar。使用 QTimer 模拟任务的进度更新,每秒钟增加 10。你可以根据需要修改更新的速度和增加的数值。
QDateEdit 是 Qt 中用于选择日期的控件,它允许用户通过图形界面选择特定的日期。以下是如何使用 QDateEdit 的说明和一个简单的示例:
使用说明:
创建 QDateEdit 对象:
# include 初始化 QDateEdit:
QDateEdit * dateEdit = new QDateEdit ( this ) ;
class="hljs-button signin active" data-title="登录复制" data-report-click="{"spm":"1001.2101.3001.4334"}">这里创建了一个 QDateEdit 控件。
设置日期范围和默认日期:
dateEdit-> setDateRange ( QDate ( 2000 , 1 , 1 ) , QDate ( 2100 , 12 , 31 ) ) ;
dateEdit-> setDate ( QDate :: currentDate ( ) ) ;
class="hljs-button signin active" data-title="登录复制" data-report-click="{"spm":"1001.2101.3001.4334"}">使用 setDateRange() 函数可以设置日期的范围。使用 setDate() 函数可以设置默认的日期。
获取选择的日期:
QDate selectedDate = dateEdit-> date ( ) ;
class="hljs-button signin active" data-title="登录复制" data-report-click="{"spm":"1001.2101.3001.4334"}">使用 date() 函数可以获取用户选择的日期。
示例代码:
下面是一个简单的示例,演示了如何创建一个窗口,包含一个 QDateEdit 控件:
# include # include # include # include # include class MyWidget : public QWidget {
Q_OBJECT
public :
MyWidget ( QWidget * parent = nullptr ) : QWidget ( parent) {
QVBoxLayout * layout = new QVBoxLayout ( this ) ;
QDateEdit * dateEdit = new QDateEdit ( this ) ;
dateEdit-> setDateRange ( QDate ( 2000 , 1 , 1 ) , QDate ( 2100 , 12 , 31 ) ) ;
dateEdit-> setDate ( QDate :: currentDate ( ) ) ;
connect ( dateEdit, SIGNAL ( dateChanged ( const QDate& ) ) , this , SLOT ( onDateChanged ( const QDate& ) ) ) ;
layout-> addWidget ( dateEdit) ;
setLayout ( layout) ;
}
private slots:
void onDateChanged ( const QDate & date) {
qDebug ( ) << "Selected Date:" << date. toString ( "yyyy-MM-dd" ) ;
}
} ;
int main ( int argc, char * argv[ ] ) {
QApplication app ( argc, argv) ;
MyWidget widget;
widget. setWindowTitle ( "QDateEdit Example" ) ;
widget. show ( ) ;
return app. exec ( ) ;
}
class="hljs-button signin active" data-title="登录复制" data-report-click="{"spm":"1001.2101.3001.4334"}">1 2 3 4 5 6 7 8 9 10 11 12 13 14 15 16 17 18 19 20 21 22 23 24 25 26 27 28 29 30 31 32 33 34 35 36 37 38 在这个示例中,创建了一个窗口 widget 和一个 QDateEdit 控件 dateEdit。当用户选择不同的日期时,onDateChanged(const QDate &date) 槽函数将会被调用,输出选择的日期。
QTimeEdit 是 Qt 中用于选择时间的控件,它允许用户通过图形界面选择特定的时间。以下是如何使用 QTimeEdit 的说明和一个简单的示例:
使用说明:
创建 QTimeEdit 对象:
# include 初始化 QTimeEdit:
QTimeEdit * timeEdit = new QTimeEdit ( this ) ;
class="hljs-button signin active" data-title="登录复制" data-report-click="{"spm":"1001.2101.3001.4334"}">这里创建了一个 QTimeEdit 控件。
设置时间范围和默认时间:
timeEdit-> setTimeRange ( QTime ( 0 , 0 , 0 ) , QTime ( 23 , 59 , 59 ) ) ;
timeEdit-> setTime ( QTime :: currentTime ( ) ) ;
class="hljs-button signin active" data-title="登录复制" data-report-click="{"spm":"1001.2101.3001.4334"}">使用 setTimeRange() 函数可以设置时间的范围。使用 setTime() 函数可以设置默认的时间。
获取选择的时间:
QTime selectedTime = timeEdit-> time ( ) ;
class="hljs-button signin active" data-title="登录复制" data-report-click="{"spm":"1001.2101.3001.4334"}">使用 time() 函数可以获取用户选择的时间。
示例代码:
下面是一个简单的示例,演示了如何创建一个窗口,包含一个 QTimeEdit 控件:
# include # include # include # include # include class MyWidget : public QWidget {
Q_OBJECT
public :
MyWidget ( QWidget * parent = nullptr ) : QWidget ( parent) {
QVBoxLayout * layout = new QVBoxLayout ( this ) ;
QTimeEdit * timeEdit = new QTimeEdit ( this ) ;
timeEdit-> setTimeRange ( QTime ( 0 , 0 , 0 ) , QTime ( 23 , 59 , 59 ) ) ;
timeEdit-> setTime ( QTime :: currentTime ( ) ) ;
connect ( timeEdit, SIGNAL ( timeChanged ( const QTime& ) ) , this , SLOT ( onTimeChanged ( const QTime& ) ) ) ;
layout-> addWidget ( timeEdit) ;
setLayout ( layout) ;
}
private slots:
void onTimeChanged ( const QTime & time) {
qDebug ( ) << "Selected Time:" << time. toString ( "hh:mm:ss" ) ;
}
} ;
int main ( int argc, char * argv[ ] ) {
QApplication app ( argc, argv) ;
MyWidget widget;
widget. setWindowTitle ( "QTimeEdit Example" ) ;
widget. show ( ) ;
return app. exec ( ) ;
}
# include "main.moc" 1 2 3 4 5 6 7 8 9 10 11 12 13 14 15 16 17 18 19 20 21 22 23 24 25 26 27 28 29 30 31 32 33 34 35 36 37 38 39 在这个示例中,创建了一个窗口 widget 和一个 QTimeEdit 控件 timeEdit。当用户选择不同的时间时,onTimeChanged(const QTime &time) 槽函数将会被调用,输出选择的时间。
QDateTimeEdit 是 Qt 中用于选择日期和时间的控件,它允许用户通过图形界面选择特定的日期和时间。以下是如何使用 QDateTimeEdit 的说明和一个简单的示例:
使用说明:
创建 QDateTimeEdit 对象:
# include 初始化 QDateTimeEdit:
QDateTimeEdit * dateTimeEdit = new QDateTimeEdit ( this ) ;
class="hljs-button signin active" data-title="登录复制" data-report-click="{"spm":"1001.2101.3001.4334"}">这里创建了一个 QDateTimeEdit 控件。
设置日期和时间范围以及默认日期和时间:
dateTimeEdit-> setDateRange ( QDate ( 2000 , 1 , 1 ) , QDate ( 2100 , 12 , 31 ) ) ;
dateTimeEdit-> setTimeRange ( QTime ( 0 , 0 , 0 ) , QTime ( 23 , 59 , 59 ) ) ;
dateTimeEdit-> setDateTime ( QDateTime :: currentDateTime ( ) ) ;
class="hljs-button signin active" data-title="登录复制" data-report-click="{"spm":"1001.2101.3001.4334"}">使用 setDateRange() 函数可以设置日期的范围,使用 setTimeRange() 函数可以设置时间的范围。使用 setDateTime() 函数可以设置默认的日期和时间。
获取选择的日期和时间:
QDateTime selectedDateTime = dateTimeEdit-> dateTime ( ) ;
class="hljs-button signin active" data-title="登录复制" data-report-click="{"spm":"1001.2101.3001.4334"}">使用 dateTime() 函数可以获取用户选择的日期和时间。
示例代码:
下面是一个简单的示例,演示了如何创建一个窗口,包含一个 QDateTimeEdit 控件:
# include # include # include # include # include class MyWidget : public QWidget {
Q_OBJECT
public :
MyWidget ( QWidget * parent = nullptr ) : QWidget ( parent) {
QVBoxLayout * layout = new QVBoxLayout ( this ) ;
QDateTimeEdit * dateTimeEdit = new QDateTimeEdit ( this ) ;
dateTimeEdit-> setDateRange ( QDate ( 2000 , 1 , 1 ) , QDate ( 2100 , 12 , 31 ) ) ;
dateTimeEdit-> setTimeRange ( QTime ( 0 , 0 , 0 ) , QTime ( 23 , 59 , 59 ) ) ;
dateTimeEdit-> setDateTime ( QDateTime :: currentDateTime ( ) ) ;
connect ( dateTimeEdit, SIGNAL ( dateTimeChanged ( const QDateTime& ) ) , this , SLOT ( onDateTimeChanged ( const QDateTime& ) ) ) ;
layout-> addWidget ( dateTimeEdit) ;
setLayout ( layout) ;
}
private slots:
void onDateTimeChanged ( const QDateTime & dateTime) {
qDebug ( ) << "Selected Date and Time:" << dateTime. toString ( "yyyy-MM-dd hh:mm:ss" ) ;
}
} ;
int main ( int argc, char * argv[ ] ) {
QApplication app ( argc, argv) ;
MyWidget widget;
widget. setWindowTitle ( "QDateTimeEdit Example" ) ;
widget. show ( ) ;
return app. exec ( ) ;
}
# include "main.moc" 1 2 3 4 5 6 7 8 9 10 11 12 13 14 15 16 17 18 19 20 21 22 23 24 25 26 27 28 29 30 31 32 33 34 35 36 37 38 39 40 41 在这个示例中,创建了一个窗口 widget 和一个 QDateTimeEdit 控件 dateTimeEdit。当用户选择不同的日期和时间时,onDateTimeChanged(const QDateTime &dateTime) 槽函数将会被调用,输出选择的日期和时间。
QTabWidget 是 Qt 中用于显示多个标签页的控件,每个标签页都可以包含不同的内容。用户可以通过点击不同的标签页来切换显示的内容。以下是如何使用 QTabWidget 的说明和一个简单的示例:
使用说明:
创建 QTabWidget 对象:
# include 初始化 QTabWidget:
QTabWidget * tabWidget = new QTabWidget ( this ) ;
class="hljs-button signin active" data-title="登录复制" data-report-click="{"spm":"1001.2101.3001.4334"}">这里创建了一个 QTabWidget 控件。
添加标签页:
QWidget * page1 = new QWidget ( ) ;
QWidget * page2 = new QWidget ( ) ;
tabWidget-> addTab ( page1, "Tab 1" ) ;
tabWidget-> addTab ( page2, "Tab 2" ) ;
class="hljs-button signin active" data-title="登录复制" data-report-click="{"spm":"1001.2101.3001.4334"}">使用 addTab() 函数可以向 QTabWidget 中添加标签页,第一个参数是标签页的内容,第二个参数是标签页的名称。
设置当前显示的标签页:
tabWidget-> setCurrentIndex ( 0 ) ;
class="hljs-button signin active" data-title="登录复制" data-report-click="{"spm":"1001.2101.3001.4334"}">使用 setCurrentIndex() 函数可以设置当前显示的标签页的索引。
示例代码:
下面是一个简单的示例,演示了如何创建一个窗口,包含一个 QTabWidget 控件:
# include # include # include # include # include class MyWidget : public QWidget {
Q_OBJECT
public :
MyWidget ( QWidget * parent = nullptr ) : QWidget ( parent) {
QVBoxLayout * layout = new QVBoxLayout ( this ) ;
QTabWidget * tabWidget = new QTabWidget ( this ) ;
QWidget * page1 = new QWidget ( ) ;
QLabel * label1 = new QLabel ( "Content of Tab 1" , page1) ;
QVBoxLayout * page1Layout = new QVBoxLayout ( page1) ;
page1Layout-> addWidget ( label1) ;
page1-> setLayout ( page1Layout) ;
tabWidget-> addTab ( page1, "Tab 1" ) ;
QWidget * page2 = new QWidget ( ) ;
QLabel * label2 = new QLabel ( "Content of Tab 2" , page2) ;
QVBoxLayout * page2Layout = new QVBoxLayout ( page2) ;
page2Layout-> addWidget ( label2) ;
page2-> setLayout ( page2Layout) ;
tabWidget-> addTab ( page2, "Tab 2" ) ;
layout-> addWidget ( tabWidget) ;
setLayout ( layout) ;
}
} ;
int main ( int argc, char * argv[ ] ) {
QApplication app ( argc, argv) ;
MyWidget widget;
widget. setWindowTitle ( "QTabWidget Example" ) ;
widget. show ( ) ;
return app. exec ( ) ;
}
# include "main.moc" 1 2 3 4 5 6 7 8 9 10 11 12 13 14 15 16 17 18 19 20 21 22 23 24 25 26 27 28 29 30 31 32 33 34 35 36 37 38 39 40 41 42 43 44 45 在这个示例中,创建了一个窗口 widget 和一个 QTabWidget 控件 tabWidget。tabWidget 包含两个标签页,每个标签页都包含一个 QLabel 控件,用于显示相应标签页的内容。用户可以通过点击不同的标签页来切换显示的内容。
QListWidget 是 Qt 中用于显示一个可选择的列表的控件,可以包含文本、图标等元素。以下是如何使用 QListWidget 的说明和一个简单的示例:
使用说明:
创建 QListWidget 对象:
# include 初始化 QListWidget:
QListWidget * listWidget = new QListWidget ( this ) ;
class="hljs-button signin active" data-title="登录复制" data-report-click="{"spm":"1001.2101.3001.4334"}">这里创建了一个 QListWidget 控件。
添加条目:
QListWidgetItem * item1 = new QListWidgetItem ( "Item 1" ) ;
QListWidgetItem * item2 = new QListWidgetItem ( "Item 2" ) ;
listWidget-> addItem ( item1) ;
listWidget-> addItem ( item2) ;
class="hljs-button signin active" data-title="登录复制" data-report-click="{"spm":"1001.2101.3001.4334"}">使用 addItem() 函数可以向 QListWidget 中添加条目,每个条目可以是一个 QListWidgetItem 对象。
处理条目选择事件:
connect ( listWidget, SIGNAL ( itemClicked ( QListWidgetItem* ) ) , this , SLOT ( onItemClicked ( QListWidgetItem* ) ) ) ;
class="hljs-button signin active" data-title="登录复制" data-report-click="{"spm":"1001.2101.3001.4334"}">使用 itemClicked(QListWidgetItem*) 信号可以捕获条目被点击的事件,将其连接到一个槽函数中以处理条目选择事件。
示例代码:
下面是一个简单的示例,演示了如何创建一个窗口,包含一个 QListWidget 控件:
# include # include # include # include # include # include class MyWidget : public QWidget {
Q_OBJECT
public :
MyWidget ( QWidget * parent = nullptr ) : QWidget ( parent) {
QVBoxLayout * layout = new QVBoxLayout ( this ) ;
QListWidget * listWidget = new QListWidget ( this ) ;
QListWidgetItem * item1 = new QListWidgetItem ( "Item 1" ) ;
QListWidgetItem * item2 = new QListWidgetItem ( "Item 2" ) ;
listWidget-> addItem ( item1) ;
listWidget-> addItem ( item2) ;
connect ( listWidget, SIGNAL ( itemClicked ( QListWidgetItem* ) ) , this , SLOT ( onItemClicked ( QListWidgetItem* ) ) ) ;
layout-> addWidget ( listWidget) ;
setLayout ( layout) ;
}
private slots:
void onItemClicked ( QListWidgetItem * item) {
qDebug ( ) << "Selected Item:" << item-> text ( ) ;
}
} ;
int main ( int argc, char * argv[ ] ) {
QApplication app ( argc, argv) ;
MyWidget widget;
widget. setWindowTitle ( "QListWidget Example" ) ;
widget. show ( ) ;
return app. exec ( ) ;
}
# include "main.moc" 1 2 3 4 5 6 7 8 9 10 11 12 13 14 15 16 17 18 19 20 21 22 23 24 25 26 27 28 29 30 31 32 33 34 35 36 37 38 39 40 41 42 43 44 45 在这个示例中,创建了一个窗口 widget 和一个 QListWidget 控件 listWidget。listWidget 包含两个条目,当用户点击条目时,onItemClicked(QListWidgetItem *item) 槽函数将会被调用,输出被选中的条目文本。
QTreeWidget 是 Qt 中用于显示树形结构的控件,每个节点可以包含子节点。以下是如何使用 QTreeWidget 的说明和一个简单的示例:
使用说明:
创建 QTreeWidget 对象:
# include 初始化 QTreeWidget:
QTreeWidget * treeWidget = new QTreeWidget ( this ) ;
class="hljs-button signin active" data-title="登录复制" data-report-click="{"spm":"1001.2101.3001.4334"}">这里创建了一个 QTreeWidget 控件。
添加根节点:
QTreeWidgetItem * rootItem = new QTreeWidgetItem ( treeWidget) ;
rootItem-> setText ( 0 , "Root Node" ) ;
class="hljs-button signin active" data-title="登录复制" data-report-click="{"spm":"1001.2101.3001.4334"}">使用 QTreeWidgetItem 类可以创建树节点,使用 setText() 函数可以设置节点的文本内容。
添加子节点:
QTreeWidgetItem * childItem = new QTreeWidgetItem ( rootItem) ;
childItem-> setText ( 0 , "Child Node" ) ;
class="hljs-button signin active" data-title="登录复制" data-report-click="{"spm":"1001.2101.3001.4334"}">使用 QTreeWidgetItem 类创建的节点可以作为父节点传递,形成树形结构。
处理节点选择事件:
connect ( treeWidget, SIGNAL ( itemClicked ( QTreeWidgetItem* , int ) ) , this , SLOT ( onItemClicked ( QTreeWidgetItem* , int ) ) ) ;
class="hljs-button signin active" data-title="登录复制" data-report-click="{"spm":"1001.2101.3001.4334"}">使用 itemClicked(QTreeWidgetItem*, int) 信号可以捕获节点被点击的事件,将其连接到一个槽函数中以处理节点选择事件。
示例代码:
以下是一个简单的示例,演示了如何创建一个窗口,包含一个 QTreeWidget 控件:
# include # include # include # include # include # include class MyWidget : public QWidget {
Q_OBJECT
public :
MyWidget ( QWidget * parent = nullptr ) : QWidget ( parent) {
QVBoxLayout * layout = new QVBoxLayout ( this ) ;
QTreeWidget * treeWidget = new QTreeWidget ( this ) ;
QTreeWidgetItem * rootItem = new QTreeWidgetItem ( treeWidget) ;
rootItem-> setText ( 0 , "Root Node" ) ;
QTreeWidgetItem * childItem = new QTreeWidgetItem ( rootItem) ;
childItem-> setText ( 0 , "Child Node" ) ;
treeWidget-> addTopLevelItem ( rootItem) ;
connect ( treeWidget, SIGNAL ( itemClicked ( QTreeWidgetItem* , int ) ) , this , SLOT ( onItemClicked ( QTreeWidgetItem* , int ) ) ) ;
layout-> addWidget ( treeWidget) ;
setLayout ( layout) ;
}
private slots:
void onItemClicked ( QTreeWidgetItem * item, int column) {
qDebug ( ) << "Selected Node:" << item-> text ( column) ;
}
} ;
int main ( int argc, char * argv[ ] ) {
QApplication app ( argc, argv) ;
MyWidget widget;
widget. setWindowTitle ( "QTreeWidget Example" ) ;
widget. show ( ) ;
return app. exec ( ) ;
}
# include "main.moc" 1 2 3 4 5 6 7 8 9 10 11 12 13 14 15 16 17 18 19 20 21 22 23 24 25 26 27 28 29 30 31 32 33 34 35 36 37 38 39 40 41 42 43 44 45 46 在这个示例中,创建了一个窗口 widget 和一个 QTreeWidget 控件 treeWidget。treeWidget 包含一个根节点和一个子节点。当用户点击节点时,onItemClicked(QTreeWidgetItem *item, int column) 槽函数将会被调用,输出被选中的节点文本。
Qt 中的消息事件机制是事件驱动的编程模型的一部分,用于处理用户输入、系统事件等。在掌握Qt消息事件机制时,你需要了解以下几个重要知识点:
事件类别: Qt中的事件分为不同的类别,比如键盘事件、鼠标事件、定时器事件等。了解这些事件类别有助于你选择正确的事件处理函数。
事件处理函数: Qt中的每个QWidget派生类都有一组事件处理函数,用于处理特定类型的事件。例如,键盘事件可以在keyPressEvent(QKeyEvent *event)函数中处理,鼠标事件可以在mousePressEvent(QMouseEvent *event)函数中处理。了解这些函数的用途和调用时机是很重要的。
事件过滤器: 你可以使用事件过滤器(Event Filter)来对特定类型的事件进行全局处理。事件过滤器允许你在应用程序级别拦截和处理事件。你需要了解如何使用QObject::installEventFilter(QObject *filterObj)来安装事件过滤器,并在事件过滤器函数中处理特定类型的事件。
事件分发: Qt的事件系统会将事件传递给特定的控件,然后由控件的事件处理函数处理。如果你想在父对象中处理子对象的事件,你需要了解事件分发机制,包括事件的传递顺序和如何使用event(QEvent *event)函数来分发事件。
事件对象(QEvent): Qt中所有的事件都是QEvent的子类。了解不同类型的QEvent,如QKeyEvent、QMouseEvent等,并知道如何使用这些事件对象的方法和属性来获取事件的相关信息。
定时器事件: 定时器事件是一种常见的事件类型,它允许你在一定时间间隔内执行特定的操作。了解如何使用QTimer类来创建和处理定时器事件。
自定义事件: 有时,你可能需要定义自己的事件类型,以便在应用程序中传递自定义信息。了解如何使用QEvent的子类来创建自定义事件,并在控件中处理这些自定义事件。
事件循环: Qt中的事件循环是一个非常重要的概念,它负责接收、分发和处理事件。了解事件循环的工作原理,以及如何使用QCoreApplication::processEvents()来强制处理事件,是编写响应式应用程序的关键。
通过掌握这些知识点,你就能够更好地理解和利用Qt的消息事件机制,使你的应用程序能够高效地响应用户的输入和系统事件。
在Qt中,事件类别是指不同类型的事件,例如键盘事件、鼠标事件、定时器事件等。每种事件类型都有相应的事件类别,你可以在相关的事件处理函数中处理这些事件。以下是不同事件类别的使用说明和示例讲解:
键盘事件是用户按下、释放键盘按键时产生的事件。
使用说明:
键盘事件处理函数为 keyPressEvent(QKeyEvent *event) 和 keyReleaseEvent(QKeyEvent *event)。 示例:
void MyWidget :: keyPressEvent ( QKeyEvent * event) {
if ( event-> key ( ) == Qt:: Key_Escape) {
qDebug ( ) << "Escape key is pressed!" ;
}
}
class="hljs-button signin active" data-title="登录复制" data-report-click="{"spm":"1001.2101.3001.4334"}">鼠标事件是用户在窗口上进行鼠标点击、移动等操作时产生的事件。
使用说明:
鼠标事件处理函数为 mousePressEvent(QMouseEvent *event)、mouseReleaseEvent(QMouseEvent *event)、mouseMoveEvent(QMouseEvent *event)。 示例:
void MyWidget :: mousePressEvent ( QMouseEvent * event) {
qDebug ( ) << "Mouse Pressed at (" << event-> x ( ) << ", " << event-> y ( ) << ")" ;
}
class="hljs-button signin active" data-title="登录复制" data-report-click="{"spm":"1001.2101.3001.4334"}">定时器事件是在一定时间间隔内周期性触发的事件。
使用说明:
定时器事件处理函数为 timerEvent(QTimerEvent *event)。 示例:
void MyWidget :: timerEvent ( QTimerEvent * event) {
qDebug ( ) << "Timer Event Triggered!" ;
}
class="hljs-button signin active" data-title="登录复制" data-report-click="{"spm":"1001.2101.3001.4334"}">你可以创建自定义事件类别,继承自 QEvent 的子类,并在需要的时候发送和接收自定义事件。
使用说明:
自定义事件类继承自 QEvent。 使用 QCoreApplication::sendEvent() 发送自定义事件。 在事件接收者处重载 event(QEvent *event) 函数,处理自定义事件。 示例:
class CustomEvent : public QEvent {
public :
CustomEvent ( ) : QEvent ( QEvent:: User) { }
} ;
void MyWidget :: sendCustomEvent ( ) {
CustomEvent * event = new CustomEvent ( ) ;
QCoreApplication :: sendEvent ( this , event) ;
}
bool MyWidget :: event ( QEvent * event) {
if ( event-> type ( ) == QEvent:: User) {
qDebug ( ) << "Custom Event Received!" ;
return true ;
}
return QWidget :: event ( event) ;
}
class="hljs-button signin active" data-title="登录复制" data-report-click="{"spm":"1001.2101.3001.4334"}">1 2 3 4 5 6 7 8 9 10 11 12 13 14 15 16 17 18 19 这些是常见的事件类别和使用方法。根据具体需求,你可以选择相应的事件处理函数,并在这些函数中编写相应的事件处理逻辑。
在Qt中,事件处理函数是用于处理特定类型事件的成员函数,每个QWidget派生类都有它自己的事件处理函数。这些函数被用来处理鼠标事件、键盘事件、定时器事件等。以下是Qt中事件处理函数的使用说明和一个简单的示例:
键盘事件处理函数为:
keyPressEvent(QKeyEvent *event): 处理按键按下事件。keyReleaseEvent(QKeyEvent *event): 处理按键释放事件。示例:
void MyWidget :: keyPressEvent ( QKeyEvent * event) {
if ( event-> key ( ) == Qt:: Key_Escape) {
qDebug ( ) << "Escape key pressed!" ;
}
}
class="hljs-button signin active" data-title="登录复制" data-report-click="{"spm":"1001.2101.3001.4334"}">鼠标事件处理函数为:
mousePressEvent(QMouseEvent *event): 处理鼠标按键按下事件。mouseReleaseEvent(QMouseEvent *event): 处理鼠标按键释放事件。mouseMoveEvent(QMouseEvent *event): 处理鼠标移动事件。示例:
void MyWidget :: mousePressEvent ( QMouseEvent * event) {
qDebug ( ) << "Mouse button pressed at (" << event-> x ( ) << ", " << event-> y ( ) << ")" ;
}
class="hljs-button signin active" data-title="登录复制" data-report-click="{"spm":"1001.2101.3001.4334"}">定时器事件处理函数为:
timerEvent(QTimerEvent *event): 处理定时器事件。示例:
void MyWidget :: timerEvent ( QTimerEvent * event) {
qDebug ( ) << "Timer Event Triggered!" ;
}
class="hljs-button signin active" data-title="登录复制" data-report-click="{"spm":"1001.2101.3001.4334"}">自定义事件处理函数为:
event(QEvent *event): 处理自定义事件。在这个函数中,你可以检查事件的类型并处理它。示例:
bool MyWidget :: event ( QEvent * event) {
if ( event-> type ( ) == QEvent:: User) {
qDebug ( ) << "Custom Event Received!" ;
return true ;
}
return QWidget :: event ( event) ;
}
class="hljs-button signin active" data-title="登录复制" data-report-click="{"spm":"1001.2101.3001.4334"}">在这些事件处理函数中,你可以根据事件的类型和内容执行相应的操作。例如,在鼠标事件处理函数中,你可以获取鼠标的位置并作出响应。在键盘事件处理函数中,你可以检查特定的按键是否被按下。在自定义事件处理函数中,你可以处理自定义事件并做出相应的处理。
这些事件处理函数使得你能够响应用户输入、系统事件等,从而构建出交互式的用户界面。
Qt事件过滤器(Event Filter)允许你在Qt应用程序中捕捉和处理事件,而无需修改原始的事件处理函数。使用事件过滤器,你可以在整个应用程序中截获和处理特定类型的事件,而不仅仅局限于单个控件。以下是Qt事件过滤器的使用说明和一个示例:
安装事件过滤器: 使用 QObject::installEventFilter(QObject *filterObj) 函数安装事件过滤器。这个函数将事件过滤器对象安装到指定的QObject上。
重载事件过滤器函数: 在事件过滤器类中,需要重载 QObject::eventFilter(QObject *watched, QEvent *event) 函数。这个函数将会在被安装事件过滤器的对象上的所有事件发生时被调用。
处理特定类型的事件: 在事件过滤器函数中,你可以通过 event->type() 检查事件的类型,并根据需要处理事件。
以下是一个简单的示例,演示了如何使用事件过滤器来截获和处理QPushButton的点击事件:
# include # include # include # include class EventFilter : public QObject {
Q_OBJECT
public :
explicit EventFilter ( QObject * parent = nullptr ) : QObject ( parent) { }
protected :
bool eventFilter ( QObject * watched, QEvent * event) override {
if ( watched-> isWidgetType ( ) && event-> type ( ) == QEvent:: MouseButtonPress) {
qDebug ( ) << "Mouse button pressed on widget:" << watched;
return true ;
}
return false ;
}
} ;
int main ( int argc, char * argv[ ] ) {
QApplication app ( argc, argv) ;
QWidget window;
window. setWindowTitle ( "Event Filter Example" ) ;
window. setGeometry ( 100 , 100 , 300 , 200 ) ;
QPushButton button ( "Click Me!" , & window) ;
button. setGeometry ( 100 , 50 , 100 , 30 ) ;
EventFilter eventFilter;
button. installEventFilter ( & eventFilter) ;
window. show ( ) ;
return app. exec ( ) ;
}
# include "main.moc" 1 2 3 4 5 6 7 8 9 10 11 12 13 14 15 16 17 18 19 20 21 22 23 24 25 26 27 28 29 30 31 32 33 34 35 36 37 38 39 40 在这个示例中,我们创建了一个名为EventFilter的事件过滤器类,重载了eventFilter()函数。在eventFilter()函数中,我们检查事件的类型,如果是鼠标按下事件,就输出信息。然后,我们在QPushButton上安装了这个事件过滤器。
当你运行这个程序并点击按钮时,你会看到事件过滤器捕捉到了鼠标按下事件,输出了相关的信息。
在Qt中,事件分发是指当一个事件发生时,Qt系统决定应该把这个事件传递给哪个QWidget的过程。Qt中的事件分发主要通过event(QEvent *event)函数来实现。QWidget的所有子类都继承了event()函数,可以在该函数中处理不同类型的事件。
重载event()函数: 在需要处理事件的QWidget子类中,可以重载event(QEvent *event)函数。在该函数中,你可以根据event->type()的值判断事件类型,并处理相应的事件。
返回值: 在event()函数中,你可以根据需要处理事件,并返回true表示事件已被处理,不再传递,返回false表示事件未被处理,将被传递到父组件或者进一步传递给其他子组件。
以下是一个简单的示例,演示了如何在一个自定义的QWidget子类中重载event()函数来处理鼠标按下事件:
# include # include # include # include class CustomWidget : public QWidget {
public :
CustomWidget ( QWidget * parent = nullptr ) : QWidget ( parent) { }
protected :
bool event ( QEvent * event) override {
if ( event-> type ( ) == QEvent:: MouseButtonPress) {
QMouseEvent * mouseEvent = static_cast < QMouseEvent* > ( event) ;
if ( mouseEvent-> button ( ) == Qt:: LeftButton) {
qDebug ( ) << "Left mouse button pressed at (" << mouseEvent-> x ( ) << ", " << mouseEvent-> y ( ) << ")" ;
return true ;
}
}
return QWidget :: event ( event) ;
}
} ;
int main ( int argc, char * argv[ ] ) {
QApplication app ( argc, argv) ;
CustomWidget widget;
widget. setWindowTitle ( "Event Dispatching Example" ) ;
widget. setGeometry ( 100 , 100 , 300 , 200 ) ;
widget. show ( ) ;
return app. exec ( ) ;
}
class="hljs-button signin active" data-title="登录复制" data-report-click="{"spm":"1001.2101.3001.4334"}">1 2 3 4 5 6 7 8 9 10 11 12 13 14 15 16 17 18 19 20 21 22 23 24 25 26 27 28 29 30 31 32 在这个示例中,我们创建了一个自定义的QWidget子类CustomWidget,并在其中重载了event()函数。当鼠标左键按下时,event()函数将捕捉到鼠标按下事件,输出相应的信息。如果事件被处理,event()函数返回true,事件将不再传递。如果事件未被处理,event()函数返回false,事件会被传递给父组件或者其他子组件。
你可以在event()函数中处理各种类型的事件,包括键盘事件、定时器事件等,具体的事件类型通过event->type()来获取。
在Qt中,事件对象是QEvent或其子类的实例,用于封装事件的信息。不同的事件类型对应着QEvent的不同子类。你可以使用这些事件对象的方法和属性来获取事件的相关信息,例如鼠标坐标、键盘按键等。
使用说明:
获取事件类型: 通过event->type()可以获取事件对象的类型。
类型转换(如果需要): 如果你知道事件是某个特定类型的事件,可以使用static_cast或dynamic_cast将QEvent对象转换为相应的事件子类,以便获取更多的事件信息。
获取事件属性: 事件对象的子类通常有特定的方法或属性,用于获取事件的相关信息,例如鼠标位置、键盘按键等。
示例:
以下是一个处理鼠标按下事件的示例,演示了如何使用事件对象获取鼠标坐标:
# include # include # include # include class CustomWidget : public QWidget {
public :
CustomWidget ( QWidget * parent = nullptr ) : QWidget ( parent) { }
protected :
void mousePressEvent ( QMouseEvent * event) override {
if ( event-> type ( ) == QEvent:: MouseButtonPress) {
int x = event-> x ( ) ;
int y = event-> y ( ) ;
qDebug ( ) << "Mouse button pressed at (" << x << ", " << y << ")" ;
}
}
} ;
int main ( int argc, char * argv[ ] ) {
QApplication app ( argc, argv) ;
CustomWidget widget;
widget. setWindowTitle ( "Event Object Example" ) ;
widget. setGeometry ( 100 , 100 , 300 , 200 ) ;
widget. show ( ) ;
return app. exec ( ) ;
}
class="hljs-button signin active" data-title="登录复制" data-report-click="{"spm":"1001.2101.3001.4334"}">1 2 3 4 5 6 7 8 9 10 11 12 13 14 15 16 17 18 19 20 21 22 23 24 25 26 27 28 29 30 在这个示例中,我们创建了一个自定义的QWidget子类CustomWidget,并在其中重载了mousePressEvent函数,处理鼠标按下事件。在事件处理函数中,我们使用了static_cast将事件对象转换为QMouseEvent,然后获取了鼠标事件的坐标。
在Qt中,定时器事件是一种周期性触发的事件,通常用于执行一些重复性的操作,比如更新UI、定期检查数据等。你可以使用QTimer类来创建定时器,并连接定时器事件的处理函数。以下是如何使用Qt的定时器事件的说明和示例:
使用说明:
创建定时器: 使用QTimer类创建一个定时器对象。
设置定时器参数: 使用setInterval()方法设置定时器的时间间隔,以毫秒为单位。
连接定时器事件处理函数: 使用timeout信号连接定时器事件的处理函数。
启动定时器: 使用start()方法启动定时器,使其开始计时。
示例:
以下是一个简单的示例,演示了如何创建一个定时器,以及在定时器事件处理函数中更新UI显示:
# include # include # include # include class TimerExample : public QWidget {
Q_OBJECT
public :
TimerExample ( QWidget * parent = nullptr ) : QWidget ( parent) {
timer = new QTimer ( this ) ;
timer-> setInterval ( 1000 ) ;
label = new QLabel ( "Time: 0" , this ) ;
label-> setGeometry ( 50 , 50 , 100 , 30 ) ;
connect ( timer, SIGNAL ( timeout ( ) ) , this , SLOT ( updateTime ( ) ) ) ;
timer-> start ( ) ;
}
public slots:
void updateTime ( ) {
static int time = 0 ;
label-> setText ( "Time: " + QString :: number ( time) ) ;
time++ ;
}
private :
QTimer * timer;
QLabel * label;
} ;
int main ( int argc, char * argv[ ] ) {
QApplication app ( argc, argv) ;
TimerExample widget;
widget. setWindowTitle ( "Timer Example" ) ;
widget. setGeometry ( 100 , 100 , 300 , 200 ) ;
widget. show ( ) ;
return app. exec ( ) ;
}
# include "main.moc" 1 2 3 4 5 6 7 8 9 10 11 12 13 14 15 16 17 18 19 20 21 22 23 24 25 26 27 28 29 30 31 32 33 34 35 36 37 38 39 40 41 42 43 44 在这个示例中,我们创建了一个定时器timer,设置了1秒的时间间隔。然后,我们连接了timer的timeout信号到updateTime()槽函数。updateTime()槽函数在每次定时器事件触发时更新UI显示,显示一个递增的时间。
当你运行这个程序时,你会看到标签上的时间每秒钟递增一次,这是由定时器触发的定时器事件所引发的。
在Qt中,你可以创建自定义事件类型,以便在应用程序中传递自定义的信息。为了实现自定义事件,你需要继承自QEvent类,并定义你自己的事件类型。然后,你可以在需要的时候创建自定义事件对象,并将它们发送给事件接收者。以下是如何使用Qt的自定义事件的说明和示例:
使用说明:
定义自定义事件类型: 创建一个继承自QEvent的子类,并在子类中添加你需要的成员变量和方法。
创建自定义事件对象: 在需要的时候,创建你自定义事件类型的对象,传入构造函数中的参数,以便在事件接收者处获取信息。
发送自定义事件: 使用QCoreApplication::sendEvent()或者QCoreApplication::postEvent()发送自定义事件对象。
接收和处理自定义事件: 在事件接收者处重载event(QEvent *event)函数,检查事件的类型,并根据需要处理自定义事件。
示例:
以下是一个示例,演示了如何创建一个自定义事件类型CustomEvent,并在两个窗口之间传递自定义事件:
# include # include # include # include # include class CustomEvent : public QEvent {
public :
CustomEvent ( int data) : QEvent ( QEvent:: User) , eventData ( data) { }
int getData ( ) const {
return eventData;
}
private :
int eventData;
} ;
class SenderWidget : public QWidget {
public :
SenderWidget ( ) {
QTimer :: singleShot ( 2000 , this , & SenderWidget:: sendCustomEvent) ;
}
void sendCustomEvent ( ) {
CustomEvent * event = new CustomEvent ( 42 ) ;
QCoreApplication :: sendEvent ( this , event) ;
}
} ;
class ReceiverWidget : public QWidget {
public :
ReceiverWidget ( ) {
installEventFilter ( this ) ;
}
bool event ( QEvent * event) override {
if ( event-> type ( ) == QEvent:: User) {
CustomEvent * customEvent = static_cast < CustomEvent* > ( event) ;
int data = customEvent-> getData ( ) ;
qDebug ( ) << "Custom Event Received with data:" << data;
return true ;
}
return QWidget :: event ( event) ;
}
} ;
int main ( int argc, char * argv[ ] ) {
QApplication app ( argc, argv) ;
SenderWidget sender;
ReceiverWidget receiver;
receiver. setGeometry ( 300 , 100 , 200 , 150 ) ;
sender. show ( ) ;
receiver. show ( ) ;
return app. exec ( ) ;
}
class="hljs-button signin active" data-title="登录复制" data-report-click="{"spm":"1001.2101.3001.4334"}">1 2 3 4 5 6 7 8 9 10 11 12 13 14 15 16 17 18 19 20 21 22 23 24 25 26 27 28 29 30 31 32 33 34 35 36 37 38 39 40 41 42 43 44 45 46 47 48 49 50 51 52 53 54 55 56 57 58 59 在这个示例中,我们创建了一个自定义事件类CustomEvent,该事件携带一个整数数据。SenderWidget在两秒后创建了一个CustomEvent对象,并通过QCoreApplication::sendEvent()发送给自身。ReceiverWidget在event(QEvent *event)函数中捕捉到CustomEvent,并输出携带的数据。这样,我们成功地通过自定义事件在两个窗口之间传递了信息。
在Qt中,事件循环(Event Loop)是一个重要的概念,它负责接收、分发和处理事件。Qt应用程序的事件循环通常在QCoreApplication或QApplication的exec()函数中开始。事件循环会不断地从事件队列中取出事件,分发给对应的窗口控件,然后调用相应的事件处理函数。
使用说明:
启动事件循环: 事件循环通常在主函数中的app.exec()启动,它会一直运行,直到应用程序被关闭。
事件分发: 在事件循环中,Qt会不断从事件队列中取出事件,然后将事件分发给相应的窗口或对象。
事件处理函数: 每个QObject派生类都有一个event(QEvent *event)函数,用于处理所有类型的事件。你可以在这个函数中处理事件,或者调用特定事件处理函数。
示例:
以下是一个简单的示例,演示了如何使用Qt的事件循环和事件处理函数。在这个示例中,我们创建了一个窗口,当鼠标按下时,窗口会关闭。
# include # include # include class CustomWidget : public QWidget {
public :
CustomWidget ( QWidget * parent = nullptr ) : QWidget ( parent) { }
protected :
void mousePressEvent ( QMouseEvent * event) override {
if ( event-> button ( ) == Qt:: LeftButton) {
close ( ) ;
}
}
} ;
int main ( int argc, char * argv[ ] ) {
QApplication app ( argc, argv) ;
CustomWidget widget;
widget. setWindowTitle ( "Event Loop Example" ) ;
widget. setGeometry ( 100 , 100 , 300 , 200 ) ;
widget. show ( ) ;
return app. exec ( ) ;
}
class="hljs-button signin active" data-title="登录复制" data-report-click="{"spm":"1001.2101.3001.4334"}">1 2 3 4 5 6 7 8 9 10 11 12 13 14 15 16 17 18 19 20 21 22 23 24 25 26 在这个示例中,我们创建了一个自定义的QWidget子类CustomWidget,重载了mousePressEvent函数,当鼠标左键按下时,窗口会被关闭。app.exec()启动了事件循环,使得窗口能够响应鼠标事件并关闭窗口。当你点击窗口时,事件循环会不断地从事件队列中取出鼠标事件,将其分发给CustomWidget,然后调用mousePressEvent函数处理事件。
在Qt中,文件操作是一个非常常见的任务。以下是与Qt文件操作相关的一些主要知识点:
文件和目录的读写 文本文件的读写 二进制文件的读写 文件对话框 文件状态和信息 在Qt中,文件和目录的读写操作主要使用QFile和QDir类。以下是文件和目录的读写使用说明和一个简单的示例:
写文件: QFile类进行文件的写操作。首先,创建一个QFile对象,然后打开文件并使用QTextStream类进行写入操作。
QFile file ( "example.txt" ) ;
if ( file. open ( QIODevice:: WriteOnly | QIODevice:: Text) ) {
QTextStream out ( & file) ;
out << "Hello, World!" ;
file. close ( ) ;
}
class="hljs-button signin active" data-title="登录复制" data-report-click="{"spm":"1001.2101.3001.4334"}"> 读文件: QFile类进行文件的读操作。打开文件后,可以使用QTextStream类逐行读取文本内容。
QFile file ( "example.txt" ) ;
if ( file. open ( QIODevice:: ReadOnly | QIODevice:: Text) ) {
QTextStream in ( & file) ;
QString line = in. readLine ( ) ;
qDebug ( ) << "Read from file: " << line;
file. close ( ) ;
}
class="hljs-button signin active" data-title="登录复制" data-report-click="{"spm":"1001.2101.3001.4334"}"> 创建目录: QDir类创建目录。如果目录已存在,mkdir()函数会返回false。
QDir directory;
if ( ! directory. mkdir ( "myDirectory" ) ) {
qDebug ( ) << "Failed to create directory!" ;
}
class="hljs-button signin active" data-title="登录复制" data-report-click="{"spm":"1001.2101.3001.4334"}"> 遍历目录: QDir类的entryList()函数可以获取目录下的文件列表。
QDir directory ( "myDirectory" ) ;
QStringList files = directory. entryList ( QDir:: Files) ;
qDebug ( ) << "Files in directory: " << files;
class="hljs-button signin active" data-title="登录复制" data-report-click="{"spm":"1001.2101.3001.4334"}"> 删除目录: QDir类的rmdir()函数可以删除目录。请注意,目录必须为空才能被成功删除。
QDir directory ( "myDirectory" ) ;
if ( directory. exists ( ) && directory. rmdir ( "." ) ) {
qDebug ( ) << "Directory deleted successfully!" ;
} else {
qDebug ( ) << "Failed to delete directory!" ;
}
class="hljs-button signin active" data-title="登录复制" data-report-click="{"spm":"1001.2101.3001.4334"}"> 在上述示例中,QFile用于文件的读写操作,而QDir用于目录的创建、遍历和删除操作。根据实际需求,你可以选择适当的函数和类来进行文件和目录的操作。
在Qt中,你可以使用QDataStream类来进行二进制文件的读写操作。QDataStream提供了对各种基本数据类型的直接序列化和反序列化支持,使得对二进制文件的操作更加方便。
打开文件: QFile类打开一个文件,指定QIODevice::WriteOnly标志表示以写入方式打开文件。
QFile file ( "data.bin" ) ;
if ( file. open ( QIODevice:: WriteOnly) ) {
QDataStream out ( & file) ;
}
class="hljs-button signin active" data-title="登录复制" data-report-click="{"spm":"1001.2101.3001.4334"}"> 写入数据: <<操作符将数据写入到QDataStream中。QDataStream会自动处理数据的序列化。
int intValue = 42 ;
double doubleValue = 3.14 ;
QString stringValue = "Hello, World!" ;
out << intValue << doubleValue << stringValue;
class="hljs-button signin active" data-title="登录复制" data-report-click="{"spm":"1001.2101.3001.4334"}"> 关闭文件:
file. close ( ) ;
class="hljs-button signin active" data-title="登录复制" data-report-click="{"spm":"1001.2101.3001.4334"}"> 打开文件: QFile类打开已有的二进制文件,指定QIODevice::ReadOnly标志表示以只读方式打开文件。
QFile file ( "data.bin" ) ;
if ( file. open ( QIODevice:: ReadOnly) ) {
QDataStream in ( & file) ;
}
class="hljs-button signin active" data-title="登录复制" data-report-click="{"spm":"1001.2101.3001.4334"}"> 读取数据: >>操作符将数据从QDataStream中读取。QDataStream会自动处理数据的反序列化。
int intValue;
double doubleValue;
QString stringValue;
in >> intValue >> doubleValue >> stringValue;
class="hljs-button signin active" data-title="登录复制" data-report-click="{"spm":"1001.2101.3001.4334"}"> 关闭文件:
file. close ( ) ;
class="hljs-button signin active" data-title="登录复制" data-report-click="{"spm":"1001.2101.3001.4334"}"> 下面是一个完整的示例,演示了如何将数据写入二进制文件,然后再从文件中读取数据:
# include # include # include int main ( ) {
QFile file ( "data.bin" ) ;
if ( file. open ( QIODevice:: WriteOnly) ) {
QDataStream out ( & file) ;
int intValue = 42 ;
double doubleValue = 3.14 ;
QString stringValue = "Hello, World!" ;
out << intValue << doubleValue << stringValue;
file. close ( ) ;
}
if ( file. open ( QIODevice:: ReadOnly) ) {
QDataStream in ( & file) ;
int intValue;
double doubleValue;
QString stringValue;
in >> intValue >> doubleValue >> stringValue;
file. close ( ) ;
qDebug ( ) << "Read from file: " << intValue << doubleValue << stringValue;
}
return 0 ;
}
class="hljs-button signin active" data-title="登录复制" data-report-click="{"spm":"1001.2101.3001.4334"}">1 2 3 4 5 6 7 8 9 10 11 12 13 14 15 16 17 18 19 20 21 22 23 24 25 26 27 28 29 30 31 32 33 34 在这个示例中,程序首先将整数、双精度浮点数和字符串写入到二进制文件中,然后再从文件中读取这些数据。这种方法非常方便,适用于各种数据类型的读写。
在Qt中,可以使用QFileDialog类提供文件对话框,方便用户选择文件或目录。QFileDialog提供了多种模式和选项,可以满足各种文件选择需求。
获取文件路径: QFileDialog::getOpenFileName获取单个文件的路径,或者使用QFileDialog::getOpenFileNames获取多个文件的路径。这两个函数返回用户选择的文件路径,或者为空字符串(如果用户取消选择)。
QString filePath = QFileDialog :: getOpenFileName ( this , "Open File" , "/path/to/default/directory" , "Text Files (*.txt);;All Files (*)" ) ;
class="hljs-button signin active" data-title="登录复制" data-report-click="{"spm":"1001.2101.3001.4334"}">QStringList filepaths = QFileDialog :: getOpenFileNames ( this , "Open Files" , "/path/to/default/directory" , "Text Files (*.txt);;All Files (*)" ) ;
class="hljs-button signin active" data-title="登录复制" data-report-click="{"spm":"1001.2101.3001.4334"}"> 获取目录路径: QFileDialog::getExistingDirectory获取用户选择的目录路径。该函数返回用户选择的目录路径,或者为空字符串(如果用户取消选择)。
QString dirPath = QFileDialog :: getExistingDirectory ( this , "Select Directory" , "/path/to/default/directory" ) ;
class="hljs-button signin active" data-title="登录复制" data-report-click="{"spm":"1001.2101.3001.4334"}"> 保存文件: QFileDialog::getSaveFileName获取用户选择的保存文件路径。该函数返回用户选择的文件路径,或者为空字符串(如果用户取消选择)。
QString saveFilePath = QFileDialog :: getSaveFileName ( this , "Save File" , "/path/to/default/directory" , "Text Files (*.txt);;All Files (*)" ) ;
class="hljs-button signin active" data-title="登录复制" data-report-click="{"spm":"1001.2101.3001.4334"}"> 以下是一个示例,演示了如何使用QFileDialog打开文件对话框,获取用户选择的文件路径:
# include # include # include int main ( int argc, char * argv[ ] ) {
QApplication app ( argc, argv) ;
QString filePath = QFileDialog :: getOpenFileName ( nullptr , "Open File" , "/path/to/default/directory" , "Text Files (*.txt);;All Files (*)" ) ;
QStringList filepaths = QFileDialog :: getOpenFileNames ( nullptr , "Open Files" , "/path/to/default/directory" , "Text Files (*.txt);;All Files (*)" ) ;
QString dirPath = QFileDialog :: getExistingDirectory ( nullptr , "Select Directory" , "/path/to/default/directory" ) ;
QString saveFilePath = QFileDialog :: getSaveFileName ( nullptr , "Save File" , "/path/to/default/directory" , "Text Files (*.txt);;All Files (*)" ) ;
qDebug ( ) << "Selected File: " << filePath;
qDebug ( ) << "Selected Files: " << filepaths;
qDebug ( ) << "Selected Directory: " << dirPath;
qDebug ( ) << "Save File Path: " << saveFilePath;
return app. exec ( ) ;
}
class="hljs-button signin active" data-title="登录复制" data-report-click="{"spm":"1001.2101.3001.4334"}">1 2 3 4 5 6 7 8 9 10 11 12 13 14 15 16 17 18 19 20 21 22 23 24 25 26 在这个示例中,QFileDialog的各种方法被用来获取用户选择的文件或目录路径,并输出到控制台。这种方式非常方便,可以用于文件的打开、保存和目录的选择等场景。
在Qt中,使用QFileInfo类可以获取文件的状态和信息。QFileInfo提供了一系列函数,可以获取文件的大小、创建时间、修改时间、权限等信息。以下是文件状态和信息的使用说明和示例:
获取文件信息: QFileInfo类的构造函数或setFile()函数来关联一个文件,然后使用相应的函数获取文件的信息。
QString filePath = "example.txt" ;
QFileInfo fileInfo ( filePath) ;
class="hljs-button signin active" data-title="登录复制" data-report-click="{"spm":"1001.2101.3001.4334"}"> 获取文件大小: QFileInfo::size()函数可以获取文件的大小,以字节为单位。
qint64 size = fileInfo. size ( ) ;
qDebug ( ) << "File Size: " << size << " bytes" ;
class="hljs-button signin active" data-title="登录复制" data-report-click="{"spm":"1001.2101.3001.4334"}"> 获取创建时间和修改时间: QFileInfo::created()和QFileInfo::lastModified()函数可以获取文件的创建时间和修改时间。
QDateTime createdTime = fileInfo. created ( ) ;
QDateTime modifiedTime = fileInfo. lastModified ( ) ;
qDebug ( ) << "Created Time: " << createdTime;
qDebug ( ) << "Modified Time: " << modifiedTime;
class="hljs-button signin active" data-title="登录复制" data-report-click="{"spm":"1001.2101.3001.4334"}"> 检查文件是否存在: QFileInfo::exists()函数可以检查文件是否存在,返回true表示文件存在,false表示文件不存在。
if ( fileInfo. exists ( ) ) {
qDebug ( ) << "File exists!" ;
} else {
qDebug ( ) << "File does not exist!" ;
}
class="hljs-button signin active" data-title="登录复制" data-report-click="{"spm":"1001.2101.3001.4334"}"> 以下是一个完整的示例,演示了如何使用QFileInfo获取文件的状态和信息:
# include # include # include int main ( int argc, char * argv[ ] ) {
QCoreApplication app ( argc, argv) ;
QString filePath = "example.txt" ;
QFileInfo fileInfo ( filePath) ;
qint64 size = fileInfo. size ( ) ;
qDebug ( ) << "File Size: " << size << " bytes" ;
QDateTime createdTime = fileInfo. created ( ) ;
QDateTime modifiedTime = fileInfo. lastModified ( ) ;
qDebug ( ) << "Created Time: " << createdTime;
qDebug ( ) << "Modified Time: " << modifiedTime;
if ( fileInfo. exists ( ) ) {
qDebug ( ) << "File exists!" ;
} else {
qDebug ( ) << "File does not exist!" ;
}
return app. exec ( ) ;
}
class="hljs-button signin active" data-title="登录复制" data-report-click="{"spm":"1001.2101.3001.4334"}">1 2 3 4 5 6 7 8 9 10 11 12 13 14 15 16 17 18 19 20 21 22 23 24 25 26 27 28 29 在这个示例中,QFileInfo关联了一个名为example.txt的文件。通过QFileInfo的函数,我们获取了文件的大小、创建时间、修改时间,并检查文件是否存在。这些信息可以帮助你在应用程序中获取和处理文件的状态。
点击进入源码地址
QT开发环境安装以配置。 Qt学生管理系统-- 数据库课程设计(付源码) QT线段画板实战 半小时玩转QT桌面系统托盘(含托盘消息) QT入门开发一个时钟 半小时教你做大转盘游戏(QT篇) 手把手教你制作【带吸附效果的线段绘制】(QT) 手把手教你开发-滚动效果号码抽奖(QT) 100行代码实现贪吃蛇小游戏 C++实现《扫雷》游戏(入门经典) svg转图片工具开发 Qt网路与通信(获取本机网络信息) Qt网路与通信(UDP客户与服务) Qt网络与通信(TCP聊天室) Qt多线程以及线程池 Qt散点图、折线图、柱状图、盒须图、饼状图、雷达图开发实例 取色器(QT) MQTT客户端入门开发 QT文件上传带进度条实例(含源码) Qt音乐播放器开发实例(可毕设含源码) Qt小王子
class="blog_extension_card_cont_r">
微信公众号
Qt分享+螺蛳粉购买

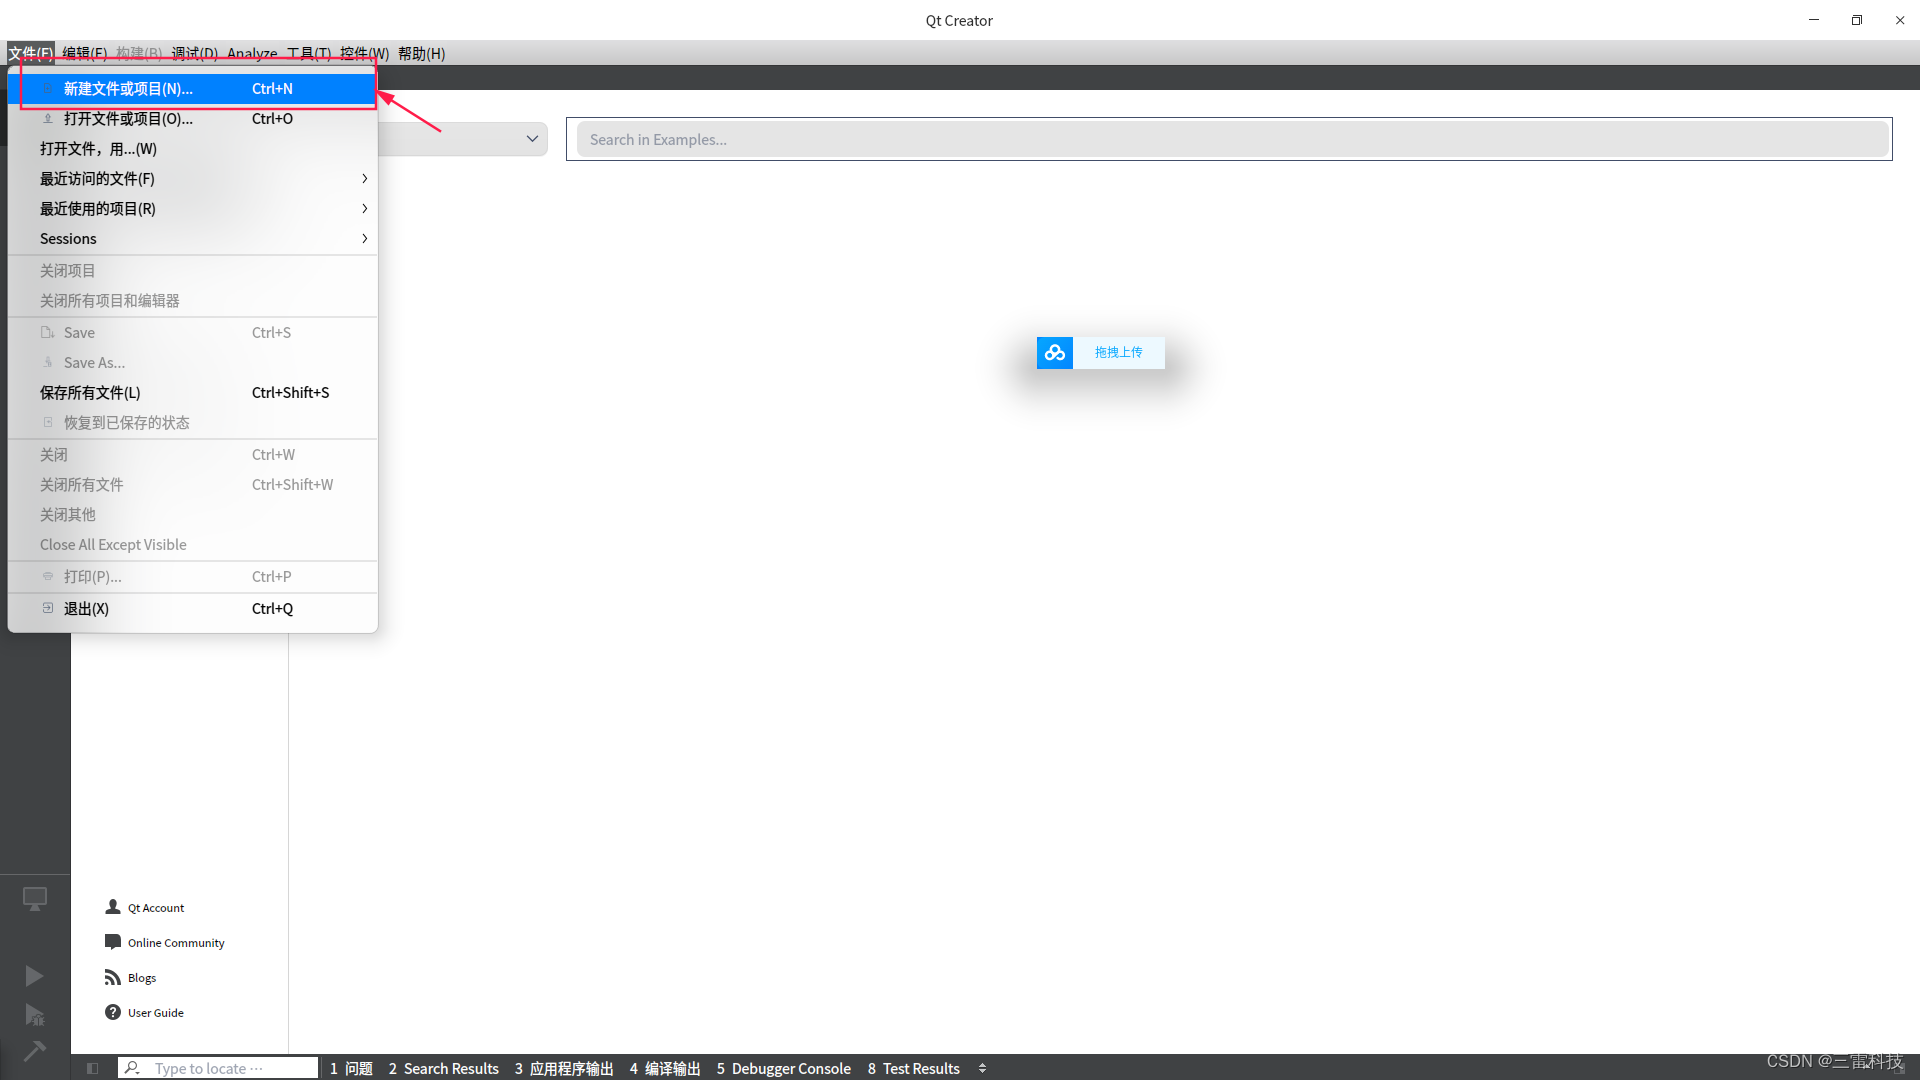
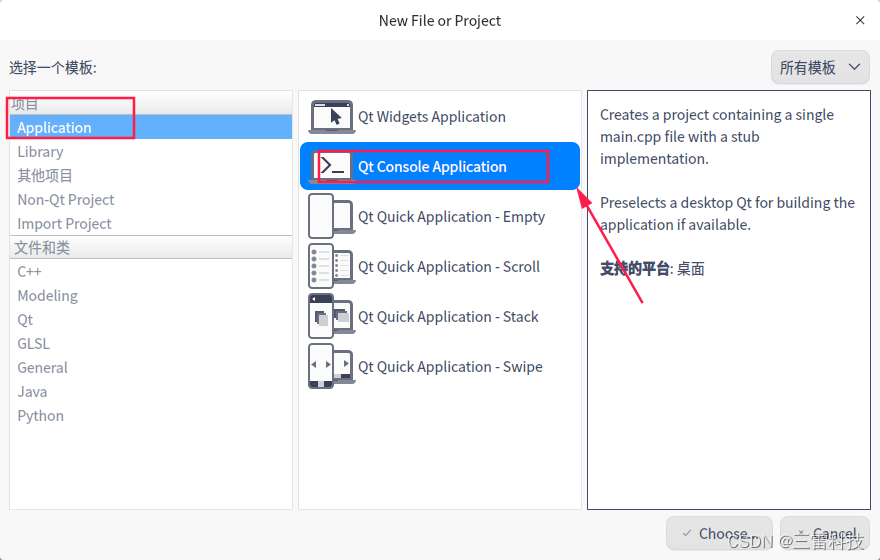
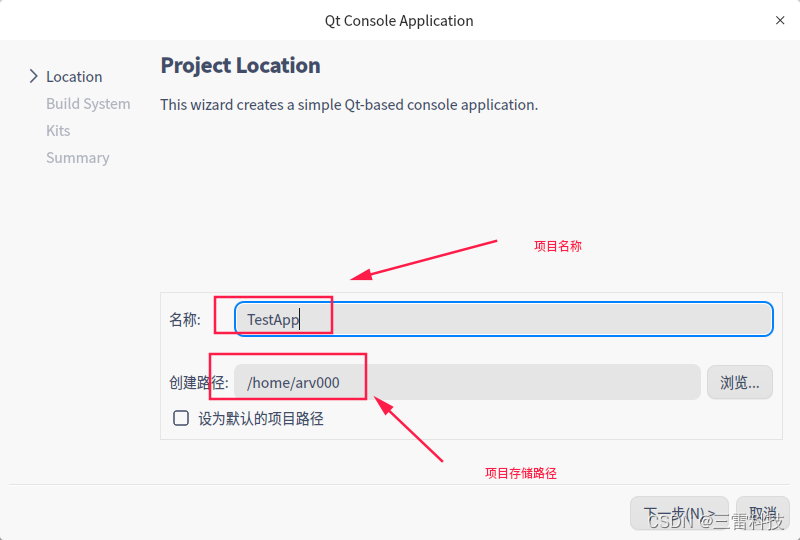
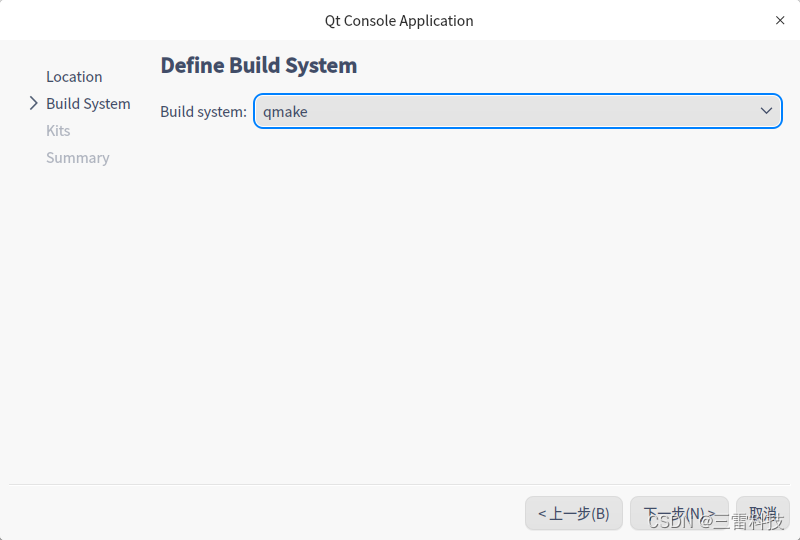
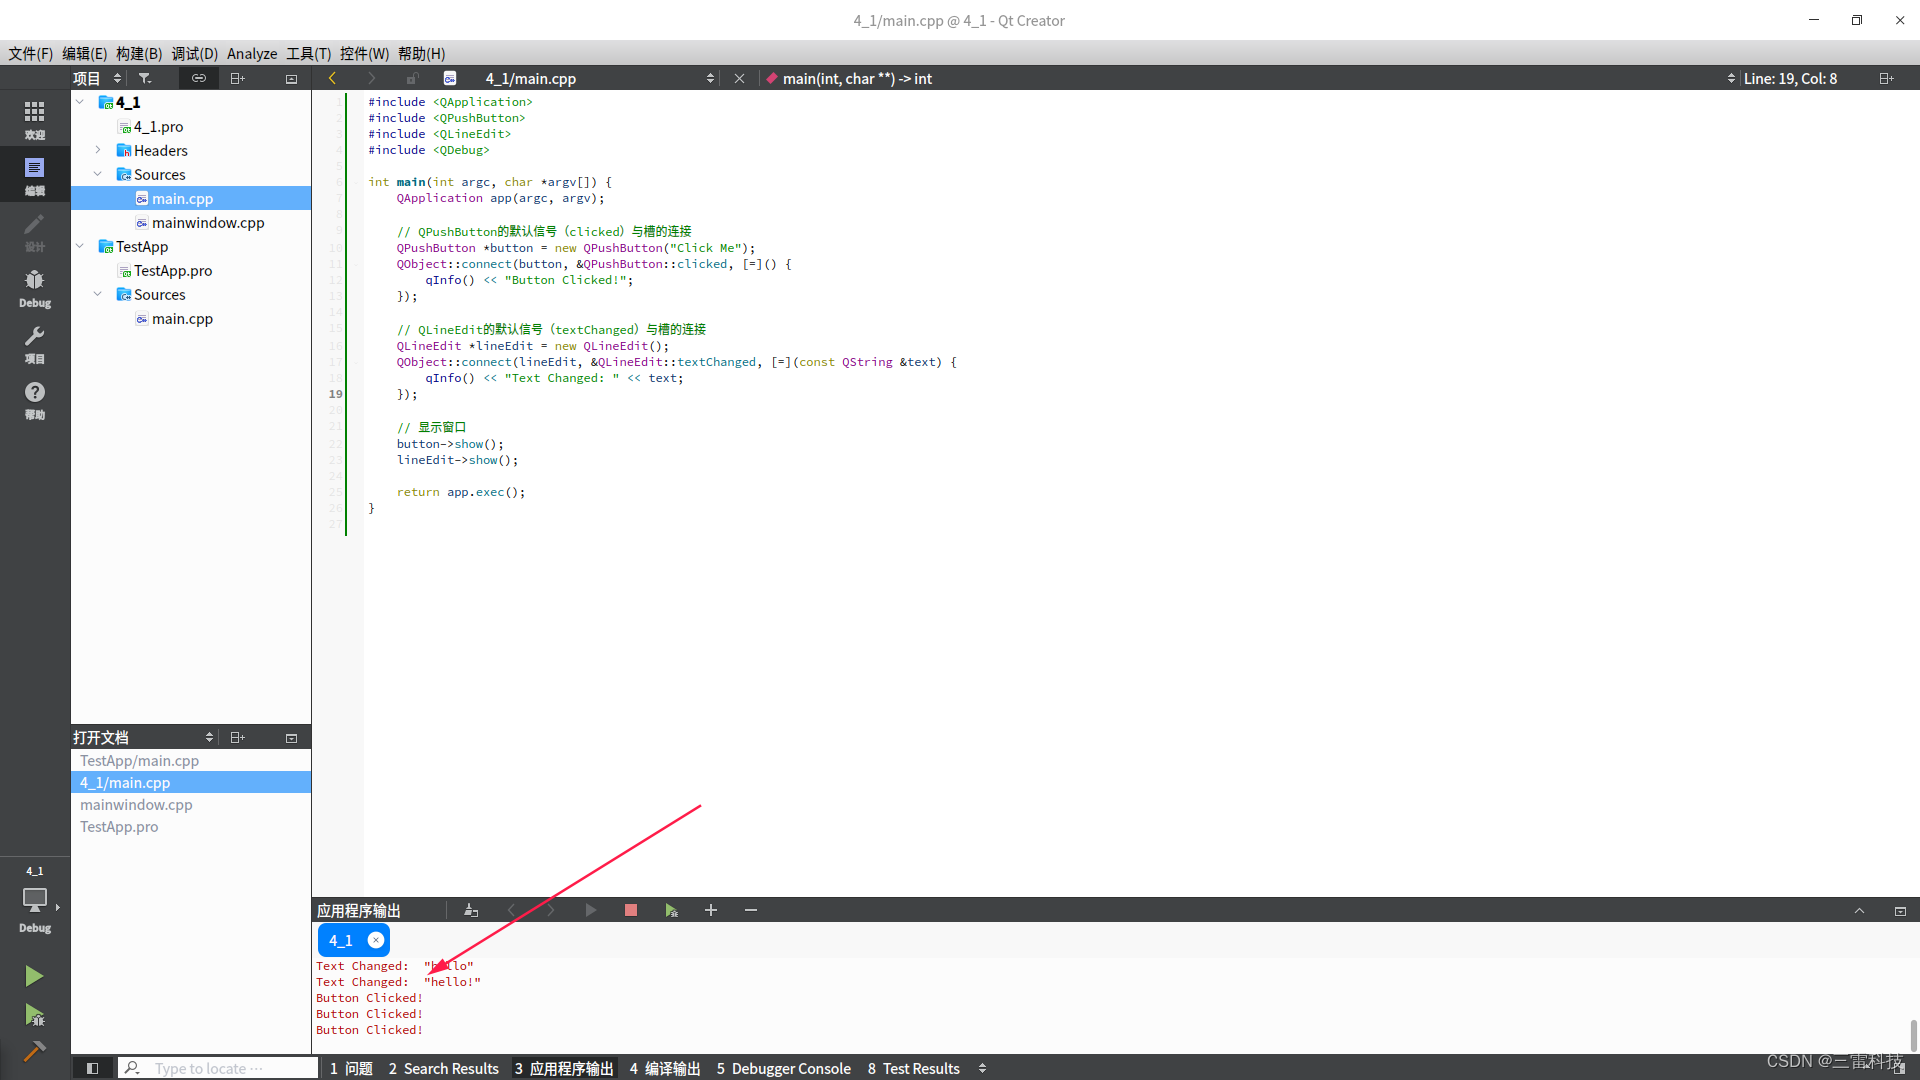
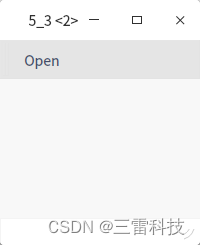
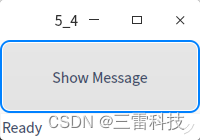
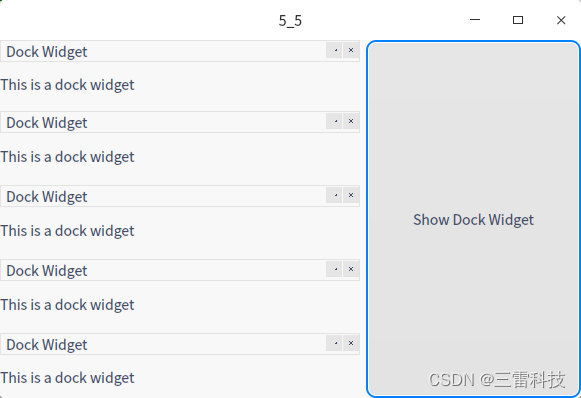
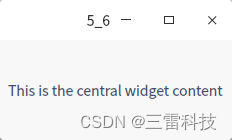
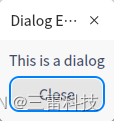
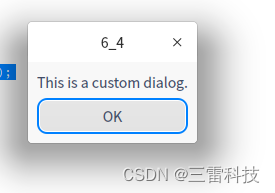
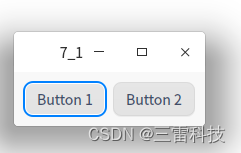
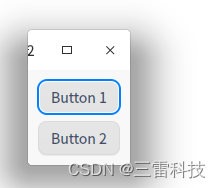
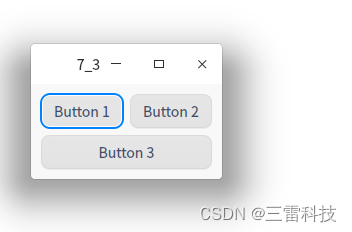
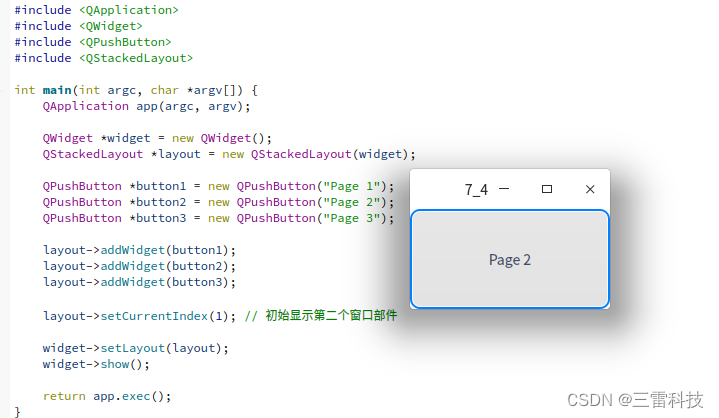
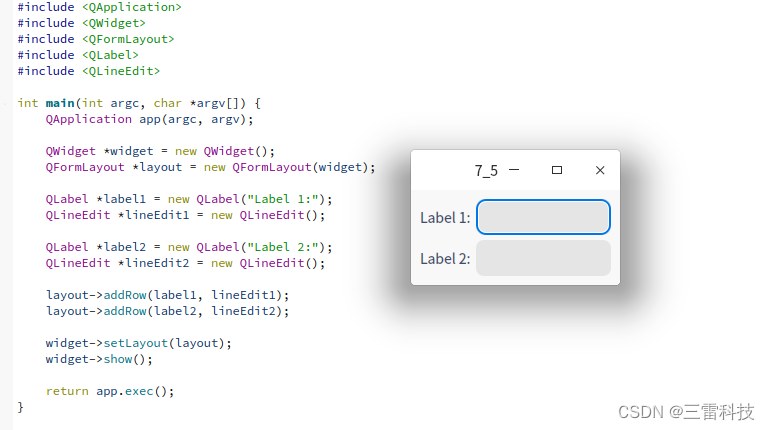
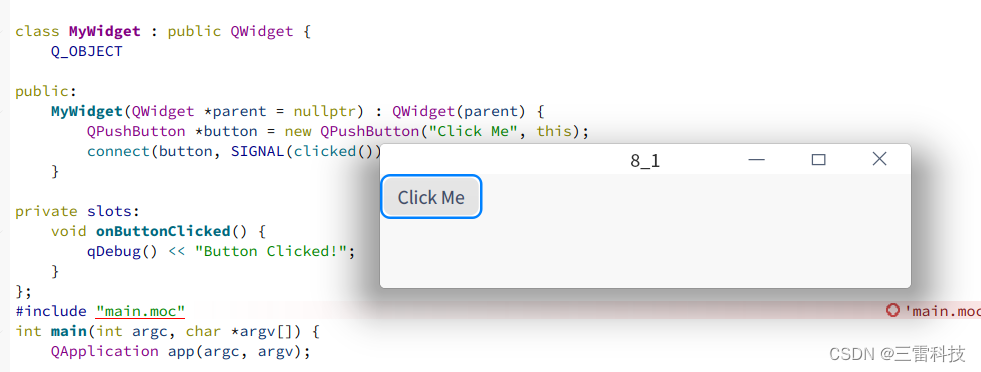
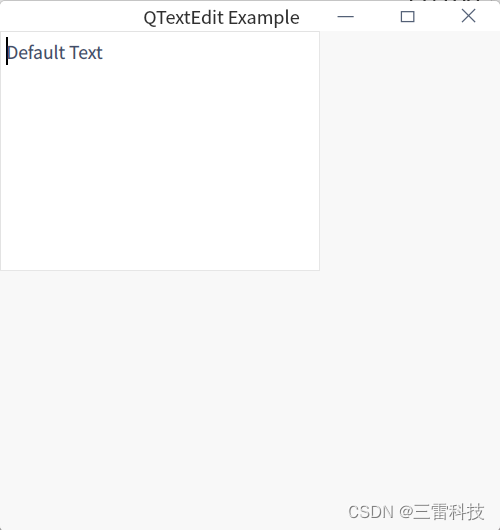

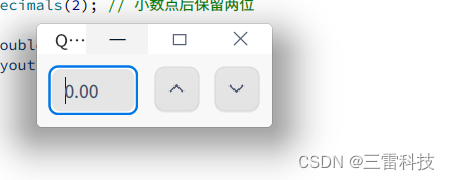
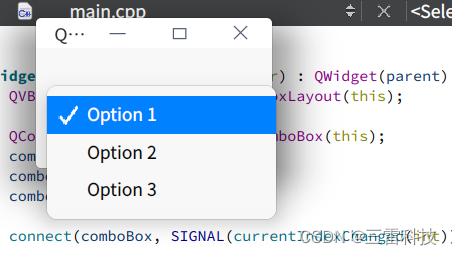
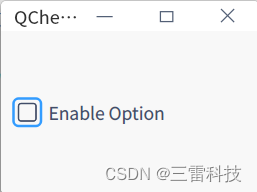
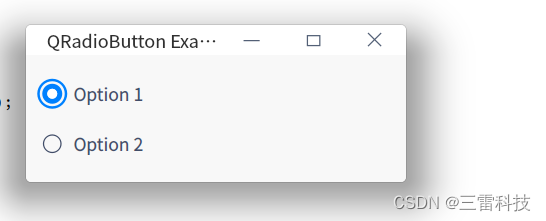

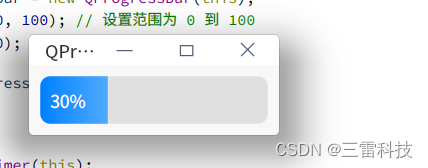
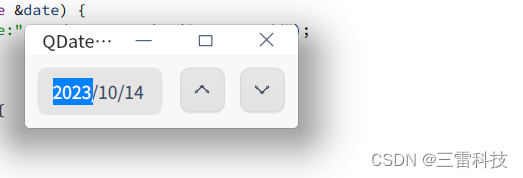
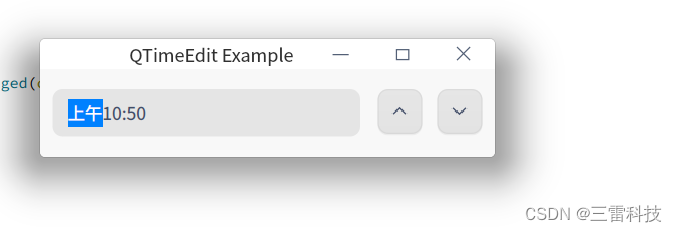
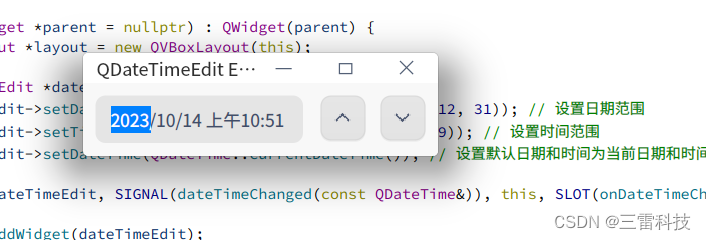
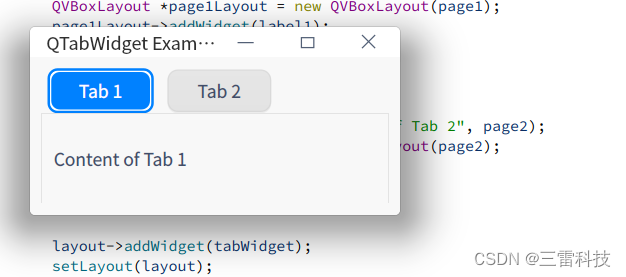
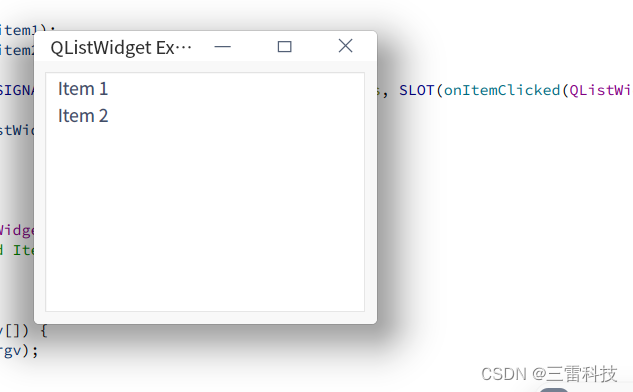
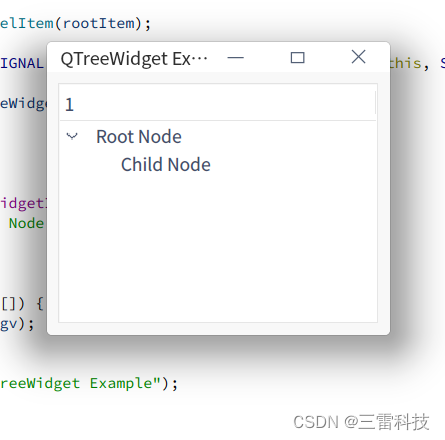
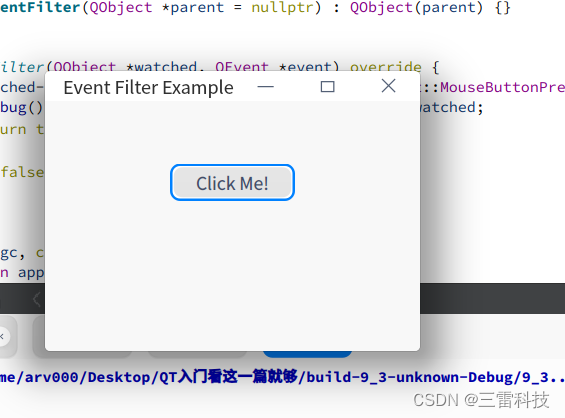
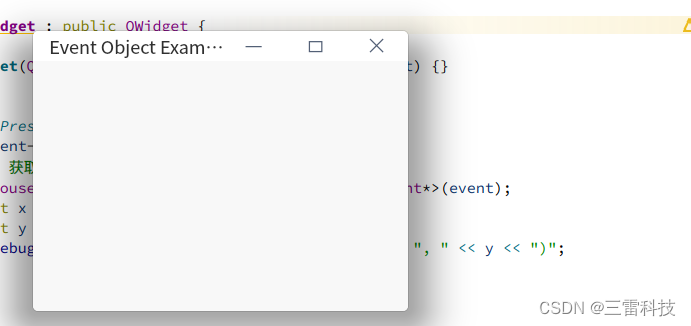
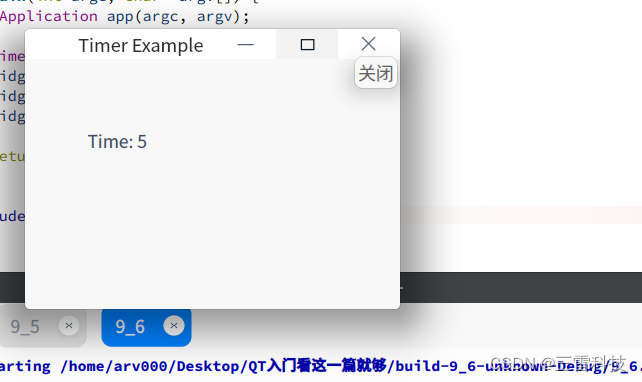
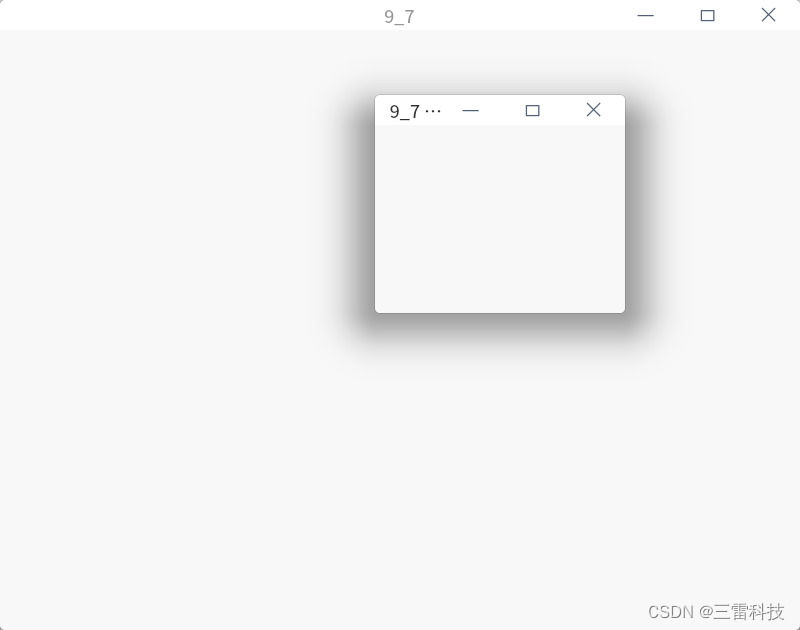
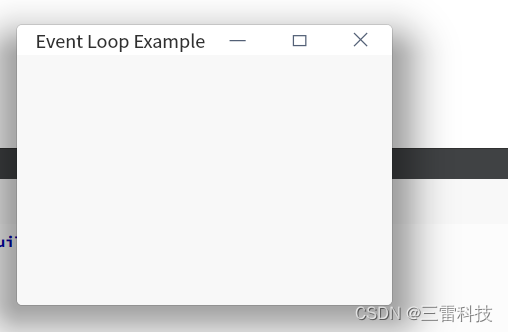
 class="blog_extension_card_cont">
class="blog_extension_card_cont_l">


评论记录:
回复评论: