
系列文章目录
1、.Net Core微服务入门系列(一)——项目搭建
2、.Net Core微服务入门全纪录(二)——Consul-服务注册与发现(上)
3、.Net Core微服务入门全纪录(三)——Consul-服务注册与发现(下)
4、.Net Core微服务入门全纪录(四)——Ocelot-API网关(上)
5、.Net Core微服务入门全纪录(五)——Ocelot-API网关(下)
6、.Net Core微服务入门全纪录(六)——EventBus-事件总线
7、.Net Core微服务入门全纪录(七)——IdentityServer4-授权认证
8、.Net Core微服务入门全纪录(八)——Docker Compose与容器网络
前言?
关于 微服务 的概念解释网上有很多, 个人理解微服务是一种系统架构模式,它和语言无关,和框架无关,和工具无关,和服务器环境无关。
微服务思想 是将传统的单体系统按照业务拆分成多个职责单一、且可独立运行的接口服务。至于服务如何拆分,没有明确的定义。几乎任何后端语言都能做微服务开发。微服务也并不是完美无缺的,微服务架构会带来更多的问题,增加系统的复杂度,引入更多的技术栈。
上一篇【.Net Core微服务入门全纪录(五)——Ocelot-API网关(下)】中已经完成了 Ocelot + Consul 的搭建,这一篇简单说一下 EventBus。
一、EventBus-事件总线
1.1 什么是事件总线?
?事件总线 是对观察者(发布-订阅)模式的一种实现。它是一种集中式事件处理机制,允许不同的组件之间进行彼此通信而又不需要相互依赖,达到一种 解耦 的目的。
如果没有接触过 EventBus ,可能不太好理解。其实 EventBus 在客户端开发中应用非常广泛android,ios,web 前端等,用于多个组件(或者界面)之间的相互通信。
1.2 为什么要用EventBus
就拿当前的项目举例,我们有一个订单服务,一个产品服务。客户端有一个下单功能,当用户下单时,调用订单服务的下单接口,那么下单接口需要调用产品服务的减库存接口,这涉及到服务与服务之间的调用。那么服务之间又怎么调用呢?直接 RESTAPI?或者效率更高的gRPC?可能这两者各有各的使用场景,但是他们都存在一个服务之间的耦合问题,或者难以做到异步调用。
试想一下:假设我们下单时调用订单服务,订单服务需要调用产品服务,产品服务又要调用物流服务,物流服务再去调用xx服务 等等。。。如果每个服务处理时间需要2s,不使用异步的话,那这种体验可想而知。
如果使用 EventBus 的话,那么订单服务只需要向 EventBus 发一个“下单事件”就可以了。产品服务会订阅“下单事件”,当产品服务收到下单事件时,自己去减库存就好了。这样就避免了两个服务之间直接调用的耦合性,并且真正做到了异步调用。
既然涉及到多个服务之间的异步调用,那么就不得不提分布式事务。分布式事务并不是微服务独有的问题,而是所有的分布式系统都会存在的问题。
关于分布式事务,可以查一下 “CAP原则” 和 “BASE理论” 了解更多。当今的分布式系统更多的会追求事务的最终一致性。
下面使用国人开发的优秀项目 “CAP”,来演示一下 EventBus 的基本使用。之所以使用 “CAP”是因为它既能解决分布式系统的最终一致性,同时又是一个 EventBus,它具备 EventBus 的所有功能!
作者介绍:https://www.cnblogs.com/savorboard/p/cap.html
二、CAP使用
2.1 环境准备
在 Docker 中准备一下需要的环境,首先是数据库,数据库我使用 PostgreSQL,用别的也行。CAP 支持:SqlServer,MySql,PostgreSql,MongoDB。
然后是MQ,这里我使用 RabbitMQ ,Kafka 也可以。
Docker运行RabbitMQ:
docker pull rabbitmq:management
docker run -d -p 15672:15672 -p 5672:5672 --name rabbitmq rabbitmq:management
- 1
- 2
?默认用户:guest,密码:guest
环境准备就完成了,Docker 就是这么方便。
2.2 代码修改
为了模拟以上业务,需要修改大量代码,下面代码如有遗漏的直接去github找。
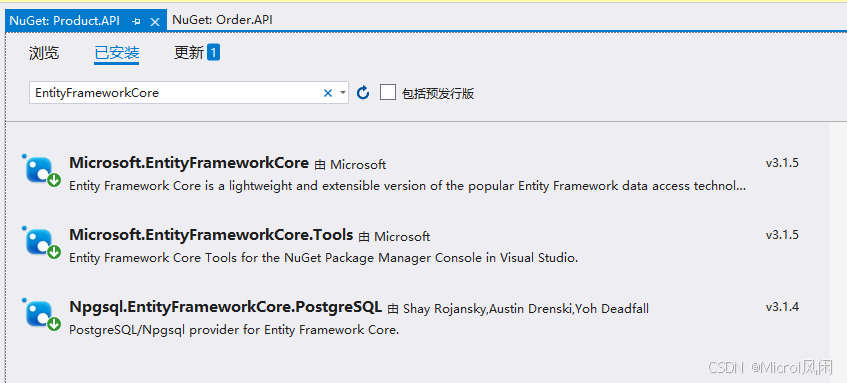
NuGet安装:
Microsoft.EntityFrameworkCore
Microsoft.EntityFrameworkCore.Tools
Npgsql.EntityFrameworkCore.PostgreSQL
- 1
- 2
- 3
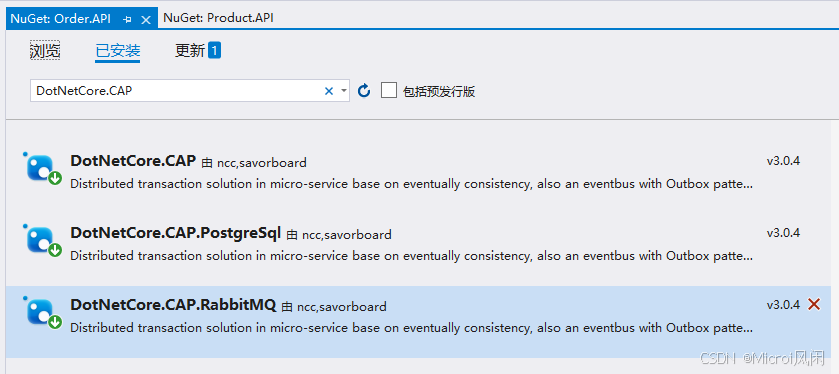
CAP相关:
DotNetCore.CAP
DotNetCore.CAP.RabbitMQ
DotNetCore.CAP.PostgreSql
- 1
- 2
- 3
Order.API/Controllers/OrdersController.cs 增加下单接口:
[Route("[controller]")]
[ApiController]
public class OrdersController : ControllerBase
{
private readonly ILogger<OrdersController> _logger;
private readonly IConfiguration _configuration;
private readonly ICapPublisher _capBus;
private readonly OrderContext _context;
public OrdersController(ILogger<OrdersController> logger, IConfiguration configuration, ICapPublisher capPublisher, OrderContext context)
{
_logger = logger;
_configuration = configuration;
_capBus = capPublisher;
_context = context;
}
[HttpGet]
public IActionResult Get()
{
string result = $"【订单服务】{DateTime.Now.ToString("yyyy-MM-dd HH:mm:ss")}——" +
$"{Request.HttpContext.Connection.LocalIpAddress}:{_configuration["ConsulSetting:ServicePort"]}";
return Ok(result);
}
/// 
- 1
- 2
- 3
- 4
- 5
- 6
- 7
- 8
- 9
- 10
- 11
- 12
- 13
- 14
- 15
- 16
- 17
- 18
- 19
- 20
- 21
- 22
- 23
- 24
- 25
- 26
- 27
- 28
- 29
- 30
- 31
- 32
- 33
- 34
- 35
- 36
- 37
- 38
- 39
- 40
- 41
- 42
- 43
- 44
- 45
- 46
- 47
- 48
- 49
- 50
- 51
- 52
- 53
- 54
- 55
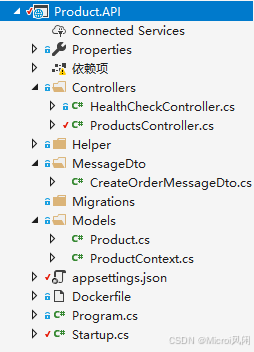
Order.API/MessageDto/CreateOrderMessageDto.cs:
/// - 1
- 2
- 3
- 4
- 5
- 6
- 7
- 8
- 9
- 10
- 11
- 12
- 13
- 14
- 15
- 16
Order.API/Models/Order.cs订单实体类:
public class Order
{
[Key]
[DatabaseGenerated(DatabaseGeneratedOption.Identity)]
public int ID { get; set; }
/// - 1
- 2
- 3
- 4
- 5
- 6
- 7
- 8
- 9
- 10
- 11
- 12
- 13
- 14
- 15
- 16
- 17
- 18
- 19
- 20
- 21
- 22
- 23
- 24
- 25
Order.API/Models/OrderContext.cs数据库Context:
public class OrderContext : DbContext
{
    public OrderContext(DbContextOptions<OrderContext> options)
       : base(options)
    {

    }

    public DbSet<Order> Orders { get; set; }

    protected override void OnModelCreating(ModelBuilder modelBuilder)
    {

    }
}
- 1
- 2
- 3
- 4
- 5
- 6
- 7
- 8
- 9
- 10
- 11
- 12
- 13
- 14
- 15
- 16
Order.API/appsettings.json增加数据库连接字符串:
"ConnectionStrings": {
  "OrderContext": "User ID=postgres;Password=pg123456;Host=host.docker.internal;Port=5432;Database=Order;Pooling=true;"
}
- 1
- 2
- 3
- 4
Order.API/Startup.cs修改ConfigureServices方法,添加Cap配置:
public void ConfigureServices(IServiceCollection services)
{
    services.AddControllers();

    services.AddDbContext<OrderContext>(opt => opt.UseNpgsql(Configuration.GetConnectionString("OrderContext")));

    //CAP
    services.AddCap(x =>
    {
        x.UseEntityFramework<OrderContext>();

        x.UseRabbitMQ("host.docker.internal");
    });
}
- 1
- 2
- 3
- 4
- 5
- 6
- 7
- 8
- 9
- 10
- 11
- 12
- 13
- 14
- 15
以上是订单服务的修改。
Product.API/Controllers/ProductsController.cs增加减库存接口:
[Route("[controller]")]
[ApiController]
public class ProductsController : ControllerBase
{
private readonly ILogger<ProductsController> _logger;
private readonly IConfiguration _configuration;
private readonly ICapPublisher _capBus;
private readonly ProductContext _context;
public ProductsController(ILogger<ProductsController> logger, IConfiguration configuration, ICapPublisher capPublisher, ProductContext context)
{
_logger = logger;
_configuration = configuration;
_capBus = capPublisher;
_context = context;
}
[HttpGet]
public IActionResult Get()
{
string result = $"【产品服务】{DateTime.Now.ToString("yyyy-MM-dd HH:mm:ss")}——" +
$"{Request.HttpContext.Connection.LocalIpAddress}:{_configuration["ConsulSetting:ServicePort"]}";
return Ok(result);
}
/// - 1
- 2
- 3
- 4
- 5
- 6
- 7
- 8
- 9
- 10
- 11
- 12
- 13
- 14
- 15
- 16
- 17
- 18
- 19
- 20
- 21
- 22
- 23
- 24
- 25
- 26
- 27
- 28
- 29
- 30
- 31
- 32
- 33
- 34
- 35
- 36
- 37
- 38
- 39
- 40
- 41
- 42
- 43
Product.API/MessageDto/CreateOrderMessageDto.cs:
/// - 1
- 2
- 3
- 4
- 5
- 6
- 7
- 8
- 9
- 10
- 11
- 12
- 13
- 14
- 15
- 16
Product.API/Models/Product.cs产品实体类:
public class Product
{
[Key]
[DatabaseGenerated(DatabaseGeneratedOption.Identity)]
public int ID { get; set; }
/// - 1
- 2
- 3
- 4
- 5
- 6
- 7
- 8
- 9
- 10
- 11
- 12
- 13
- 14
- 15
- 16
- 17
- 18
- 19
- 20
Product.API/Models/ProductContext.cs数据库Context:
public class ProductContext : DbContext
{
    public ProductContext(DbContextOptions<ProductContext> options)
       : base(options)
    {

    }

    public DbSet<Product> Products { get; set; }

    protected override void OnModelCreating(ModelBuilder modelBuilder)
    {
        base.OnModelCreating(modelBuilder);

        //初始化种子数据
        modelBuilder.Entity<Product>().HasData(new Product
        {
            ID = 1,
            Name = "产品1",
            Stock = 100
        },
        new Product
        {
            ID = 2,
            Name = "产品2",
            Stock = 100
        });
    }
}
- 1
- 2
- 3
- 4
- 5
- 6
- 7
- 8
- 9
- 10
- 11
- 12
- 13
- 14
- 15
- 16
- 17
- 18
- 19
- 20
- 21
- 22
- 23
- 24
- 25
- 26
- 27
- 28
- 29
- 30
Product.API/appsettings.json增加数据库连接字符串:
"ConnectionStrings": {
  "ProductContext": "User ID=postgres;Password=pg123456;Host=host.docker.internal;Port=5432;Database=Product;Pooling=true;"
}
- 1
- 2
- 3
- 4
Product.API/Startup.cs修改ConfigureServices方法,添加Cap配置:\
public void ConfigureServices(IServiceCollection services)
{
    services.AddControllers();

    services.AddDbContext<ProductContext>(opt => opt.UseNpgsql(Configuration.GetConnectionString("ProductContext")));

    //CAP
    services.AddCap(x =>
    {
        x.UseEntityFramework<ProductContext>();

        x.UseRabbitMQ("host.docker.internal");
    });
}
- 1
- 2
- 3
- 4
- 5
- 6
- 7
- 8
- 9
- 10
- 11
- 12
- 13
- 14
- 15
以上是产品服务的修改。
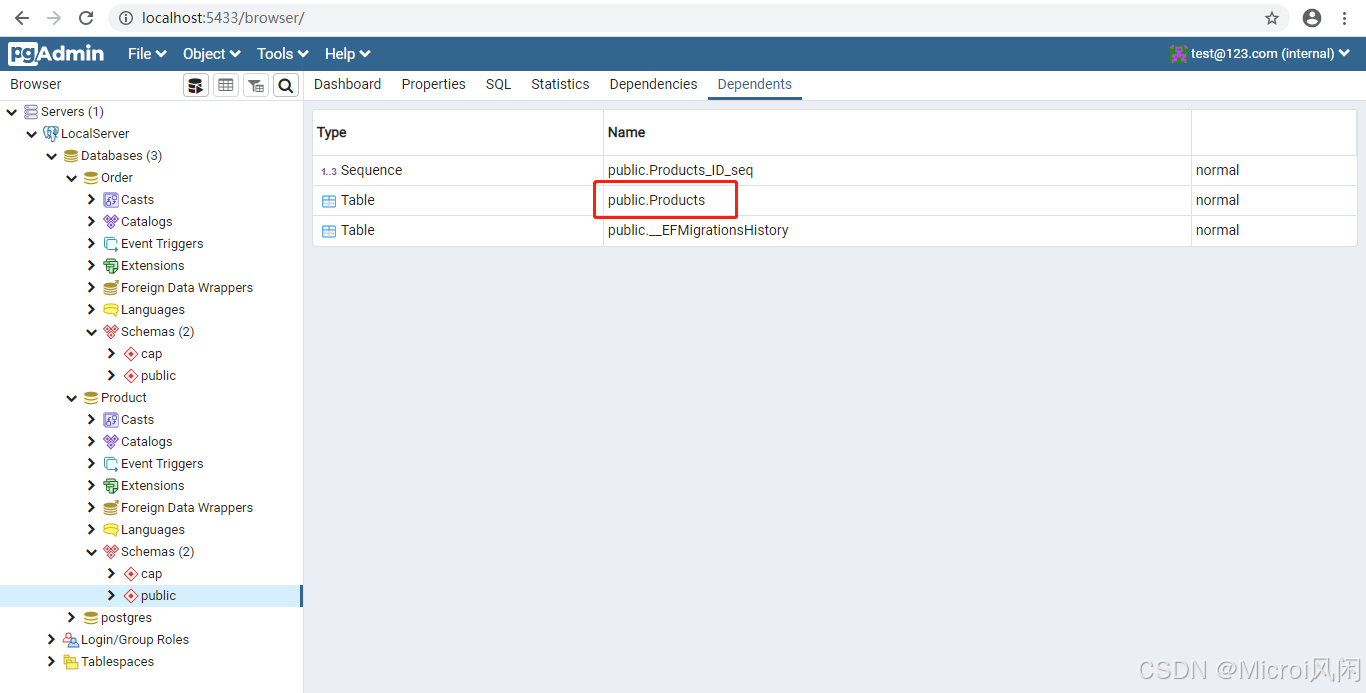
订单服务和产品服务的修改到此就完成了,看着修改很多,其实功能很简单。就是各自增加了自己的数据库表,然后订单服务增加了下单接口,下单接口会发出 “下单事件”。产品服务增加了减库存接口,减库存接口会订阅 “下单事件”。然后客户端调用下单接口下单时,产品服务会减去相应的库存,功能就这么简单。
关于 EF数据库迁移 之类的基本使用就不介绍了。使用 Docker 重新构建镜像,运行订单服务,产品服务:
docker build -t orderapi:1.1 -f ./Order.API/Dockerfile .
docker run -d -p 9060:80 --name orderservice orderapi:1.1 --ConsulSetting:ServicePort="9060"
docker run -d -p 9061:80 --name orderservice1 orderapi:1.1 --ConsulSetting:ServicePort="9061"
docker run -d -p 9062:80 --name orderservice2 orderapi:1.1 --ConsulSetting:ServicePort="9062"

docker build -t productapi:1.1 -f ./Product.API/Dockerfile .
docker run -d -p 9050:80 --name productservice productapi:1.1 --ConsulSetting:ServicePort="9050"
docker run -d -p 9051:80 --name productservice1 productapi:1.1 --ConsulSetting:ServicePort="9051"
docker run -d -p 9052:80 --name productservice2 productapi:1.1 --ConsulSetting:ServicePort="9052"
- 1
- 2
- 3
- 4
- 5
- 6
- 7
- 8
- 9
- 10
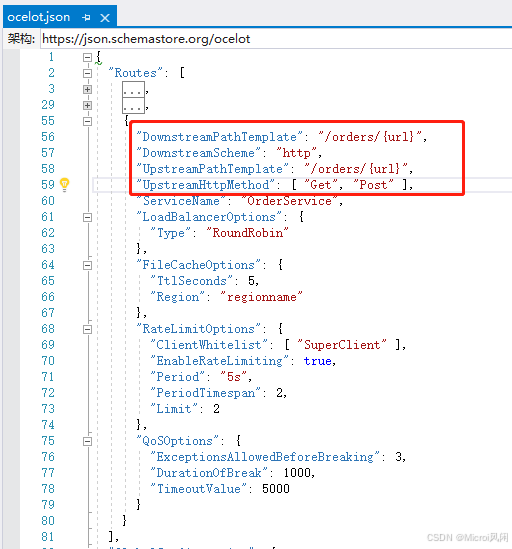
最后 Ocelot.APIGateway/ocelot.json 增加一条路由配置:
好了,进行到这里,整个环境就有点复杂了。确保我们的PostgreSQL,RabbitMQ,Consul,Gateway,服务实例都正常运行。
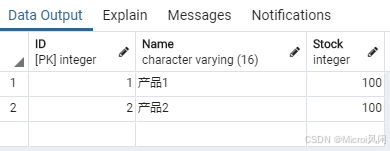
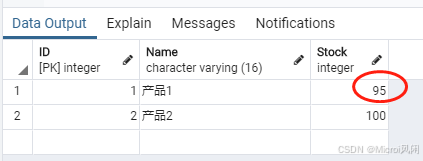
服务实例运行成功后,数据库应该是这样的:
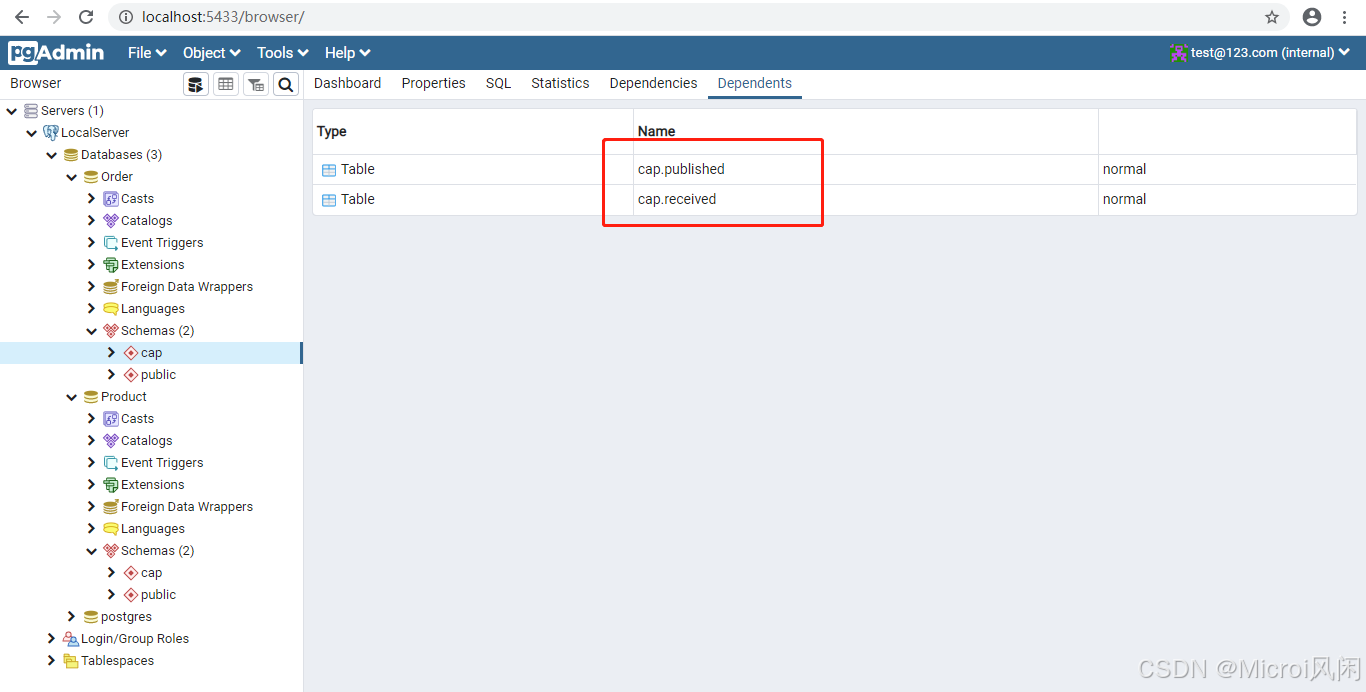
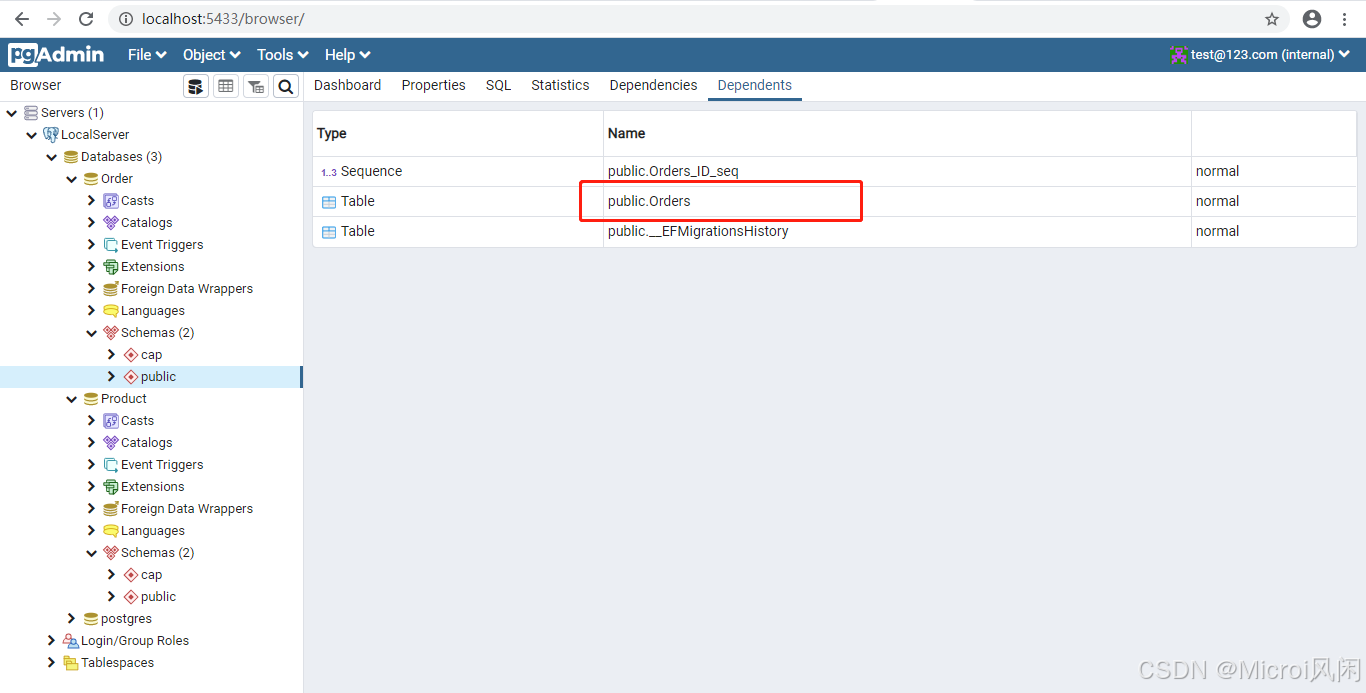
?产品表种子数据:
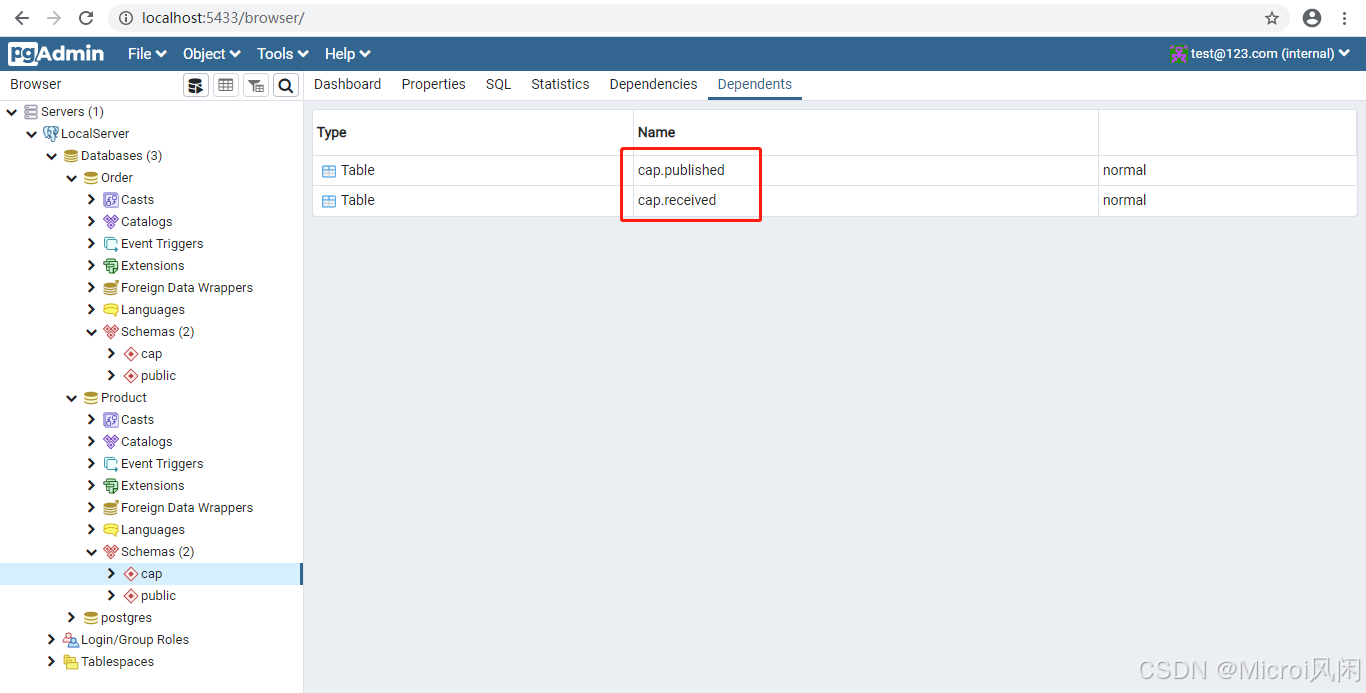
cap.published 表和 cap.received 表是由 CAP自动生成的,它内部是使用本地消息表+MQ来实现异步确保。
三、运行测试
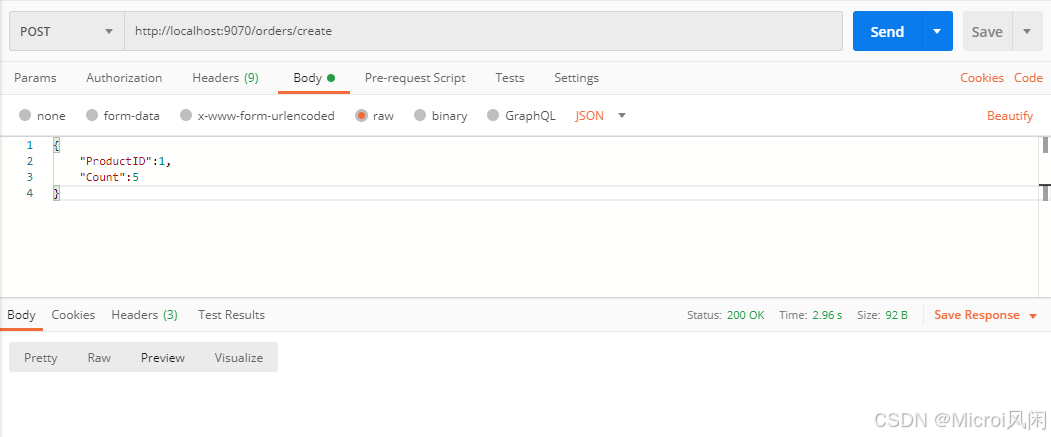
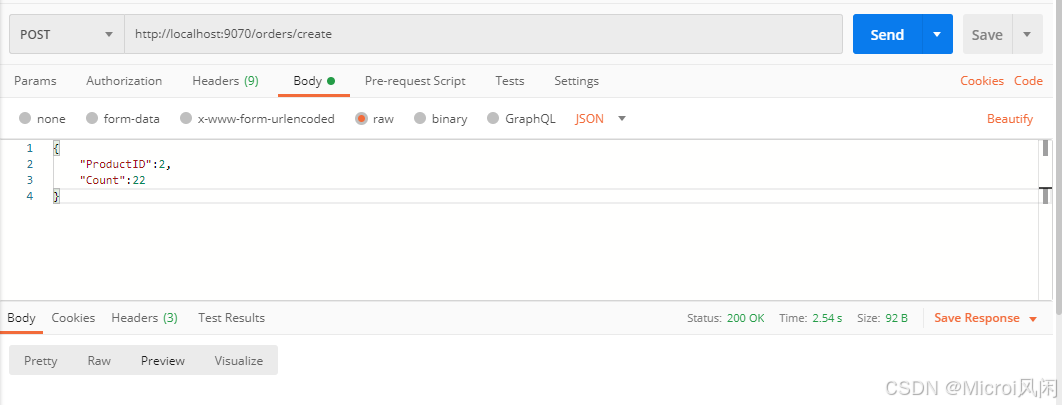
这次使用 Postman 作为客户端调用下单接口( 9070 是之前的 Ocelot 网关端口):
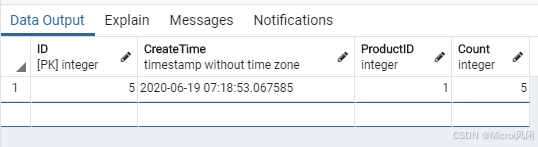
订单库 published 表:

订单库 order 表:
产品库 received 表:

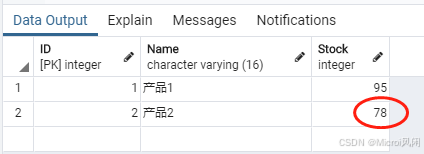
产品库 product 表:
再试一下:
OK,完成。虽然功能很简单,但是我们实现了服务的解耦,异步调用,和最终一致性。
四、总结
注意,上面的例子纯粹是为了说明 EventBus 的使用,实际中的下单流程绝对不会这么做的!希望大家不要较真。
可能有人会说如果下单成功,但是库存不足导致减库存失败了怎么办,是不是要回滚订单表的数据?如果产生这种想法,说明还没有真正理解最终一致性的思想。
首先下单前肯定会检查一下库存数量,既然允许下单那么必然是库存充足的。这里的事务是指:订单保存到数据库,和下单事件保存到 cap.published 表(保存到 cap.published 表理论上就能够发送到MQ)这两件事情,要么一同成功,要么一同失败。如果这个事务成功,那么就可以认为这个业务流程是成功的,至于产品服务的减库存是否成功那就是产品服务的事情了(理论上也应该是成功的,因为消息已经确保发到了MQ,产品服务必然会收到消息),CAP也提供了失败重试,和失败回调机制。
如果非要数据回滚也是能实现的,CAP 的 ICapPublisher.Publish 方法提供一个 callbackName参数,当减库存时,可以触发这个回调。其本质也是通过发布订阅完成,这是不推荐的做法,就不详细说了,有兴趣自己研究一下。
另外,CAP 无法保证消息不重复,实际使用中需要自己考虑一下消息的重复过滤和幂等性。

评论记录:
回复评论: