在跳出来的页面中选择 Yes
卸载第二步:删除残留的配置文件
sudo rm -rf /etc/mysql
sudo rm -rf /var/lib/mysql
class="hljs-button signin active" data-title="登录复制" data-report-click="{"spm":"1001.2101.3001.4334"}">
打开 /etc/apt/sources.list.d/mysql.list
sudo vim /etc/apt/sources.list.d/mysql.list
class="hljs-button signin active" data-title="登录复制" data-report-click="{"spm":"1001.2101.3001.4334"}">添加如下内容
deb http://repo.mysql.com/apt/ubuntu/ bionic mysql-apt-config
deb http://repo.mysql.com/apt/ubuntu/ bionic mysql-5.7
deb http://repo.mysql.com/apt/ubuntu/ bionic mysql-tools
deb-src http://repo.mysql.com/apt/ubuntu/ bionic mysql-5.7
class="hljs-button signin active" data-title="登录复制" data-report-click="{"spm":"1001.2101.3001.4334"}">更新本地的 apt 包索引
sudo apt update
class="hljs-button signin active" data-title="登录复制" data-report-click="{"spm":"1001.2101.3001.4334"}">更新过程中可能会出现如下错误
W: GPG error: http://repo.mysql.com/apt/ubuntu bionic InRelease: The following signatures couldn't be verified because the public key is not available: NO_PUBKEY B7B3B788A8D3785C
E: The repository ' http://repo.mysql.com/apt/ubuntu bionic InRelease' is not signed.
N: Updating from such a repository can' t be done securely, and is therefore disabled by default.
N: See apt-secure( 8 ) manpage for repository creation and user configuration details.
class="hljs-button signin active" data-title="登录复制" data-report-click="{"spm":"1001.2101.3001.4334"}">这是由于缺少MySQL APT存储库的公钥导致的,运行以下命令来添加公钥
wget https://repo.mysql.com/RPM-GPG-KEY-mysql-2023
sudo apt-key add RPM-GPG-KEY-mysql-2023
class="hljs-button signin active" data-title="登录复制" data-report-click="{"spm":"1001.2101.3001.4334"}">再次更新 apt 包索引
sudo apt update
class="hljs-button signin active" data-title="登录复制" data-report-click="{"spm":"1001.2101.3001.4334"}">查看系统支持的 MySQL 版本,此处可以看到已经有 5.7.42-1ubuntu18.04 了
root@iZ7xvhuhaslv4h5dm1d1svZ:~
mysql-server:
Installed: ( none)
Candidate: 8.0 .37-0ubuntu0.20.04.3
Version table:
8.0 .37-0ubuntu0.20.04.3 500
500 http://mirrors.cloud.aliyuncs.com/ubuntu focal-updates/main amd64 Packages
500 http://mirrors.cloud.aliyuncs.com/ubuntu focal-updates/main i386 Packages
500 http://mirrors.cloud.aliyuncs.com/ubuntu focal-security/main amd64 Packages
500 http://mirrors.cloud.aliyuncs.com/ubuntu focal-security/main i386 Packages
8.0 .19-0ubuntu5 500
500 http://mirrors.cloud.aliyuncs.com/ubuntu focal/main amd64 Packages
500 http://mirrors.cloud.aliyuncs.com/ubuntu focal/main i386 Packages
5.7 .42-1ubuntu18.04 500
500 http://repo.mysql.com/apt/ubuntu bionic/mysql-5.7 amd64 Packages
class="hljs-button signin active" data-title="登录复制" data-report-click="{"spm":"1001.2101.3001.4334"}">先后安装 MySQL 5.7 版本客户端和服务端,版本信息根据自己的输出自行修改。
sudo apt install -y mysql-client= 5.7 .42-1ubuntu18.04
sudo apt install -y mysql-server= 5.7 .42-1ubuntu18.04
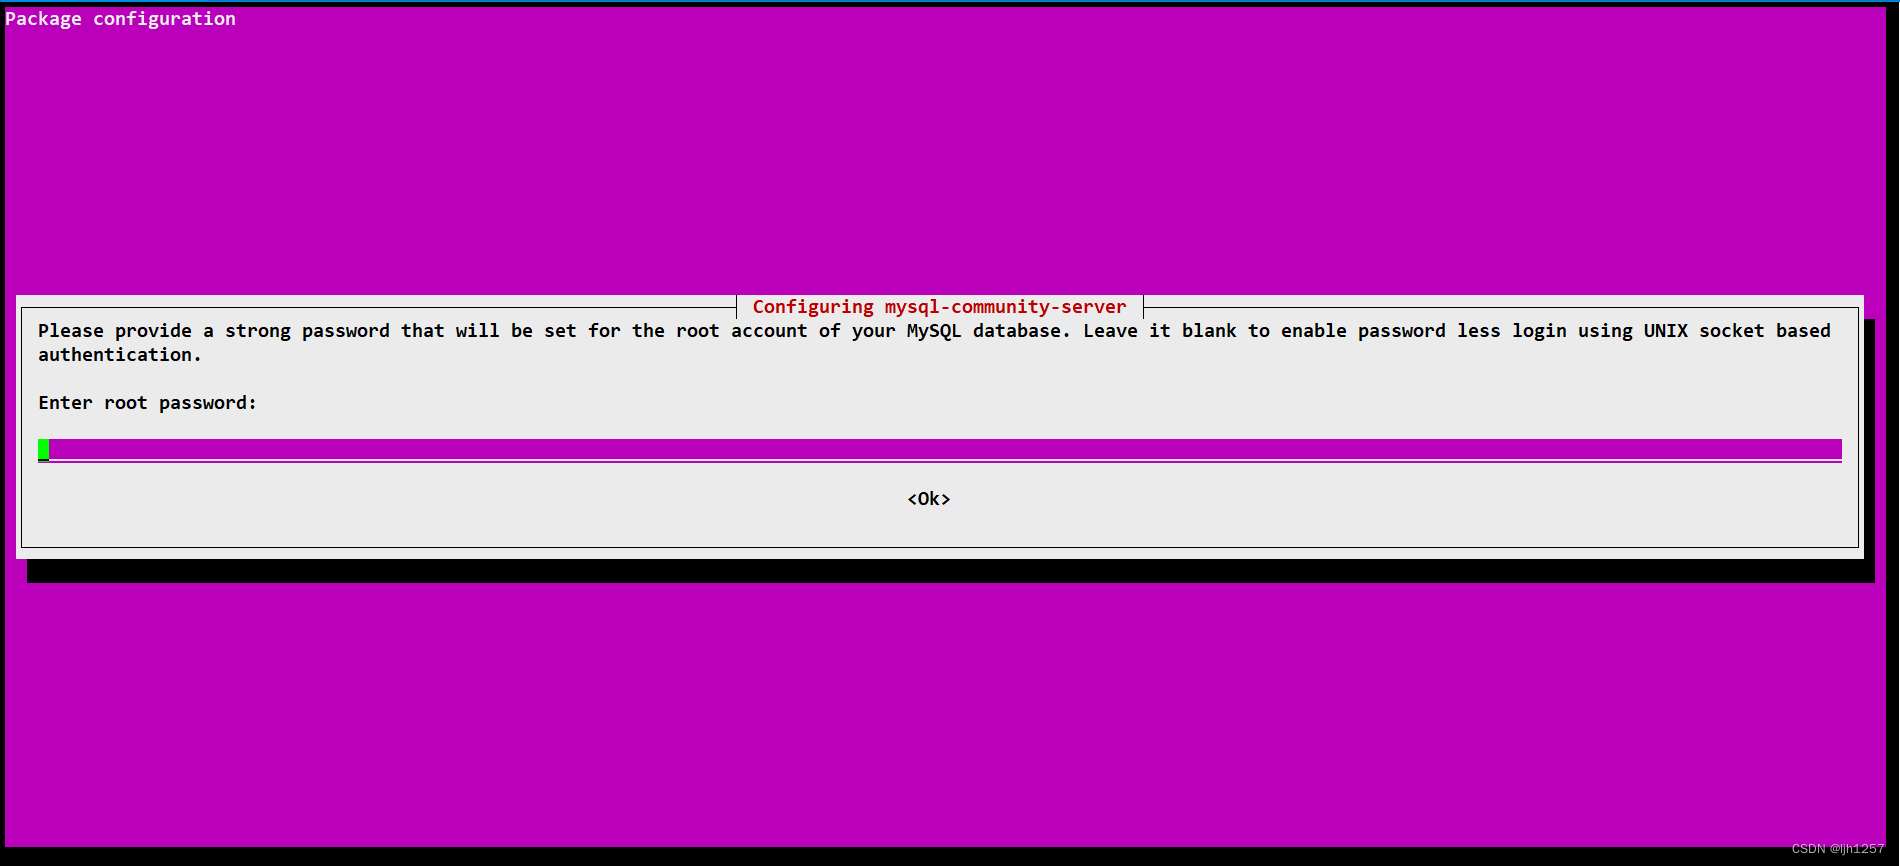
class="hljs-button signin active" data-title="登录复制" data-report-click="{"spm":"1001.2101.3001.4334"}">server 端安装过程中会自动出现如下界面,可凭喜好是否设定root用户密码
安装好了之后使用 which 查看说明安装完成
root@iZ7xvhuhaslv4h5dm1d1svZ:~
/usr/sbin/mysqld
root@iZ7xvhuhaslv4h5dm1d1svZ:~
/usr/bin/mysql
class="hljs-button signin active" data-title="登录复制" data-report-click="{"spm":"1001.2101.3001.4334"}">/etc/mysql 是 MySQL 相关配置文件所在目录,其中 conf.d 是客户端配置文件所在目录,mysql.conf.d 是服务端配置文件所在目录,MySQL 5.7 并没有显式将配置文件分开,而是 Ubuntu 20.04 的安装过程中,将 MySQL 的配置文件分为服务端和客户端部分。
root@iZ7xvhuhaslv4h5dm1d1svZ:~
root@iZ7xvhuhaslv4h5dm1d1svZ:/etc/mysql
conf.d/:
total 16
drwxr-xr-x 2 root root 4096 May 8 11 :14 ./
drwxr-xr-x 4 root root 4096 Jun 16 20 :46 .. /
-rw-r--r-- 1 root root 8 Aug 3 2016 mysql.cnf
-rw-r--r-- 1 root root 55 Aug 3 2016 mysqldump.cnf
mysql.conf.d/:
total 12
drwxr-xr-x 2 root root 4096 Jun 16 20 :46 ./
drwxr-xr-x 4 root root 4096 Jun 16 20 :46 .. /
-rw-r--r-- 1 root root 1587 Mar 16 2023 mysqld.cnf
class="hljs-button signin active" data-title="登录复制" data-report-click="{"spm":"1001.2101.3001.4334"}">首先是客户端
sudo vim /etc/mysql/conf.d/mysql.cnf
class="hljs-button signin active" data-title="登录复制" data-report-click="{"spm":"1001.2101.3001.4334"}">添加如下内容,主要是为了解决汉字兼容问题
default-character-set= utf8
class="hljs-button signin active" data-title="登录复制" data-report-click="{"spm":"1001.2101.3001.4334"}">然后是服务端
sudo vim /etc/mysql/mysql.conf.d/mysqld.cnf
class="hljs-button signin active" data-title="登录复制" data-report-click="{"spm":"1001.2101.3001.4334"}">添加如下内容
port = 3306
character-set-server= utf8
default-storage-engine= innodb
class="hljs-button signin active" data-title="登录复制" data-report-click="{"spm":"1001.2101.3001.4334"}">重启 MySQL 服务端
systemctl restart mysql.service
 class="hljs-button signin active" data-title="登录复制" data-report-click="{"spm":"1001.2101.3001.4334"}">
以上就是所有的安装过程
亲测-ubuntu20.04 安装 MySQL5.7 在 Ubuntu 上安装 MySQL 5.7 20.04 

评论记录:
回复评论: