
因为firebase dynamic link 要在2025-08-25停止运行了,被迫寻找其他方案。了解到可以借助github自己搭建一个链接(测试用)
github page
新建一个空白项目,项目名设置为用户名.github.io(如test.github.io), 创建一个index.html文件,随意写一个按钮
html 代码解读复制代码    <button onclick="openApp()">打开appbutton>
    <script>
        function openApp() {
            window.location.href = 'https://test.github.io/links?region=cn';
            console.log('打开App 点击事件')
        }
    script>
进入项目的设置页面,选择pages,选择对应分支
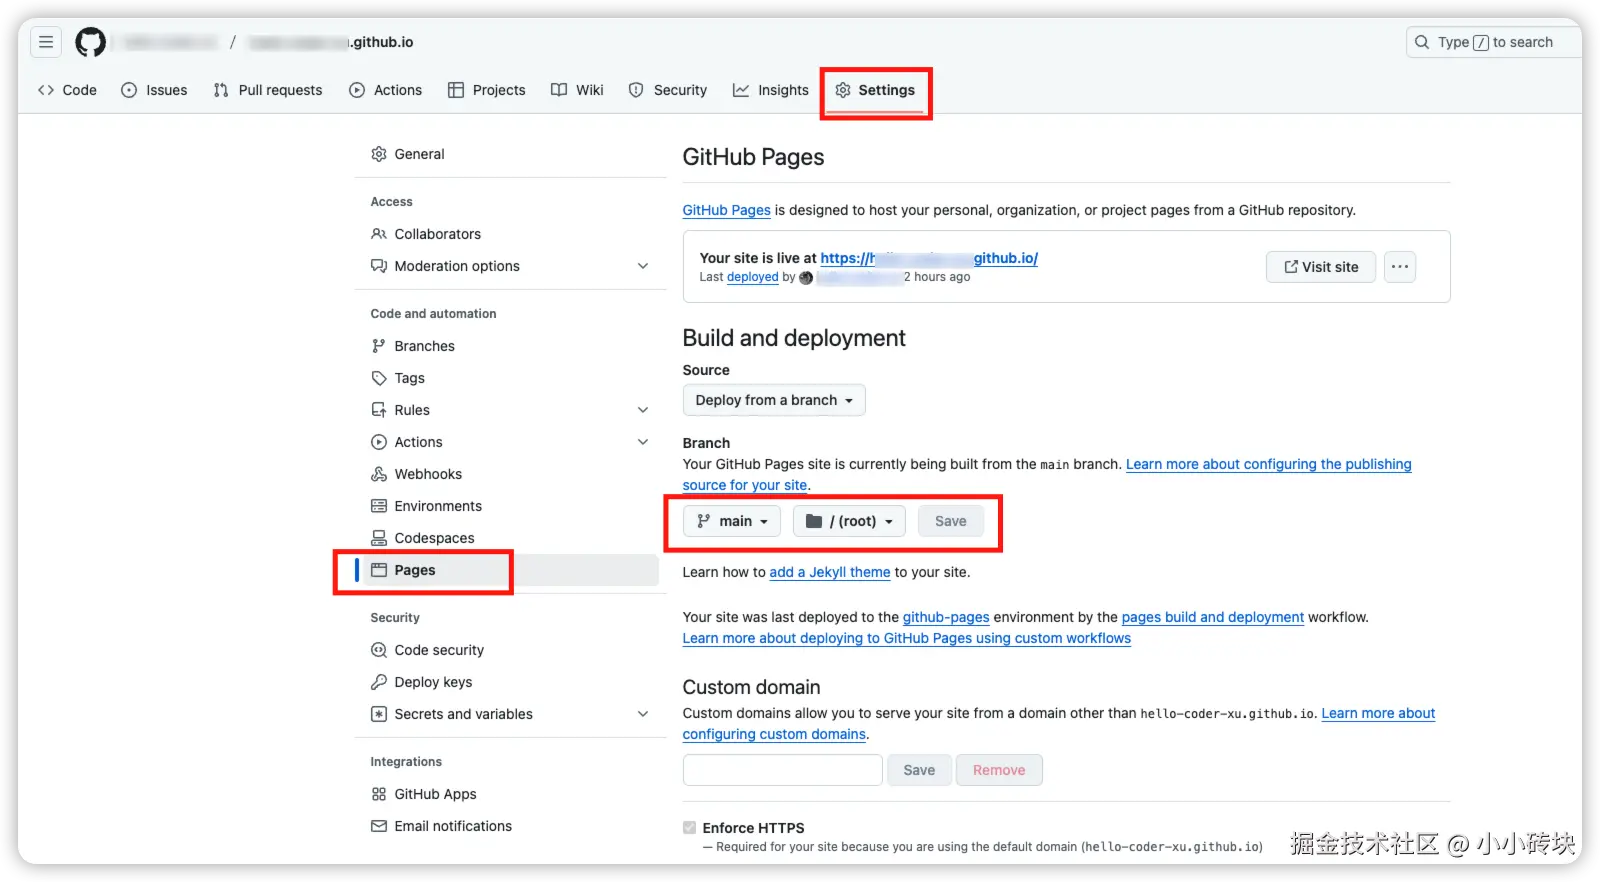
等待1-2分钟,查看 test.github.io/, 可以正常看到网页展示按钮,代表已配置成功
Android
借助Andorid studio 配置app links 的配置
选择Tools > App Links Assistant打开引导页面
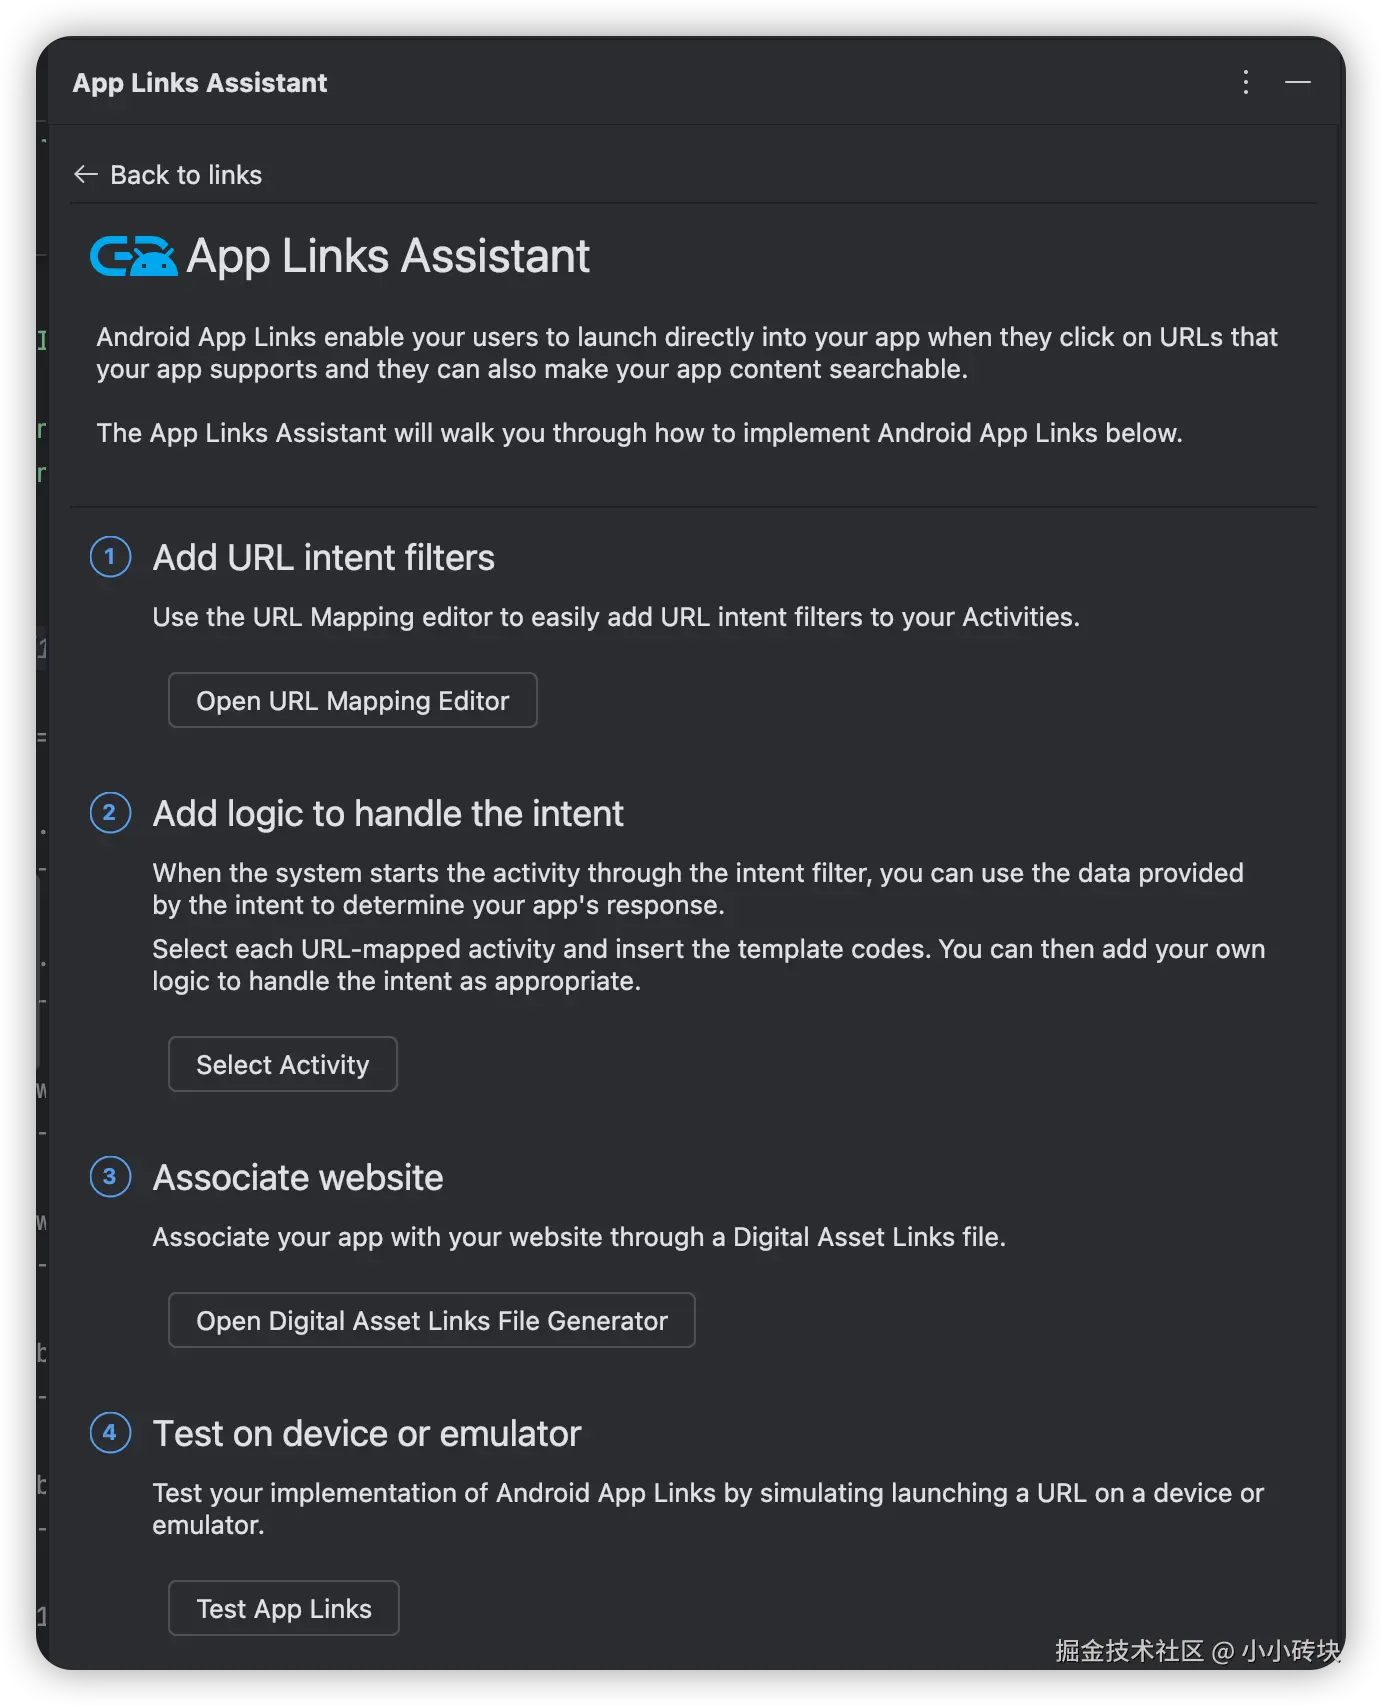
Open URL Mapping Editor
配置app与网页链接的关联
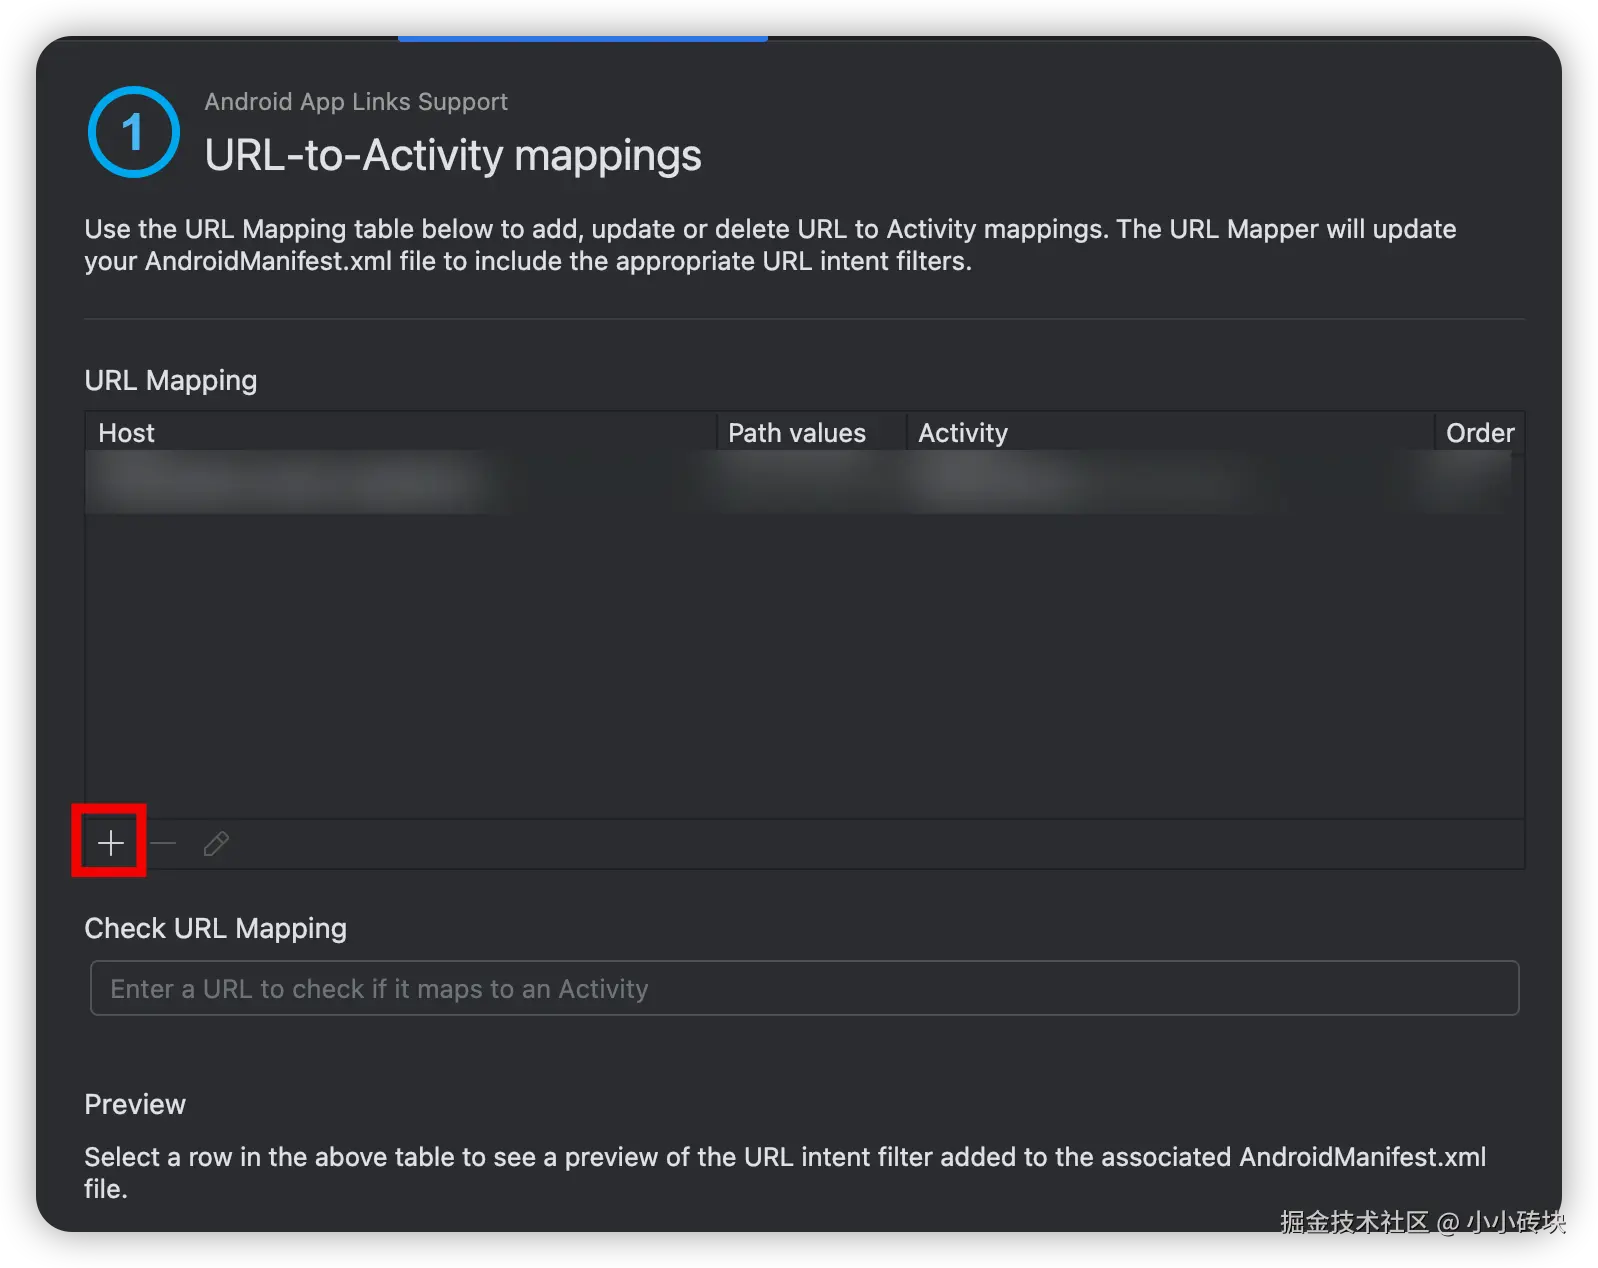
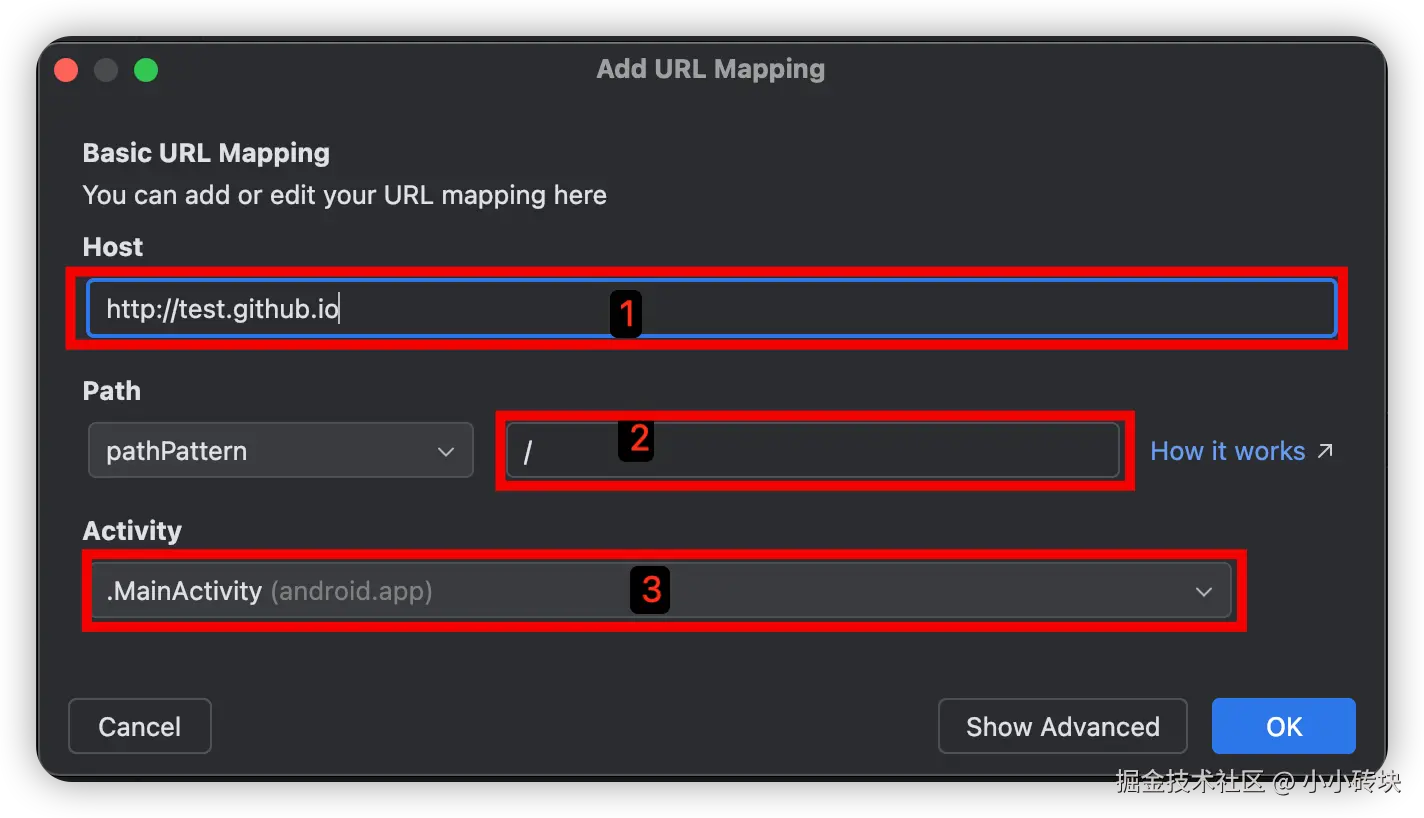
位置1,填写之前配置好的 github page 的链接test.github.io/
位置2,填写具体路径,后面通过对应完整的链接唤起app,
可以是/,唤起app链接则是test.github.io/
也可以填写实际需要的路径,如 /links,唤起app链接则是 test.github.io/links/
注意,配置的路径对应的页面可以不需要真实存在,如我配置的路径是/links,我并没有创建links.html,同样能正常换起app的
位置3,选择链接唤起app时打开的页面是哪个,如.MainActivity,到时候 https://test.github.io/links/?name=123打开app时,可以在MainActivity中读取到具体值
点击确定后,可以在AndoridMainfest.xml的插入配置代码
xml 代码解读复制代码<intent-filter android:autoVerify="true">
    <action android:name="android.intent.action.VIEW" />

    <category android:name="android.intent.category.DEFAULT" />
    <category android:name="android.intent.category.BROWSABLE" />

    <data android:scheme="https" />
    <data android:host="hello-coder-xu.github.io" />
    <data android:pathPattern="/" />
intent-filter>
Select Activity
选择Activity编写读取链接值的页面,与上面位置3相同页面
kotlin 代码解读复制代码val appLinkIntent: Intent = intent
val appLinkAction: String? = appLinkIntent.action
val appLinkData: Uri? = appLinkIntent.data
Declare website association

位置1,填写之前配置好的 github page 的链接test.github.io/
位置2,填写当前项目的包名
位置3,根据实际情况选择使用哪种签名文件,我当前测试,直接使用debug(~/.android/debug.keystore
)
位置4,点击Generate Digitl Asset Links file按钮,生成 签名信息,复制签名信息
json 代码解读复制代码[{
  "relation": ["delegate_permission/common.handle_all_urls"],
  "target": {
    "namespace": "android_app",
    "package_name": "com.example.flutter_applink_demo",
    "sha256_cert_fingerprints":
    ["DF:5A:54:75:90:9C:23:3C:E7:01:E9:09:24:9D:DF:7B:01:80:37:9A:AA:69:44:CF:FD:CA:AB:B8:4B:1A:67:A6"]
  }
}]
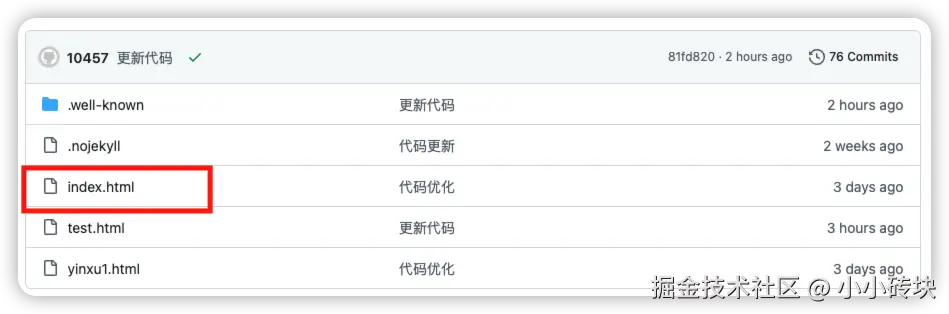
位置5,在github项目中创建.well-know文件夹,再在.well-know下创建assetlinks.json,填写签名信息
注意:【很重要点】还需要在项目中创建一个.nojekyll文件,文件内容为空的,不然https://test.github.io/.well-know/assetlinks.json 无法正常读取到
位置6,确浏览器览其中打开https://test.github.io/.well-know/assetlinks.json链接查看到签名信息内容后,点击 Link And Verify
也可以通过https://developers.google.com/digital-asset-links/tools/generator?hl=zh-cn 来验证配置是否正确
除了完成上面Android studio 引导页面的操作外,还需要在新增一个配置 (预设app开启链接)
1,在Android 的values,创建 strings.xml(已经有此文件,直接插入下面代码即可),写入下面代码
xml 代码解读复制代码"1.0" encoding="utf-8"?>
<resources>
    <string name="asset_statements" translatable="false">[{ "include": "https://test.github.io/.well-known/assetlinks.json" }]string>
resources>
2,在AndroidMainfest.xml中,在Application下,插入下面代码
ini 代码解读复制代码
    android:name="asset_statements"
    android:resource="@string/asset_statements" />
Unversal Links
步骤一
在github 项目的.well-know目录下,新建apple-app-site-association文件(无后缀),写入对应信息
json 代码解读复制代码{
    "applinks": {
        "details": [
            {
                "appID": "123456ABCD.com.example.flutterApplinkDemo",
                "paths": [
                    "/links/*"
                ]
            }
        ]
    }
}
说明
appID : 格式为 TeamId.BundleID
paths : 可以是多个路径,例如配置/links/*时, 则可以通过https://test.github.io/links/ 来唤起app
可以通过https://yurl.chayev.com/ios-results 来验证配置信息是否通过
步骤二
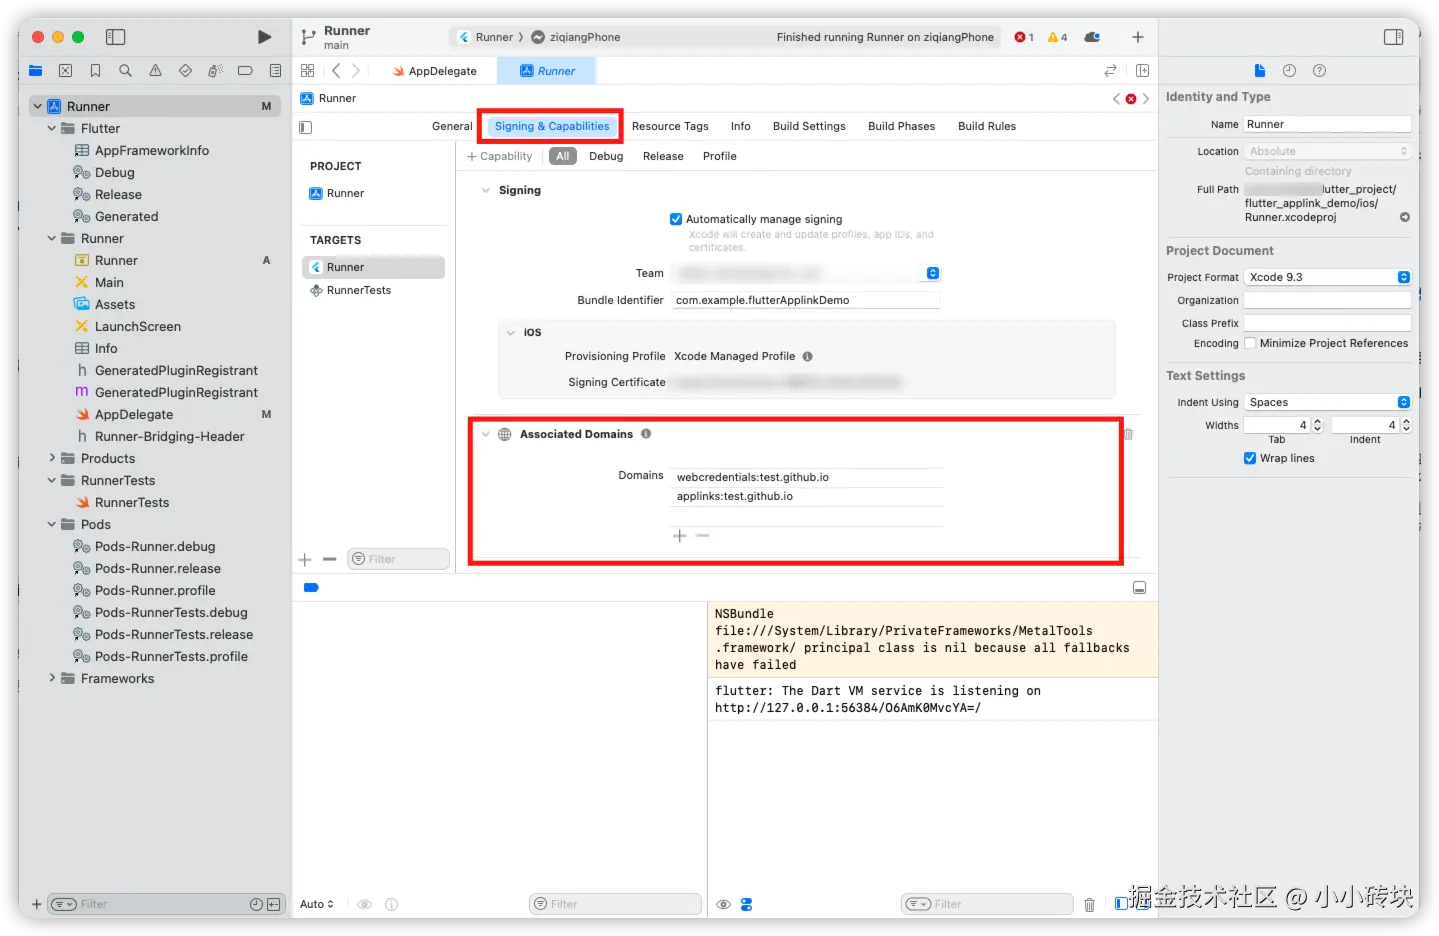
在xCode中配置下面
评论记录:
回复评论: