
Elasticsearch 和
Kibana 版本一般需要保持一致才能一起使用,但是从
8.x.x开始,安全验证不断加强,甚至8.x.x之间的版本安全验证方法都不一样,真的很恼火。
这里记录一次成功简单登陆Kibana的实际经验。
一、Elasticsearch
运行Elasticsearch容器
docker run -d \
	--name es \
	-e "ES_JAVA_OPTS=-Xms512m -Xmx512m" \
	-e "discovery.type=single-node" \
	-e "xpack.security.enabled=true" \
	-e "xpack.security.enrollment.enabled=true" \
	-v your_host_es_data_path:/usr/share/elasticsearch/data \ #宿主机绝对路径挂载
	-v your_host_es_plugins_path:/usr/share/elasticsearch/plugins \ #宿主机绝对路径挂载
	--privileged \
	--network es-net \
	-p 9200:9200 \
	-p 9300:9300 \
elasticsearch:8.11.3
- 1
- 2
- 3
- 4
- 5
- 6
- 7
- 8
- 9
- 10
- 11
- 12
- 13
重置elastic密码,记住这段密码
docker exec -it es /usr/share/elasticsearch/bin/elasticsearch-reset-password -u elastic
- 1
重置kibana_system 密码,记住这段密码
docker exec -it es /usr/share/elasticsearch/bin/elasticsearch-reset-password -u kibana_system
- 1
二、Kibana
运行Kibana容器,账户密码填kibana_system 的
docker run -d \
	--name kibana \
	-e ELASTICSEARCH_HOSTS=http://es:9200 \
	-e ELASTICSEARCH_USERNAME=kibana_system \
	-e ELASTICSEARCH_PASSWORD=kibana_system_passwrod \ #刚才获得的kibana_system 密码
	--network=es-net \
	-p 5601:5601  \
kibana:8.11.3
- 1
- 2
- 3
- 4
- 5
- 6
- 7
- 8
三、访问
访问http://localhost:5601
用elastic的账号密码登录。

四、其他
关于一些报错
kibana容器创建时不允许用elastic用户连接elasticsearch- 运行
docker exec -it es01 /usr/share/elasticsearch/bin/elasticsearch-create-enrollment-token -s kibana报错SSL错误 - 等等各种因为使用了不是
8.11.3版本的安全验证方法遇到的错误
这里是官方的install with docker教程,也是一坨shit。
https://www.elastic.co/guide/en/kibana/current/docker.html
这里是官方关于安全配置的docs,遇到什么问题就多翻翻。
https://www.elastic.co/guide/en/elasticsearch/reference/master/manually-configure-security.html
或者来社区多讨论讨论。
https://discuss.elastic.co/latest
五、ik分词器
这里是官方仓库
https://github.com/medcl/elasticsearch-analysis-ik
推荐有两种安装方式
第一种:在线安装
# 进入容器内部
docker exec -it es /bin/bash

# 在线下载并安装
./bin/elasticsearch-plugin  install https://github.com/medcl/elasticsearch-analysis-ik/releases/download/v8.11.1/elasticsearch-analysis-ik-8.11.1.zip

#退出
exit
#重启容器
docker restart es
docker restart kibana
- 1
- 2
- 3
- 4
- 5
- 6
- 7
- 8
- 9
- 10
- 11
如果遇到ik版本和es版本不匹配问题请看下面
第二种:离线安装
-
在发行版下载页面,找到和
es版本最接近的ik版本(博主这里是ik8.11.1 + es8.11.3)
https://github.com/medcl/elasticsearch-analysis-ik/releases -
在您的
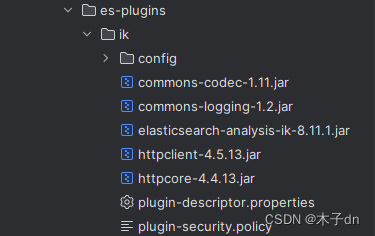
your_host_es_plugins_path目录下,创建一个名为ik的新文件夹。 -
将下载的
elasticsearch-analysis-ik-8.11.1.zip文件解压到刚刚创建的ik文件夹中
-
修改
plugin-descriptor.properties文件
!如无需要请跳过,可能造成无法预估的bug
# 'version': plugin's version
version=8.11.3
# 'elasticsearch.version' version of elasticsearch compiled against
# You will have to release a new version of the plugin for each new
# elasticsearch release. This version is checked when the plugin
# is loaded so Elasticsearch will refuse to start in the presence of
# plugins with the incorrect elasticsearch.version.
elasticsearch.version=8.11.3
- 1
- 2
- 3
- 4
- 5
- 6
- 7
- 8
- 重启容器
docker restart es
docker restart kibana
- 1
- 2
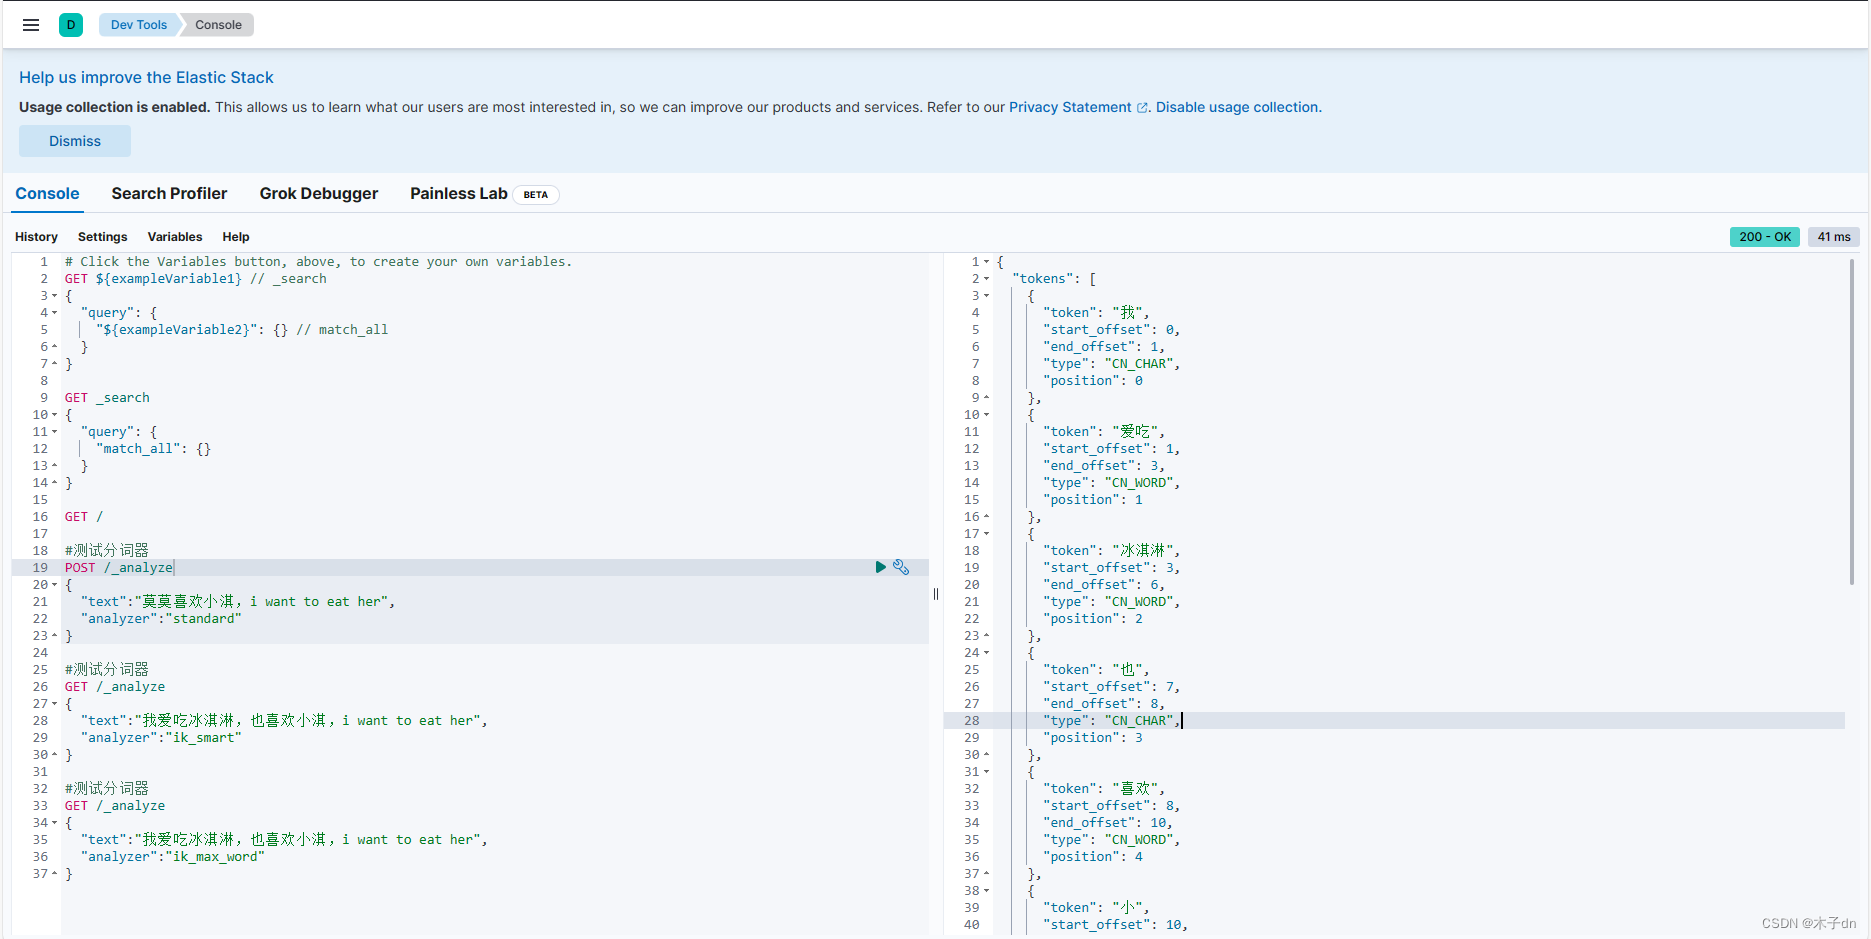
安装好了之后,登录kinaba,找到Dev Tools - Console
#测试分词器
GET /_analyze
{
  "text":"我爱吃冰淇淋,也喜欢小淇,i want to eat her",
  "analyzer":"ik_smart"
}

#测试分词器
GET /_analyze
{
  "text":"我爱吃冰淇淋,也喜欢小淇,i want to eat her",
  "analyzer":"ik_max_word"
}
- 1
- 2
- 3
- 4
- 5
- 6
- 7
- 8
- 9
- 10
- 11
- 12
- 13
这里的句子分词ik_smart和ik_max_word区别不明显,可以换用“程序员”试试。
六、ik分词器的扩展和停用
1. 配置
ik分词器并不能准确识别最新的网络流行词,以及禁用敏感词。
我们可以手动配置来实现这两点。
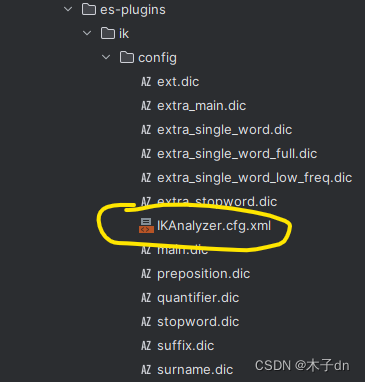
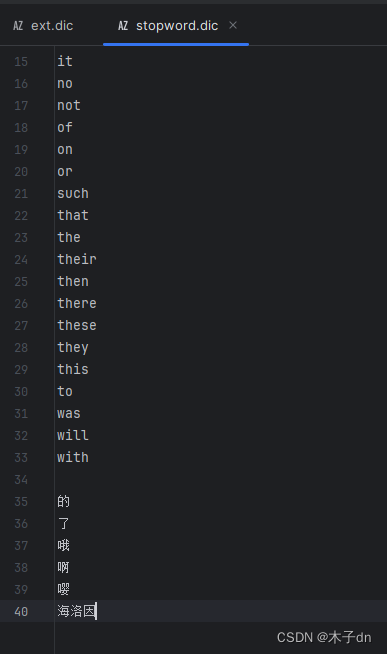
修改IKAnalyzer.cfg.xml文件如下
DOCTYPE properties SYSTEM "http://java.sun.com/dtd/properties.dtd">
<properties>
	<comment>IK Analyzer 扩展配置comment>

	<entry key="ext_dict">ext.dicentry>

	<entry key="ext_stopwords">stopword.dicentry>


properties>
- 1
- 2
- 3
- 4
- 5
- 6
- 7
- 8
- 9
- 10
- 11
- 12
- 13
- 14
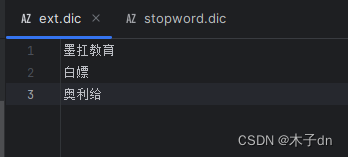
这里的意思是,使用同目录下的ext.dic作为扩展词汇;使用同目录下的stopword.dic作为禁用词汇。这两个文件有就用,没有就新建。
最后记得重启es容器
2. 测试
#测试分词器
GET /_analyze
{
  "text":"程序员墨扛教育的课程可以白嫖啊,而且就业率高达95%哦,奥利给!嘤",
  "analyzer":"ik_smart"
}
- 1
- 2
- 3
- 4
- 5
- 6
{
  "tokens": [
    {
      "token": "程序员",
      "start_offset": 0,
      "end_offset": 3,
      "type": "CN_WORD",
      "position": 0
    },
    {
      "token": "墨扛教育",
      "start_offset": 3,
      "end_offset": 7,
      "type": "CN_WORD",
      "position": 1
    },
    {
      "token": "课程",
      "start_offset": 8,
      "end_offset": 10,
      "type": "CN_WORD",
      "position": 2
    },
    {
      "token": "可以",
      "start_offset": 10,
      "end_offset": 12,
      "type": "CN_WORD",
      "position": 3
    },
    {
      "token": "白嫖",
      "start_offset": 12,
      "end_offset": 14,
      "type": "CN_WORD",
      "position": 4
    },
    {
      "token": "而且",
      "start_offset": 16,
      "end_offset": 18,
      "type": "CN_WORD",
      "position": 5
    },
    {
      "token": "就业率",
      "start_offset": 18,
      "end_offset": 21,
      "type": "CN_WORD",
      "position": 6
    },
    {
      "token": "高达",
      "start_offset": 21,
      "end_offset": 23,
      "type": "CN_WORD",
      "position": 7
    },
    {
      "token": "95",
      "start_offset": 23,
      "end_offset": 25,
      "type": "ARABIC",
      "position": 8
    },
    {
      "token": "奥利给",
      "start_offset": 28,
      "end_offset": 31,
      "type": "CN_WORD",
      "position": 9
    }
  ]
}

- 1
- 2
- 3
- 4
- 5
- 6
- 7
- 8
- 9
- 10
- 11
- 12
- 13
- 14
- 15
- 16
- 17
- 18
- 19
- 20
- 21
- 22
- 23
- 24
- 25
- 26
- 27
- 28
- 29
- 30
- 31
- 32
- 33
- 34
- 35
- 36
- 37
- 38
- 39
- 40
- 41
- 42
- 43
- 44
- 45
- 46
- 47
- 48
- 49
- 50
- 51
- 52
- 53
- 54
- 55
- 56
- 57
- 58
- 59
- 60
- 61
- 62
- 63
- 64
- 65
- 66
- 67
- 68
- 69
- 70
- 71
- 72
- 73
- 74
七、pinyin分词器
离线安装
-
在发行版下载页面,找到和
es版本最接近的版本(博主这里是pinyin8.11.1 + es8.11.3)
https://github.com/medcl/elasticsearch-analysis-pinyin -
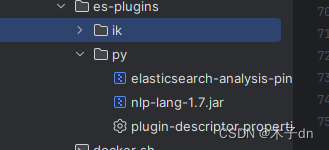
在您的
your_host_es_plugins_path目录下,创建一个名为py的新文件夹。 -
将下载的
elasticsearch-analysis-pinyin-8.11.1.zip文件解压到刚刚创建的py文件夹中
-
修改
plugin-descriptor.properties文件
!如无需要请跳过,可能造成无法预估的bug
# 'version': plugin's version
version=8.11.3
# 'elasticsearch.version' version of elasticsearch compiled against
# You will have to release a new version of the plugin for each new
# elasticsearch release. This version is checked when the plugin
# is loaded so Elasticsearch will refuse to start in the presence of
# plugins with the incorrect elasticsearch.version.
elasticsearch.version=8.11.3
- 1
- 2
- 3
- 4
- 5
- 6
- 7
- 8
- 重启容器
docker restart es
docker restart kibana
- 1
- 2
安装好了之后,登录kinaba,找到Dev Tools - Console
#测试分词器
POST /_analyze
{
  "text":"如家酒店还不错",
  "analyzer":"pinyin"
}
- 1
- 2
- 3
- 4
- 5
- 6
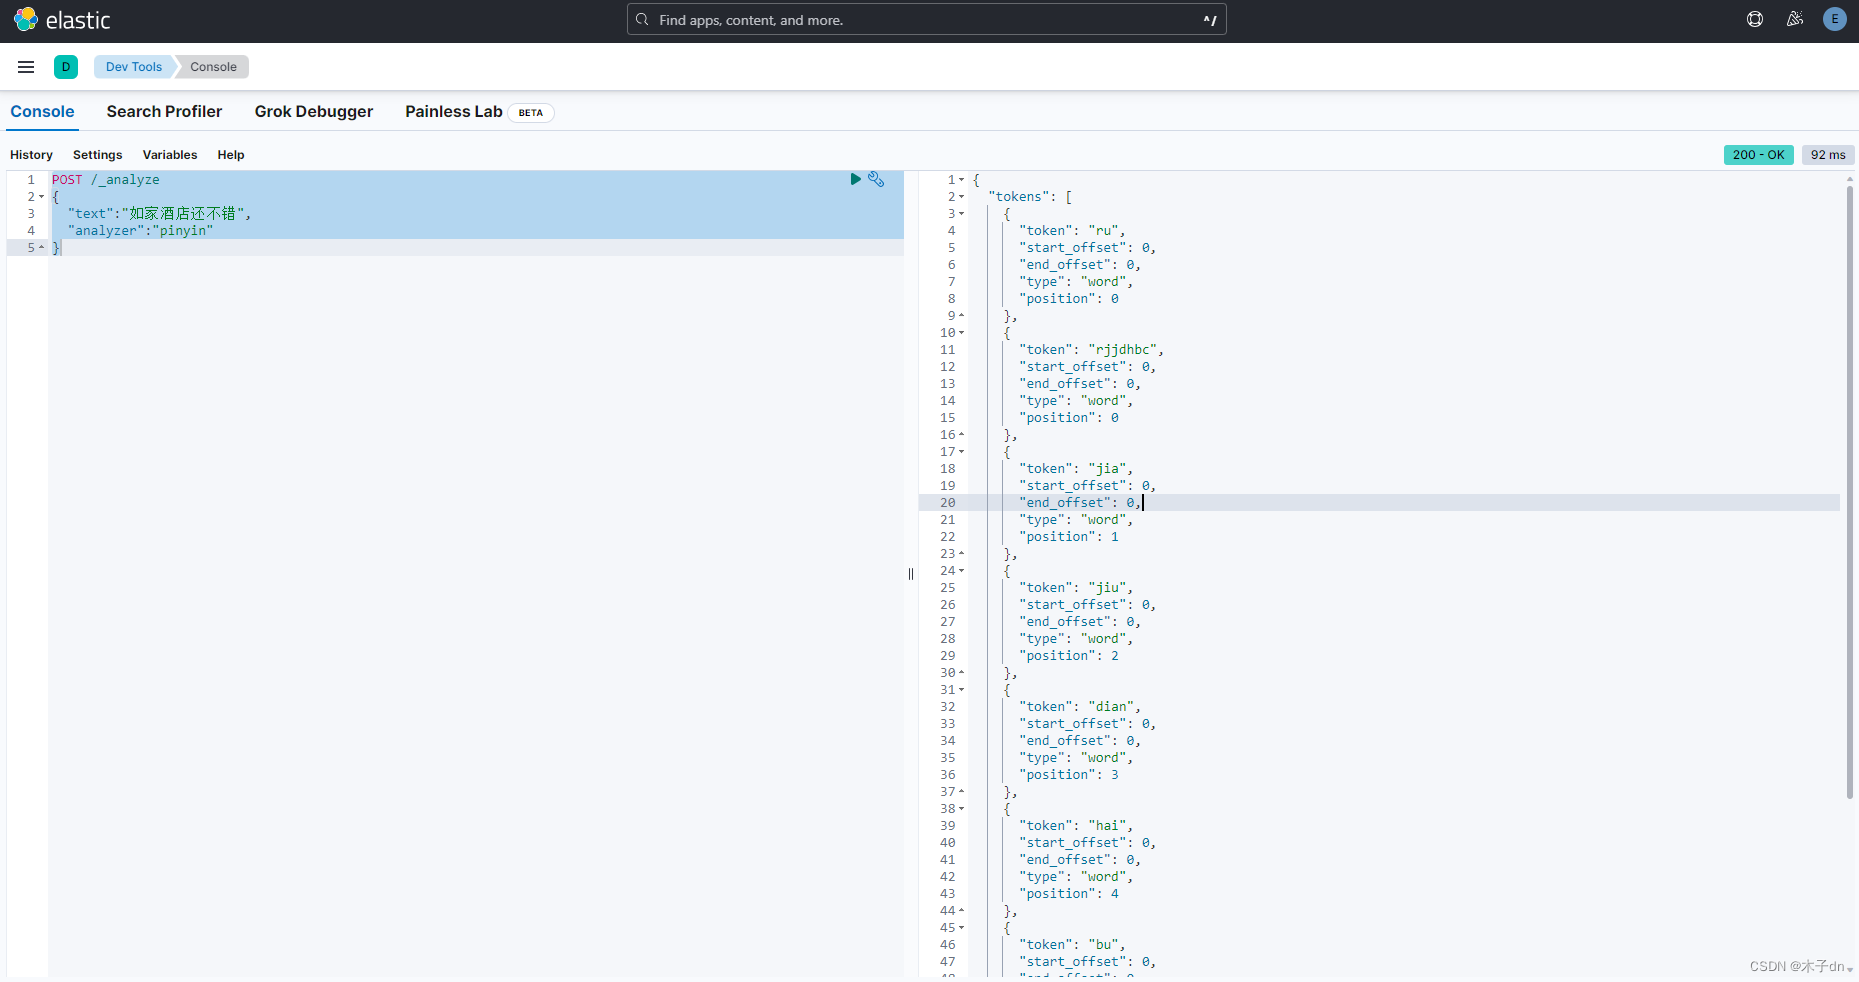
注意事项
pinyin分词器默认时有很多缺点,比如每个字都拆分变成拼音,不符合一般需求,并且如果使用pinyin分词器,默认的中文索引就没了,只剩下pinyin索引了。所以,需要完善以下几点:
- 分词时不仅包含汉字,还需包含拼音
- 分词时按词分,不是字
- 使用汉字查询时,不会查询到同音词条目docs
为了做到这几点,需要在创建索引库时构建一个自定义分词器,如下
PUT /test
{
  "settings": {
    "analysis": {
      "analyzer": {
        "my_analyzer":{
          "tokenizer":"ik_max_word",
          "filter":"py"
        }
      },
      "filter": {
        "py":{
          "type":"pinyin",
          "keep_full_pinyin":false,
          "keep_joined_full_pinyin":true,
          "keep_original":true,
          "limit_first_letter_length":16,
          "remove_duplicated_term":true,
          "none_chinese_pinyin_tokenize":false
        }
      }
    }
  },
  "mappings": {
    "properties": {
      "name":{
        "type": "text",
        "analyzer": "my_analyzer",
        "search_analyzer": "ik_smart"
      }
    }
  }
}
- 1
- 2
- 3
- 4
- 5
- 6
- 7
- 8
- 9
- 10
- 11
- 12
- 13
- 14
- 15
- 16
- 17
- 18
- 19
- 20
- 21
- 22
- 23
- 24
- 25
- 26
- 27
- 28
- 29
- 30
- 31
- 32
- 33
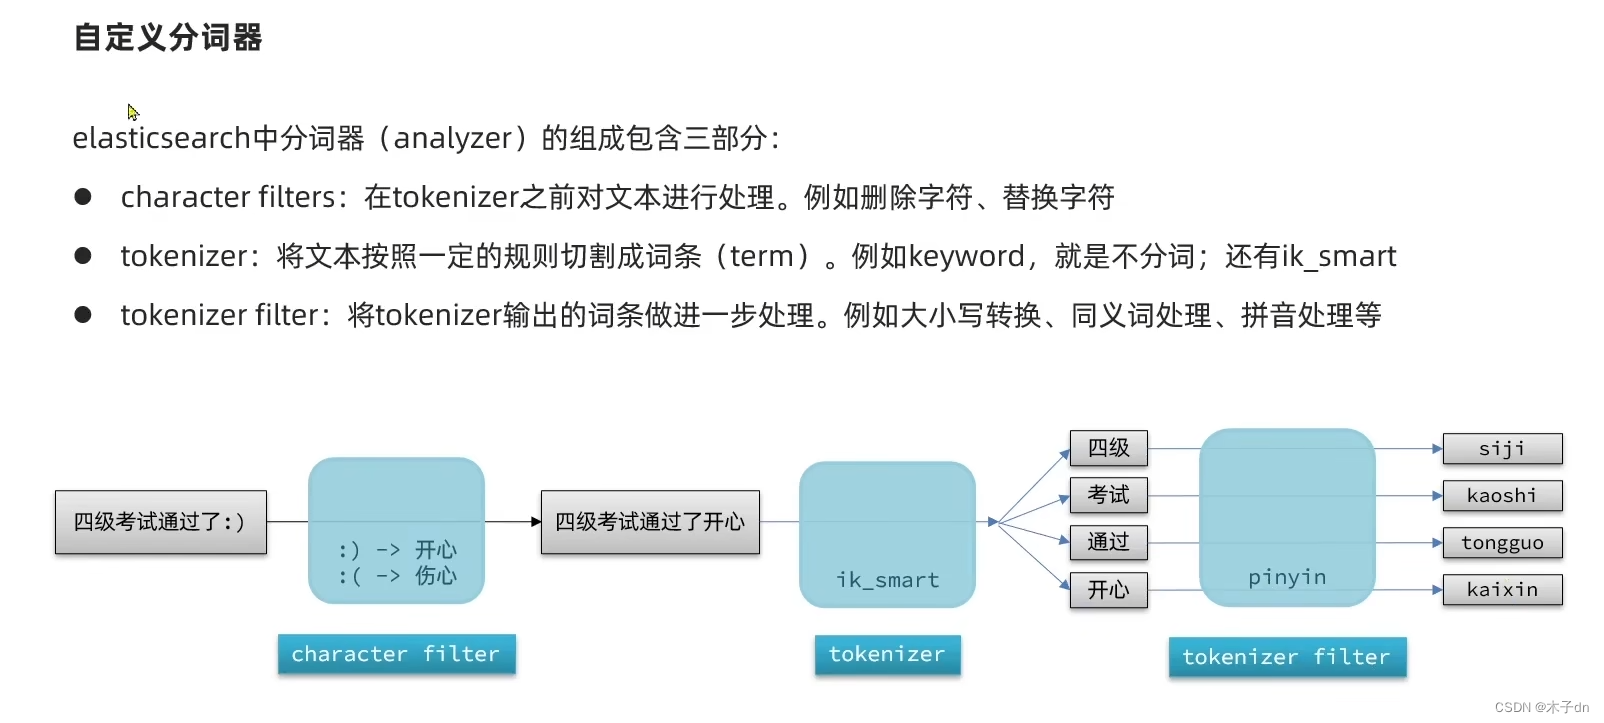
我们自定义了三步之中的tokenizer和filter,前者用ik分词,后者用pinyin分词,同时自定义了pinyin分词器的一些设置,分词时同时保留汉字和拼音,具体设置看pinyin分词器的github官网。同时设定了存入数据时使用分词器my_analyzer,搜索时,使用分词器ik_smart。
存入两个数据,如下
POST /test/_doc/1
{
  "id":1,
  "name":"狮子"
}

POST /test/_doc/2
{
  "id":2,
  "name":"虱子"
}
- 1
- 2
- 3
- 4
- 5
- 6
- 7
- 8
- 9
- 10
- 11
那么现在,索引库的具体内容如下所示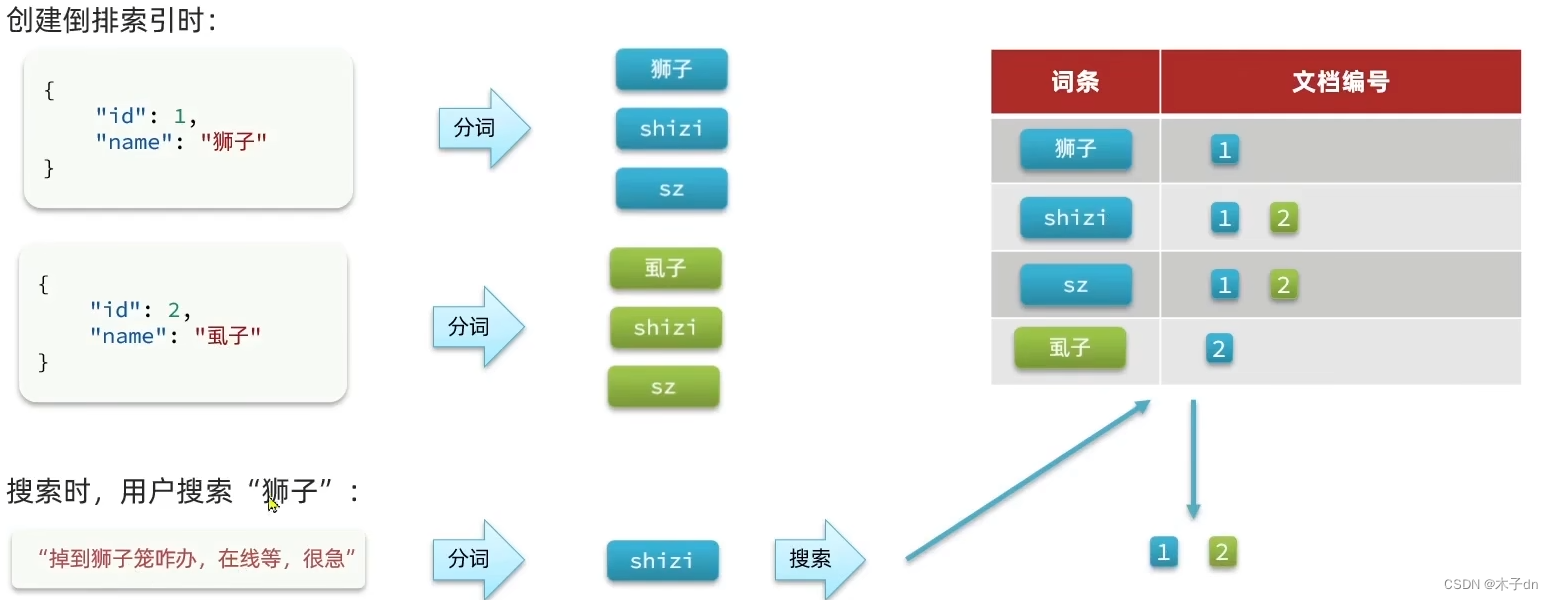
因为搜索时使用的是ik_smart分词器,不是自定义分词器,所以这里已经解决了同音词的问题。
Elasticsearch 和
Kibana 版本一般需要保持一致才能一起使用,但是从
8.x.x开始,安全验证不断加强,甚至8.x.x之间的版本安全验证方法都不一样,真的很恼火。
这里记录一次成功简单登陆Kibana的实际经验。
一、Elasticsearch
运行Elasticsearch容器
docker run -d \
	--name es \
	-e "ES_JAVA_OPTS=-Xms512m -Xmx512m" \
	-e "discovery.type=single-node" \
	-e "xpack.security.enabled=true" \
	-e "xpack.security.enrollment.enabled=true" \
	-v your_host_es_data_path:/usr/share/elasticsearch/data \ #宿主机绝对路径挂载
	-v your_host_es_plugins_path:/usr/share/elasticsearch/plugins \ #宿主机绝对路径挂载
	--privileged \
	--network es-net \
	-p 9200:9200 \
	-p 9300:9300 \
elasticsearch:8.11.3
- 1
- 2
- 3
- 4
- 5
- 6
- 7
- 8
- 9
- 10
- 11
- 12
- 13
重置elastic密码,记住这段密码
docker exec -it es /usr/share/elasticsearch/bin/elasticsearch-reset-password -u elastic
- 1
重置kibana_system 密码,记住这段密码
docker exec -it es /usr/share/elasticsearch/bin/elasticsearch-reset-password -u kibana_system
- 1
二、Kibana
运行Kibana容器,账户密码填kibana_system 的
docker run -d \
	--name kibana \
	-e ELASTICSEARCH_HOSTS=http://es:9200 \
	-e ELASTICSEARCH_USERNAME=kibana_system \
	-e ELASTICSEARCH_PASSWORD=kibana_system_passwrod \ #刚才获得的kibana_system 密码
	--network=es-net \
	-p 5601:5601  \
kibana:8.11.3
- 1
- 2
- 3
- 4
- 5
- 6
- 7
- 8
三、访问
访问http://localhost:5601
用elastic的账号密码登录。
四、其他
关于一些报错
kibana容器创建时不允许用elastic用户连接elasticsearch- 运行
docker exec -it es01 /usr/share/elasticsearch/bin/elasticsearch-create-enrollment-token -s kibana报错SSL错误 - 等等各种因为使用了不是
8.11.3版本的安全验证方法遇到的错误
这里是官方的install with docker教程,也是一坨shit。
https://www.elastic.co/guide/en/kibana/current/docker.html
这里是官方关于安全配置的docs,遇到什么问题就多翻翻。
https://www.elastic.co/guide/en/elasticsearch/reference/master/manually-configure-security.html
或者来社区多讨论讨论。
https://discuss.elastic.co/latest
五、ik分词器
这里是官方仓库
https://github.com/medcl/elasticsearch-analysis-ik
推荐有两种安装方式
第一种:在线安装
# 进入容器内部
docker exec -it es /bin/bash

# 在线下载并安装
./bin/elasticsearch-plugin  install https://github.com/medcl/elasticsearch-analysis-ik/releases/download/v8.11.1/elasticsearch-analysis-ik-8.11.1.zip

#退出
exit
#重启容器
docker restart es
docker restart kibana
- 1
- 2
- 3
- 4
- 5
- 6
- 7
- 8
- 9
- 10
- 11
如果遇到ik版本和es版本不匹配问题请看下面
第二种:离线安装
-
在发行版下载页面,找到和
es版本最接近的ik版本(博主这里是ik8.11.1 + es8.11.3)
https://github.com/medcl/elasticsearch-analysis-ik/releases -
在您的
your_host_es_plugins_path目录下,创建一个名为ik的新文件夹。 -
将下载的
elasticsearch-analysis-ik-8.11.1.zip文件解压到刚刚创建的ik文件夹中
-
修改
plugin-descriptor.properties文件
!如无需要请跳过,可能造成无法预估的bug
# 'version': plugin's version
version=8.11.3
# 'elasticsearch.version' version of elasticsearch compiled against
# You will have to release a new version of the plugin for each new
# elasticsearch release. This version is checked when the plugin
# is loaded so Elasticsearch will refuse to start in the presence of
# plugins with the incorrect elasticsearch.version.
elasticsearch.version=8.11.3
- 1
- 2
- 3
- 4
- 5
- 6
- 7
- 8
- 重启容器
docker restart es
docker restart kibana
- 1
- 2
安装好了之后,登录kinaba,找到Dev Tools - Console
#测试分词器
GET /_analyze
{
  "text":"我爱吃冰淇淋,也喜欢小淇,i want to eat her",
  "analyzer":"ik_smart"
}

#测试分词器
GET /_analyze
{
  "text":"我爱吃冰淇淋,也喜欢小淇,i want to eat her",
  "analyzer":"ik_max_word"
}
- 1
- 2
- 3
- 4
- 5
- 6
- 7
- 8
- 9
- 10
- 11
- 12
- 13
这里的句子分词ik_smart和ik_max_word区别不明显,可以换用“程序员”试试。
六、ik分词器的扩展和停用
1. 配置
ik分词器并不能准确识别最新的网络流行词,以及禁用敏感词。
我们可以手动配置来实现这两点。
修改IKAnalyzer.cfg.xml文件如下
DOCTYPE properties SYSTEM "http://java.sun.com/dtd/properties.dtd">
<properties>
	<comment>IK Analyzer 扩展配置comment>

	<entry key="ext_dict">ext.dicentry>

	<entry key="ext_stopwords">stopword.dicentry>


properties>
- 1
- 2
- 3
- 4
- 5
- 6
- 7
- 8
- 9
- 10
- 11
- 12
- 13
- 14
这里的意思是,使用同目录下的ext.dic作为扩展词汇;使用同目录下的stopword.dic作为禁用词汇。这两个文件有就用,没有就新建。
最后记得重启es容器
2. 测试
#测试分词器
GET /_analyze
{
  "text":"程序员墨扛教育的课程可以白嫖啊,而且就业率高达95%哦,奥利给!嘤",
  "analyzer":"ik_smart"
}
- 1
- 2
- 3
- 4
- 5
- 6
{
  "tokens": [
    {
      "token": "程序员",
      "start_offset": 0,
      "end_offset": 3,
      "type": "CN_WORD",
      "position": 0
    },
    {
      "token": "墨扛教育",
      "start_offset": 3,
      "end_offset": 7,
      "type": "CN_WORD",
      "position": 1
    },
    {
      "token": "课程",
      "start_offset": 8,
      "end_offset": 10,
      "type": "CN_WORD",
      "position": 2
    },
    {
      "token": "可以",
      "start_offset": 10,
      "end_offset": 12,
      "type": "CN_WORD",
      "position": 3
    },
    {
      "token": "白嫖",
      "start_offset": 12,
      "end_offset": 14,
      "type": "CN_WORD",
      "position": 4
    },
    {
      "token": "而且",
      "start_offset": 16,
      "end_offset": 18,
      "type": "CN_WORD",
      "position": 5
    },
    {
      "token": "就业率",
      "start_offset": 18,
      "end_offset": 21,
      "type": "CN_WORD",
      "position": 6
    },
    {
      "token": "高达",
      "start_offset": 21,
      "end_offset": 23,
      "type": "CN_WORD",
      "position": 7
    },
    {
      "token": "95",
      "start_offset": 23,
      "end_offset": 25,
      "type": "ARABIC",
      "position": 8
    },
    {
      "token": "奥利给",
      "start_offset": 28,
      "end_offset": 31,
      "type": "CN_WORD",
      "position": 9
    }
  ]
}
- 1
- 2
- 3
- 4
- 5
- 6
- 7
- 8
- 9
- 10
- 11
- 12
- 13
- 14
- 15
- 16
- 17
- 18
- 19
- 20
- 21
- 22
- 23
- 24
- 25
- 26
- 27
- 28
- 29
- 30
- 31
- 32
- 33
- 34
- 35
- 36
- 37
- 38
- 39
- 40
- 41
- 42
- 43
- 44
- 45
- 46
- 47
- 48
- 49
- 50
- 51
- 52
- 53
- 54
- 55
- 56
- 57
- 58
- 59
- 60
- 61
- 62
- 63
- 64
- 65
- 66
- 67
- 68
- 69
- 70
- 71
- 72
- 73
- 74
七、pinyin分词器
离线安装
-
在发行版下载页面,找到和
es版本最接近的版本(博主这里是pinyin8.11.1 + es8.11.3)
https://github.com/medcl/elasticsearch-analysis-pinyin -
在您的
your_host_es_plugins_path目录下,创建一个名为py的新文件夹。 -
将下载的
elasticsearch-analysis-pinyin-8.11.1.zip文件解压到刚刚创建的py文件夹中
-
修改
plugin-descriptor.properties文件
!如无需要请跳过,可能造成无法预估的bug
# 'version': plugin's version
version=8.11.3
# 'elasticsearch.version' version of elasticsearch compiled against
# You will have to release a new version of the plugin for each new
# elasticsearch release. This version is checked when the plugin
# is loaded so Elasticsearch will refuse to start in the presence of
# plugins with the incorrect elasticsearch.version.
elasticsearch.version=8.11.3
- 1
- 2
- 3
- 4
- 5
- 6
- 7
- 8
- 重启容器
docker restart es
docker restart kibana
- 1
- 2
安装好了之后,登录kinaba,找到Dev Tools - Console
#测试分词器
POST /_analyze
{
  "text":"如家酒店还不错",
  "analyzer":"pinyin"
}
- 1
- 2
- 3
- 4
- 5
- 6
注意事项
pinyin分词器默认时有很多缺点,比如每个字都拆分变成拼音,不符合一般需求,并且如果使用pinyin分词器,默认的中文索引就没了,只剩下pinyin索引了。所以,需要完善以下几点:
- 分词时不仅包含汉字,还需包含拼音
- 分词时按词分,不是字
- 使用汉字查询时,不会查询到同音词条目docs
为了做到这几点,需要在创建索引库时构建一个自定义分词器,如下
PUT /test
{
  "settings": {
    "analysis": {
      "analyzer": {
        "my_analyzer":{
          "tokenizer":"ik_max_word",
          "filter":"py"
        }
      },
      "filter": {
        "py":{
          "type":"pinyin",
          "keep_full_pinyin":false,
          "keep_joined_full_pinyin":true,
          "keep_original":true,
          "limit_first_letter_length":16,
          "remove_duplicated_term":true,
          "none_chinese_pinyin_tokenize":false
        }
      }
    }
  },
  "mappings": {
    "properties": {
      "name":{
        "type": "text",
        "analyzer": "my_analyzer",
        "search_analyzer": "ik_smart"
      }
    }
  }
}
- 1
- 2
- 3
- 4
- 5
- 6
- 7
- 8
- 9
- 10
- 11
- 12
- 13
- 14
- 15
- 16
- 17
- 18
- 19
- 20
- 21
- 22
- 23
- 24
- 25
- 26
- 27
- 28
- 29
- 30
- 31
- 32
- 33
我们自定义了三步之中的tokenizer和filter,前者用ik分词,后者用pinyin分词,同时自定义了pinyin分词器的一些设置,分词时同时保留汉字和拼音,具体设置看pinyin分词器的github官网。同时设定了存入数据时使用分词器my_analyzer,搜索时,使用分词器ik_smart。
存入两个数据,如下
POST /test/_doc/1
{
  "id":1,
  "name":"狮子"
}

POST /test/_doc/2
{
  "id":2,
  "name":"虱子"
}
- 1
- 2
- 3
- 4
- 5
- 6
- 7
- 8
- 9
- 10
- 11
那么现在,索引库的具体内容如下所示
因为搜索时使用的是ik_smart分词器,不是自定义分词器,所以这里已经解决了同音词的问题。
评论记录:
回复评论: