前言
验证码的种类有很多,它是常用的一种反爬手段,包括:图片验证码,滑块验证码,等一些常见的验证码场景。
识别验证码的python 库有很多,用起来也并不简单,这里推荐一个简单实用的识别验证码的库 ddddocr (带带弟弟ocr)库.
环境准备
python 版本要求小于等于python3.9 版本
pip 安装
pip install ddddocr
- 1
下载的安装包比较大,一般用国内的下载源可以加快下载速度
pip install ddddocr -i https://pypi.douban.com/simple
- 1
github地址https://github.com/sml2h3/ddddocr
快速开始
先随便找个纯英文的验证码,保持为a1.png

代码示例
import ddddocr                       # 导入 ddddocr
ocr = ddddocr.DdddOcr()              # 实例化
with open('a1.png', 'rb') as f:     # 打开图片
    img_bytes = f.read()             # 读取图片
res = ocr.classification(img_bytes)  # 识别
print(res)
- 1
- 2
- 3
- 4
- 5
- 6
运行结果

已经能识别到 xnen ,但是会出现"欢迎使用ddddocr,本项目专注带动行业内卷…"提示语, 可以加一个参数show_ad=False
import ddddocr                       # 导入 ddddocr
ocr = ddddocr.DdddOcr(show_ad=False)              # 实例化
with open('a1.png', 'rb') as f:     # 打开图片
    img_bytes = f.read()             # 读取图片
res = ocr.classification(img_bytes)  # 识别
print(res)
- 1
- 2
- 3
- 4
- 5
- 6
图片验证码
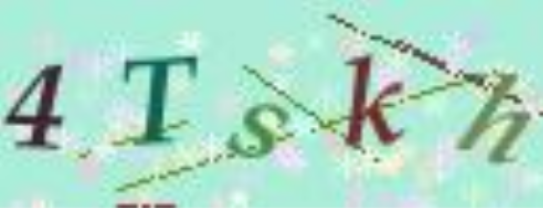
识别一下三种验证码


代码示例
import ddddocr                       # 导入 ddddocr
ocr = ddddocr.DdddOcr(show_ad=False)              # 实例化
with open('a2.png', 'rb') as f:     # 打开图片
    img_bytes = f.read()             # 读取图片
res2 = ocr.classification(img_bytes)  # 识别

print(res2)
with open('a3.png', 'rb') as f:     # 打开图片
    img_bytes = f.read()             # 读取图片
res3 = ocr.classification(img_bytes)  # 识别
print(res3)

with open('a4.png', 'rb') as f:     # 打开图片
    img_bytes = f.read()             # 读取图片
res4 = ocr.classification(img_bytes)  # 识别
print(res4)
- 1
- 2
- 3
- 4
- 5
- 6
- 7
- 8
- 9
- 10
- 11
- 12
- 13
- 14
- 15
- 16
运行结果
giv6j
zppk
4Tskh
- 1
- 2
- 3
滑块验证码
滑块验证码场景如下场景示例

先抠出2张图片,分别为background.png 和 target.png


解决问题的重点是计算缺口的位置
import ddddocr

det = ddddocr.DdddOcr(det=False, ocr=False, show_ad=False)

with open('target.png', 'rb') as f:
    target_bytes = f.read()

with open('background.png', 'rb') as f:
    background_bytes = f.read()

res = det.slide_match(target_bytes, background_bytes, simple_target=True)
print(res)
- 1
- 2
- 3
- 4
- 5
- 6
- 7
- 8
- 9
- 10
- 11
- 12
运行结果
{'target_y': 0, 'target': [184, 58, 246, 120]}
- 1
target 的四个值就是缺口位置的左上角和右下角的左边位置
识别中文
识别图片上的文字

import ddddocr
import cv2

det = ddddocr.DdddOcr(det=True)

with open("test.png", 'rb') as f:
    image = f.read()

poses = det.detection(image)

im = cv2.imread("test.png")

for box in poses:
    x1, y1, x2, y2 = box
    im = cv2.rectangle(im, (x1, y1), (x2, y2), color=(0, 0, 255), thickness=2)

cv2.imwrite("result.jpg", im)
- 1
- 2
- 3
- 4
- 5
- 6
- 7
- 8
- 9
- 10
- 11
- 12
- 13
- 14
- 15
- 16
- 17
保存后的图片


评论记录:
回复评论: