
前言:
上节我们介绍了数组的详细操作,这期内容我为大家带来类与对象的讲解。
一、面向对象
关于面向对象的理解,我们或许都听过Java和C++是面向对象的编程语言,而Java是一门纯面向对象的语言,所以在面向对象的世界里,一切皆是对象,并且在生活有许多事物都可被看作是对象,如一个苹果,一个台洗衣机等这些都具有实体都可以被看作为对象,所以在面向对象的世界里,通过对象的交互来完成事情,这比较贴近于我们的生活,也更符合现在的对事物的认知。通过将对象划出了属性和行为,比如一名学生,那么它的属性就是成绩,姓名,年龄等这些,那么它的行为就是学习,考试,吃饭等。
这节我们先介绍封装,比如类就是一种把对象的属性与行为进行了封装,因此也可以把这个类理解为就是一个载体,比如计算机就是一种封装,内部具体的细节是如何实现的,我们并不会知道,但是我们仅知道如何去操作计算机,使用鼠标,开关机键等;
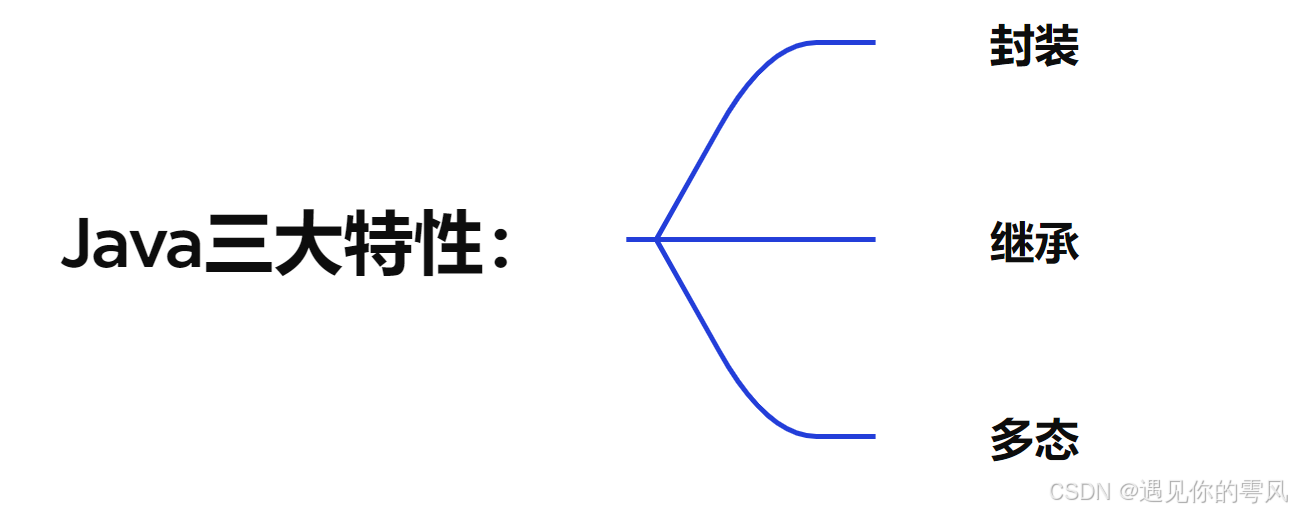
封装:将数据和操作数据的方法进行有机结合,隐藏对象的属性和实现细节,仅对外公开接口来和对象进行交互 ,在类与对象中我们主要研究的是封装性,关于另外两大特性,下节再为大家进行详细的讲解。
二、类的定义
1.类的定义格式
在Java中定义类需要用到class关键字
class ClassName {//类名一定要大驼峰的方式
       field;  // 字段(属性) 或者 成员变量
       method; // 行为 或者 成员方法
    }
- 1
- 2
- 3
- 4
上述中class是关键字,ClassName是类名,{} 中为类的主体
比如我们定义一个洗衣机类:
class WashMachine {//类名一定要大驼峰的方式
        //类具有属性,就可以简单的理解为洗衣机的参数
        //(成员)属性(有的书上会表示成员属性或者字段)
        // 特点 :是定义在类的里边,方法的外边
        public String brand;// 品牌
        public String type; // 型号
        public double weight; // 重量
        public double length; // 长
        public double width; // 宽
        public double height; // 高
        public String color; // 颜色

        //行为(也叫做成员方法)
        public void washColthes() {//洗衣服
            System.out.println("洗衣功能");
        }

        public void dryColthes() {//脱水
            System.out.println("脱水功能");
        }

        public void setTime() { //定时
            System.out.println("定时功能");
        }
}

- 1
- 2
- 3
- 4
- 5
- 6
- 7
- 8
- 9
- 10
- 11
- 12
- 13
- 14
- 15
- 16
- 17
- 18
- 19
- 20
- 21
- 22
- 23
- 24
- 25
注意事项:
- 一般一个文件当中只定义一个类
- main方法所在的类一般要使用public修饰(注意:Eclipse默认会在public修饰的类中找main方法)
- public修饰的类必须要和文件名相同
- 不要轻易去修改public修饰的类的名称,如果要修改,通过开发工具修改(给同学演示)。
- 要想去修改一般也是在一个java文件有一个类的情况去修改
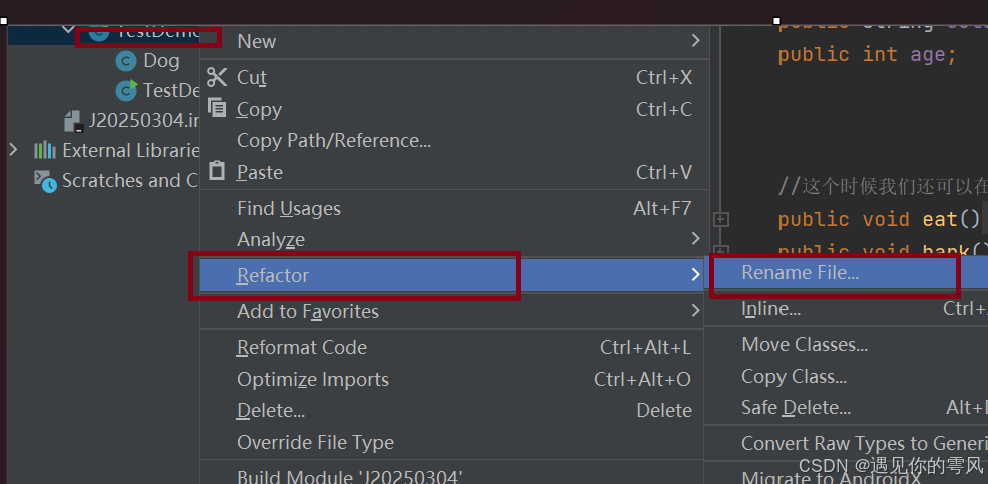
鼠标右键点击类名,比如我的这个类名就是TestDemo,然后再按如图所操作。
2.访问修饰限定符
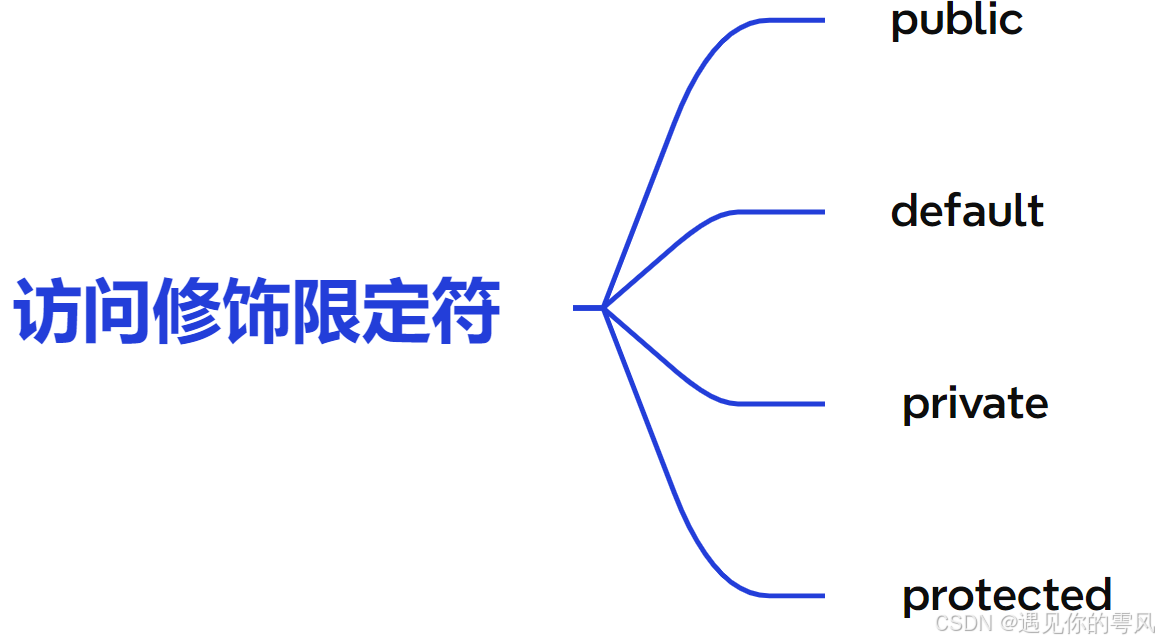
这节我们主要讲到的是private,default(默认),public,这些是现阶段类与对象中主要研究的,protected我下一节我会给大家带来详细的讲解;
public修饰的成员变量和方法均可以在类中和类外去直接访问,
private修饰的成员变量和方法只能在一个包中的一个类中去使用,其余的不行,
default是指没有修饰符,就是默认的情况,它只能在一个包中,可以在该包中所有的类去访问和使用
三、类的实例化
定义了一个类的这个过程,就相当于在计算机中定义了一种新的类型,所以他们可被称作为’类‘类型
用类类型创建对象的过程,被称之为类的实例化。
类就是好比于一个模板,通过这里面的成员属性和成员方法来进行对象的实例化
class Dog{
    public String name;
    public String color;
    public int age;
    public void eat(){
        System.out.println(name + "吃饭");
    }
    public void bark(){
        System.out.println(name + "狂吠");
    }
}
public class TestDemo {
    public static void main(String[] args) {
        Dog dog = new Dog();//对象的实例化
        dog.name = "初一";
        dog.age = 10;
        dog.color = "黄色";
        System.out.println(dog.name);
        System.out.println(dog.age);
        System.out.println(dog.color);
        dog.bark();
        dog.eat();//这时候就不需要用sout输出,
        //因为在Dog类中它们本身是行为(方法),所以这个时候也就相当于调用
        System.out.println("==============");
        Dog dog2 = new Dog();
        dog2.name = "初二";
        dog2.age = 13;
        dog2.color = "黑色";
        System.out.println(dog2.name);
        System.out.println(dog2.age);
        System.out.println(dog2.color);
        dog2.bark();
        dog2.eat();
	}
}
- 1
- 2
- 3
- 4
- 5
- 6
- 7
- 8
- 9
- 10
- 11
- 12
- 13
- 14
- 15
- 16
- 17
- 18
- 19
- 20
- 21
- 22
- 23
- 24
- 25
- 26
- 27
- 28
- 29
- 30
- 31
- 32
- 33
- 34
- 35

通过一个new关键字来实例化了一个dog对象,Dog dog = new Dog()中的dog就是一个引用指向了dog对象
dog是一个局部变量,
在main方法中,那么就是在虚拟机栈上创建了一个空间,而我们已经知道了通过new关键字生成的对象(属性)都存储在堆上,所以也通过了上述的操作,dog也获得了Dog()对象(属性的)的地址,所以它指向了Dog()的对象(属性)。
所以在java中采用new关键字,配合类名来实例化对象;然后通过对象的引用来访问对象的属性即“ . “,
对象的成员属性在没有赋值的时候引用类型默认的是null,简单类型对应的为0,boolean被默认为false,
char默认为’\u0000’。
做个比方。类实例化出对象就像现实中使用建筑设计图建造出房子,类就像是设计图,
只设计出需要什么东西,但是并没有实体的建筑存在,同样类也只是一个设计,实例化出的对象才能实际存储数据,占用物理空间
总结:
1. 每次new了一个新的对象,都会去开辟一块新的内存
2. 通过new关键字可以实例化多个对象,但是每个对象都是独立的,互不干扰的
3. 同一个类可以创建多个实例(即使多个对象)
4.类是一种自定义的类型,所以可以能够来定义变量
四、this引用
1.this引用
this是对当前对象的引用,在成员方法中所有成员变量的操作,都是通过该引用去访问
public class Date {
//属性
public int year;
public int month;
public int day;
//行为
public void setDate1(/*Date this,*/int y,int m,int d){//建立日期
this.year = y;
this.month = m;
this.day = d;
}
public void setDate2(int year,int month,int day){//建立日期
year = year;
month = month;
day = day;
}
public void setDate3(int year,int month,int day){//建立日期
this.year = year;
this.month = month;
this.day = day;
}
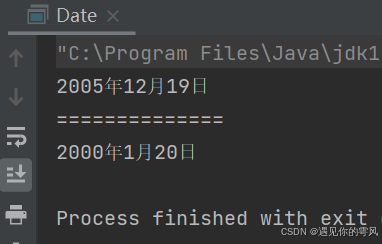
public void printDate(){//打印日期
System.out.println(this.year+"年"+this.month+"月"+this.day+"日");
}
public static void main(String[] args) {
Date date = new Date();
date.setDate1(2005,12,19);
date.printDate();
System.out.println("==============");
Date date2 = new Date();
date2.setDate1(2000,01,20);
date2.printDate();
}
}
- 1
- 2
- 3
- 4
- 5
- 6
- 7
- 8
- 9
- 10
- 11
- 12
- 13
- 14
- 15
- 16
- 17
- 18
- 19
- 20
- 21
- 22
- 23
- 24
- 25
- 26
- 27
- 28
- 29
- 30
- 31
- 32
- 33
- 34
- 35
- 36
- 37
- 38
那么这个时候有多个set方法,那么这个时候谁调用了当前的setDate方法,那么谁就是使用this;并且编译器会帮我们隐藏一个变量叫做Date this,所以就会表明了这个this就是这个类的对象的
2.this引用的原因
public class Date {
    //属性
    public int year;
    public int month;
    public int day;
	//行为
	public void setDate2(int year,int month,int day){//建立日期
        year = year;
        month = month;
        day = day;
    }
    public void printDate(){//打印日期
        System.out.println(year+"年"+month+"月"+day+"日");
    }
    public static void main(String[] args) {
        Date date = new Date();
        date.setDate2(2000,01,10);
        System.out.println("他的生日是:");
        date.printDate();//调用这个方法
   }
}
- 1
- 2
- 3
- 4
- 5
- 6
- 7
- 8
- 9
- 10
- 11
- 12
- 13
- 14
- 15
- 16
- 17
- 18
- 19
- 20
- 21
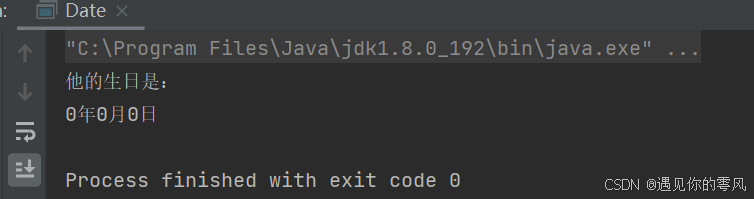
这个时候的打印结果就是0年0月0日;就近访问原则:在传参数的时候,如果同名,那么局部变量优先自己给自己赋值,那么也就是在虚拟机栈上中自己给自己赋值通过new关键字定义,我们明白date在虚拟机栈上来创建栈帧;实例化的对象被创建并储存在堆上。
public class Date {
  public int year;
  public int month;
  public int day;

  public void setDate3(int year,int month,int day){//建立日期
      this.year = year;
      this.month = month;
      this.day = day;
  }
   public void printDate(){//打印日期
      System.out.println(this.year+"年"+this.month+"月"+this.day+"日");
   }
}
  public static void main(String[] args) {
     		Date date = new Date();
      	Date date2 = new Date();
      	date2.setDate1(2000,01,20);
      	date2.printDate();
  }
- 1
- 2
- 3
- 4
- 5
- 6
- 7
- 8
- 9
- 10
- 11
- 12
- 13
- 14
- 15
- 16
- 17
- 18
- 19
- 20

这个时候打印的就是我传的参数
结论:
- 当形参与成员变量名相同时,会造成局部变量优先赋值。
- this是对当前对象的引用,建议我们习惯使用this,所以让我们自己可以充分地了解的那一个方法是调用哪一个对象。
- this只能在"成员方法"中使用
- 在"成员方法"中,this只能引用当前对象,不能再引用其他对象
- this是“成员方法”第一个隐藏的参数,编译器会自动传递,在成员方法执行时,编译器会负责将调用成员方法对象的引用传递给该成员方法,this负责来接收
五、对象的构造和初始化
1.初始化对象
在学习Java中,我们都明白在Java方法内部定义一个局部变量,必须要初始化,否则会编译失败。
public class TestDemo {
    public static void main(String[] args) {
        Student student = new Student();
        student.name = "张三";
        student.age = 19;
        student.eat();
        student.show();
    }
}
class Student{
    //成员变量
    public String name;
    public int age;
    //成员方法
    public void eat()
    {
        System.out.println(this.name + "吃饭了");
    }
    public void show(){
        System.out.println("姓名:" + this.name + " 年龄:" + this.age);
    }
}
- 1
- 2
- 3
- 4
- 5
- 6
- 7
- 8
- 9
- 10
- 11
- 12
- 13
- 14
- 15
- 16
- 17
- 18
- 19
- 20
- 21
- 22
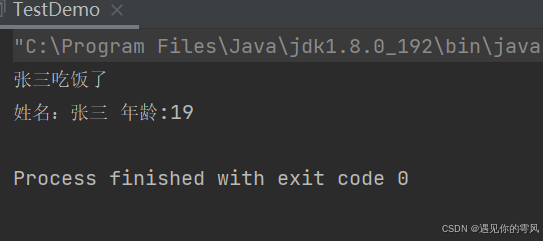
这种就是通过对象的实例化的同时赋予了值进行了初始化。
2.构造方法
(1).构造方法的概念:
- 方法名必须和类名相同
- 没有返回值
- 在整个对象的生命周期只有一次
(2).特性:
例如我有一个Student的类,那么它的构造方法就是Student,
    public Student(){
        System.out.println("打印一个不带参数的方法");
    }
- 1
- 2
- 3
再通过对象的实例化的时候,就是可以调用了构造方法
class Student{
    //成员变量
    public String name;
    public int age;
    public Student(){
        System.out.println("不带参数的构造方法");
    }
}
public class TestDemo {
    public static void main(String[] args) {
    Student student = new Student();
    }
}
- 1
- 2
- 3
- 4
- 5
- 6
- 7
- 8
- 9
- 10
- 11
- 12
- 13
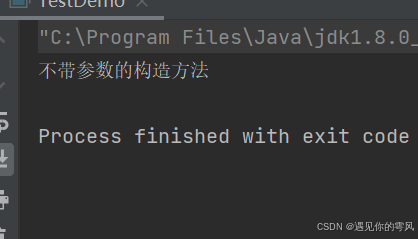
注意:构造方法的作用就是对对象中的成员进行初始化,但并不负责给对象开辟空间
class Student{
//成员变量
public String name;
public int age;
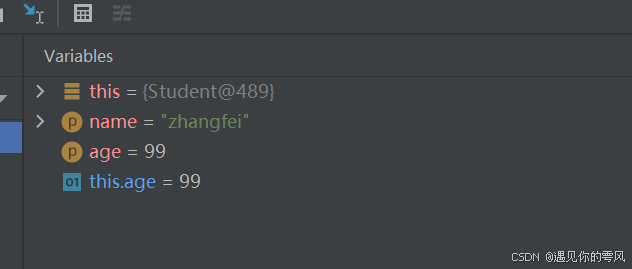
public Student(String name,int age){
this.name = name;
this.age = age;
System.out.println("带有2个参数的构造方法");
}
}
public class TestDemo {
public static void main(String[] args) {
Student student1 = new Student("zhangfei" ,99);
}
}
- 1
- 2
- 3
- 4
- 5
- 6
- 7
- 8
- 9
- 10
- 11
- 12
- 13
- 14
- 15
- 16
构造方法之间是可以构成方法的重载:
- 方法名相同
- 参数列表不同
如果用户没有显式定义,编译器会生成一份默认的构造方法,生成的默认构造方法一定是无参的。
一旦用户显式定义编译器则不会再生成
(3).this调用:
class Student{
    //成员变量
    public String name;
    public int age;
    public Student(String name,int age){
        this.name = name;
        this.age = age;
        System.out.println("带有2个参数的构造方法");
    }
    public Student(){
        this("cc",19);
        System.out.println("不带参数的构造方法");
    }
}
public class TestDemo {
    public static void main(String[] args) {
    	Student student = new Student();
    }
}
- 1
- 2
- 3
- 4
- 5
- 6
- 7
- 8
- 9
- 10
- 11
- 12
- 13
- 14
- 15
- 16
- 17
- 18
- 19
this();是调用类当中的其他构造方法,比如这个时候就会调用了public Student(String name,int age)这个方法
只能在当前的构造方法内部来使用,并且只能在第一行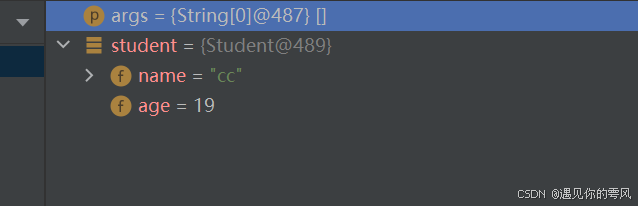
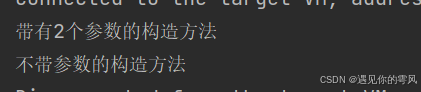
而这个时候我们看到了先打印的是带有两个构造参数的方法,因为我实例化没有参数,所以先去无参数寻找,发现了this(),然后再去调用有参数的构造方法,所以先打印了有参数的方法,再打印了无参数的方法。
class Student{
    //成员变量
    public String name;
    public int age;
    //成员方法
    public void eat()
    {
        System.out.println(this.name + "吃饭了");
        this.show();//这种调用的不是构造方法,那么this可以不是在第一行
    }

    public Student(String name,int age){
        this.name = name;
        this.age = age;
        System.out.println("带有2个参数的构造方法");
    }
    public void show(){
        System.out.println("姓名:" + this.name + "年龄" + this.age);
    }
}
public class TestDemo {
    public static void main(String[] args) {
    	Student student = new Student("张三",19);
        student.eat() ;
}
- 1
- 2
- 3
- 4
- 5
- 6
- 7
- 8
- 9
- 10
- 11
- 12
- 13
- 14
- 15
- 16
- 17
- 18
- 19
- 20
- 21
- 22
- 23
- 24
- 25
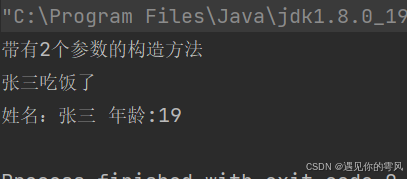
this还可以调用其他的成员方法,但是此时便可以不用在第一行了
当然this调用还需要一些注意的地方,不能形成环
class Date(){
    public Date() {
        this(1991, 1, 1)
    }
    public Date(int year, int month, int day){
        this();
    }
}
- 1
- 2
- 3
- 4
- 5
- 6
- 7
- 8
构造方法的绝大多数情况下使用public来修饰,特殊场景下会被private修饰,被private修饰之后的构造方法只能在类中使用,关于这个情况我们后期会给大家进行讲解
3.就地初始化
在声明成员变量的同时,便直接给出了初始化的值
class Student{
//成员变量
public String name ="张三";
public int age = 19;
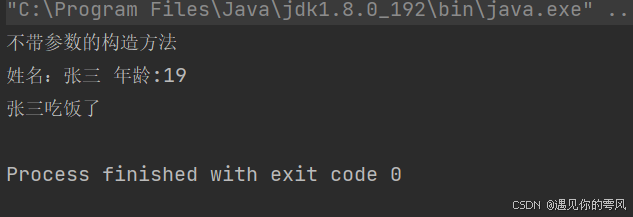
public Student(){
System.out.println("不带参数的构造方法");
}
//成员方法
public void eat()
{
System.out.println(this.name + "吃饭了");
}
public void show(){
System.out.println("姓名:" + this.name + " 年龄:" + this.age);
}
public static void main(String[] args) {
Student student = new Student();
student.show();
student.eat();
}
}
- 1
- 2
- 3
- 4
- 5
- 6
- 7
- 8
- 9
- 10
- 11
- 12
- 13
- 14
- 15
- 16
- 17
- 18
- 19
- 20
- 21
- 22
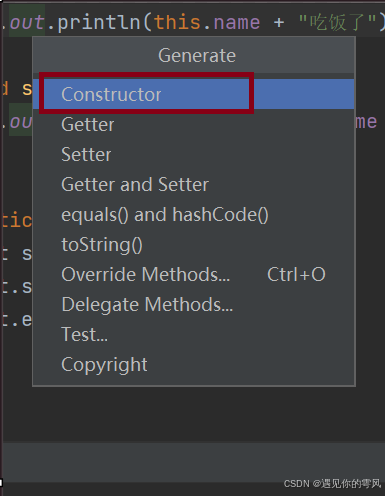
当然我们还可以快速进行写出了带有参数构造方法,用IDEA
鼠标右键点击代码空白处,然后点击Generate,再点击
Constructor,选中你要的参数,点击就可以进行构造了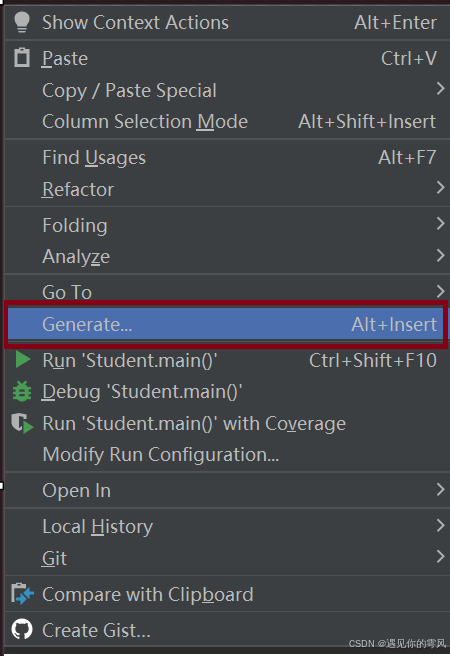
4.默认初始化
class Date{
public int year;
public int month;
public int day;
public void setDate(int year,int month,int day){
this.year = year;
this.month = month;
this.day = day;
}
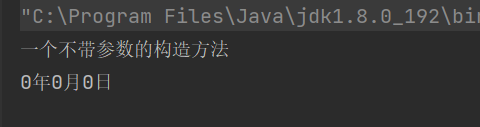
public Date(){
System.out.println("一个不带参数的构造方法");
}
public void printDate(){
System.out.println(this.year+ "年" + this.month + "月" + this.day + "日");
}
public static void main(String[] args) {
Date date = new Date();
date.printDate();
}
}
- 1
- 2
- 3
- 4
- 5
- 6
- 7
- 8
- 9
- 10
- 11
- 12
- 13
- 14
- 15
- 16
- 17
- 18
- 19
- 20
这时候我们没有进行赋值,那么成员变量便会自己赋值为0,或者null
六、封装
1.访问限定符
前面我们已经简单介绍过了封装的概念,那么接下来我就详细地介绍一下访问限定符中的private,
我们封装现阶段主要可以用它来进行,因为我们都知道private只能在当前的类中去使用,一但出了这个类就不能用了。
class Student{
    private String name;
    private int age;
    public void eat()
    {
        System.out.println(this.name + "吃饭了");
        this.show();//这种调用的不是构造方法,那么this可以不是在第一行
    }
    public int getAge() {
        return age;
    }
    public void setAge(int age) {
        this.age = age;
    }
    public String getName(){
        return this.name;
    }
    public void setName(String name){
        this.name = name;
    }
    public Student(String name, int age) {
        this.name = name;
        this.age = age;
    }
    public Student(){
        this("cc",19);
        System.out.println("不带参数的构造方法");
    }
    public void show(){
        System.out.println("姓名:" + this.name + "年龄" + this.age);
    }
}
public class TestDemo {
    public static void main(String[] args) {
        Student student = new Student();
        student.setName("why");
        System.out.println(student.getName());
    }
- 1
- 2
- 3
- 4
- 5
- 6
- 7
- 8
- 9
- 10
- 11
- 12
- 13
- 14
- 15
- 16
- 17
- 18
- 19
- 20
- 21
- 22
- 23
- 24
- 25
- 26
- 27
- 28
- 29
- 30
- 31
- 32
- 33
- 34
- 35
- 36
- 37
- 38
这个时候用private修饰name,那么这个时候只能在类中进行赋值和使用,一旦出了这个类,就报错;如果这个时候还想对name赋值和使用,那么我们就要在类中定义方法。比如我们有定义了getName和setName方法,这时候调用这两个方法就可以解决。
鼠标右键generate,选中Getter and Setter,就可以快速创建可以修改还可以赋值的方法,在封装的情况下(比如利用private来实现封装)

当然我们可以根据自己的需求来进行选择,Getter和Setter可以分别进行创建。
2.Java中的包
(1).包的概念
为了更好的管理类,把多个类收集在一起成为一组,称为软件包,
所以我们在Java中也引入了包,包是对类、接口等的封装机制的体现,是一种对类或者接口等的很好的组织方式。包还有一个重要的作用:在同一个工程中允许存在相同名称的类,只要处在不同的包中即可。
(2).导入包中的类
再Java中有许多现成的类,我们只要通过导入就可以实现让其我们使用,
比如日期Date类,我们就可以使用java.util.Date搭配入了java.util这个包中的Date类
	public static void main(String[] args) {
        	java.util.Date date = new java.util.Date();
        	//所以我们在代码中的Date前直接加上java.util.  不在前面声明
    }
- 1
- 2
- 3
- 4
我们可能觉得这种方法是会比较麻烦,所以我们可以在类前面通过import语句来进行导入这个包
import java.util.Date;
public class TestDemo {
	public static void main(String[] args) {
        	Date date = new Date();
    }
}
- 1
- 2
- 3
- 4
- 5
- 6
比如我们在前面数组中讲过用数组的快速操作,那么也是通过导入这个包中的类,比如我们还想调用数组;
所以这时候我们还需要写java.util.Arrays但是这也是这个包中的类,所以我们可以用**通配符“ * ”**这个可以适配所有的这个包中的类,让它自己寻找,比如有Arrays和Date的情况下,那么它调用Arrays时,那么这个通配符就会是Arrays,同理Date时,那么通配符就是Date。
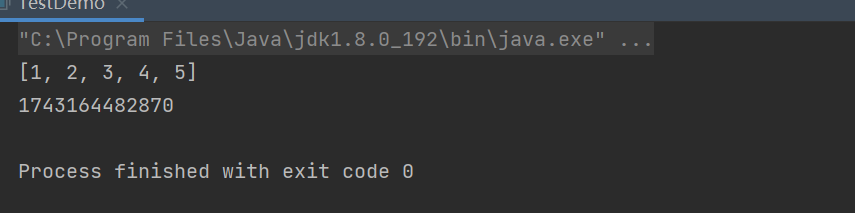
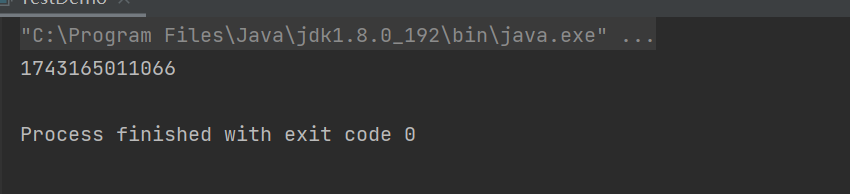
import java.util.*;
public class TestDemo {
	 public static void main(String[] args) {
        int[] array = new int[]{1,2,3,4,5};
        String ret = Arrays.toString(array);
        System.out.println(ret);
        Date date = new Date();
        System.out.println(date.getTime());
    }
}
- 1
- 2
- 3
- 4
- 5
- 6
- 7
- 8
- 9
- 10
当然这里有个情况也要注意一下:
import java.util.*;
import java.sql.*;
public class TestDemo {
	 public static void main(String[] args) {
        Date date = new Date();
        System.out.println(date.getTime());
    }
}
- 1
- 2
- 3
- 4
- 5
- 6
- 7
- 8

因为sql这个包也是有Date类,编译器无法识别,是哪一个中的,所以我们更建议显式的指定要导入的类名. 否则还是容易出现冲突的情况.为了更好的显示,所以我们在代码中直接加上,不在前面声明
import java.util.*;
//import java.util.Date;
import java.sql.*;
public class TestDemo {
   public static void main(String[] args) {
       java.util.Date date = new java.util.Date();
       System.out.println(date.getTime());
   }
}
- 1
- 2
- 3
- 4
- 5
- 6
- 7
- 8
- 9
我们还可以进行静态导入:
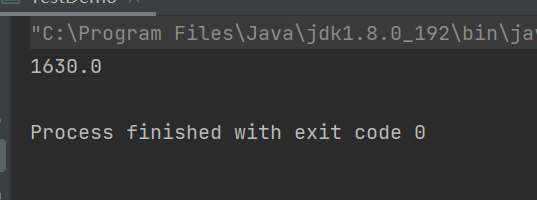
import static java.lang.Math.*;//静态导入

public class TestDemo {
	 public static void main(String[] args) {
        double x = 30;
        double y = 40;
        //double result1 = Math.sqrt(Math.pow(x,2)) + Math.pow(y,2));//正常写一个
        double result = sqrt(pow(x,2)) + (pow(y,2));//静态导入
        System.out.println(result);
     }
}
- 1
- 2
- 3
- 4
- 5
- 6
- 7
- 8
- 9
- 10
- 11
(3).自定义包
自定义包名全是英文字母要小写
包名需要尽量指定成唯一的名字, 通常会用公司的域名的颠倒形式
比如xx网址:com.xx.www
那么这个时候我创建了一个包,该包有三个文件夹 ,所以我们可以在每个文件夹去建立类
其实src也是一种包
操作步骤:在IDEA中新建一个包:右键src,按如图操作
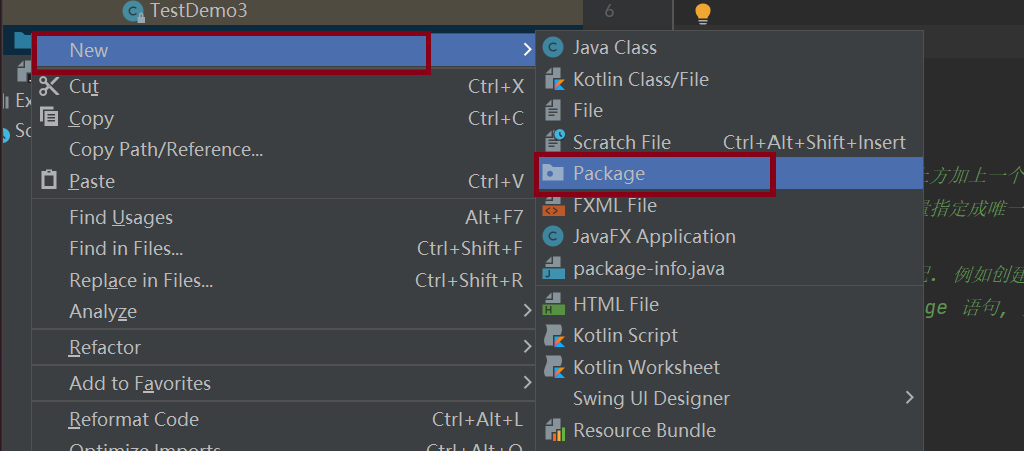
然后写好包名即可,然后再创建类即可
包名要和代码路径相匹配. 例如创建 com.xx.demo1 的包, 那么会存在一个对应的路径 com/xx/demo1 来存储代码.
如果一个类没有 package 语句, 则该类被放到一个默认包中.
还有就是包权限就是default的访问权限,在一个包中不同类可以进行访问
我们常见的包,有这些:
- java.lang:系统常用基础类(String、Object),此包从JDK1.1后自动导入。
- java.lang.reflect:java 反射编程包;
- java.net:进行网络编程开发包。
- java.sql:进行数据库开发的支持包。
- java.util:是java提供的工具程序包。(集合类等) 非常重要
- java.io:I/O编程开发包。
七、static成员
1.static修饰成员变量
static修饰的成员变量被称之为静态成员变量,静态成员变量最大特性是:不属于某个对象,是所有的对象是共有的。
举个例子:一个学校里有师生,但是师生都在教室里上课,那么这个教室就是师生所共有的。
class Student{
	//成员变量
    private String name;
    private int age;
    public String classRoom;
    //构造方法
    public Student(){

    }
    public Student(String name, int age) {
        this.name = name;
        this.age = age;
    }
    public String getName() {
        return name;
    }
    public void setName(String name) {
        this.name = name;
    }
    public int getAge() {
        return age;
    }
    public void setAge(int age) {
        this.age = age;
    }
    //成员方法
    public void eat(){
        System.out.println(this.name + "正在吃饭");
    }
    public void show(){
        System.out.println("姓名" + this.name + "年龄" + this.age );
    }
}
public class Test {
	public static void main(String[] args) {
	        Student student1 = new Student("A",10);
	        student1.classRoom = "109";
	        Student student2 = new Student("B",3);
	        student2.classRoom = "109";
	        Student student3 = new Student("C",15);
	        student3.classRoom = "109";
	}
}
- 1
- 2
- 3
- 4
- 5
- 6
- 7
- 8
- 9
- 10
- 11
- 12
- 13
- 14
- 15
- 16
- 17
- 18
- 19
- 20
- 21
- 22
- 23
- 24
- 25
- 26
- 27
- 28
- 29
- 30
- 31
- 32
- 33
- 34
- 35
- 36
- 37
- 38
- 39
- 40
- 41
- 42
- 43

这个时候我们通过调试可以看到classRoom是共有的
如果我们将classRoom进行static的修饰,这时候我们再看,
class Student{
	//成员变量
    private String name;
    private int age;
    public static String classRoom;
    //构造方法
    public Student(){

    }
    public Student(String name, int age) {
        this.name = name;
        this.age = age;
    }
    public String getName() {
        return name;
    }
    public void setName(String name) {
        this.name = name;
    }
    public int getAge() {
        return age;
    }
    public void setAge(int age) {
        this.age = age;
    }
    //成员方法
    public void eat(){
        System.out.println(this.name + "正在吃饭");
    }
    public void show(){
        System.out.println("姓名" + this.name + "年龄" + this.age );
    }
}
public class Test {
	public static void main(String[] args) {
	        Student student1 = new Student("A",10);
	        Student student2 = new Student("B",3);
	        Student student3 = new Student("C",15);
	        Student.classRoom = "109";
	        //因为它被static修饰完之后,就不再对象的里面,所以说我们就不需要对象的引用了
       	 	System.out.println(Student.classRoom);
	}
}
- 1
- 2
- 3
- 4
- 5
- 6
- 7
- 8
- 9
- 10
- 11
- 12
- 13
- 14
- 15
- 16
- 17
- 18
- 19
- 20
- 21
- 22
- 23
- 24
- 25
- 26
- 27
- 28
- 29
- 30
- 31
- 32
- 33
- 34
- 35
- 36
- 37
- 38
- 39
- 40
- 41
- 42
- 43
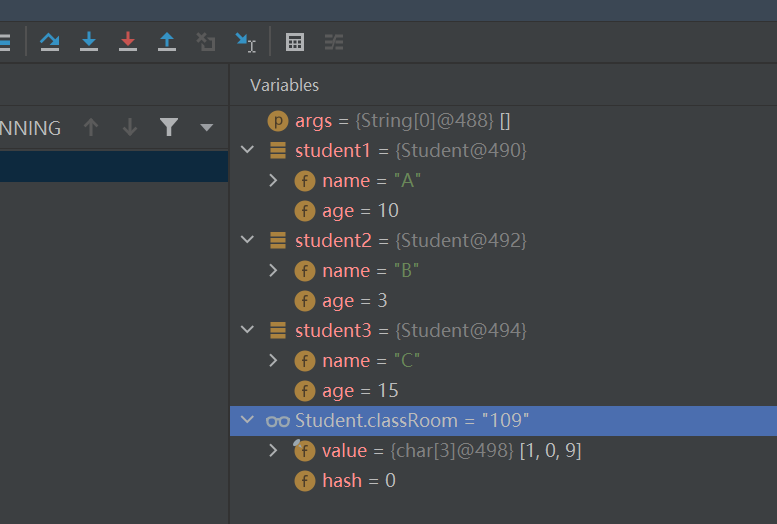
当使用static时候,我们通过调试来进行,可以发现对象实例化出并没有classRoom;所以当把classRoom使用static修饰之后,就不存在与对象之中了;那么此时的classRoom被拿到了方法区(虚拟机栈)并被赋值 “109”;那么此时的所有的对象都会共用了classRoom这个成员变量。
静态成员变量的实现不需要类的对象的引用(不依赖于对象),仅需要类名的调用即可
2.static修饰成员方法
与之静态成员变量非常之类似,在Java中,被static修饰的成员方法称为静态成员方法,是类的方法,不是某个对象所特有的。
class Student{
	//成员变量
    private String name;
    private int age;
    public static String classRoom;
    //构造方法
    public Student(){

    }
    public Student(String name, int age) {
        this.name = name;
        this.age = age;
    }
    public String getName() {
        return name;
    }
    public void setName(String name) {
        this.name = name;
    }
    public int getAge() {
        return age;
    }
    public void setAge(int age) {
        this.age = age;
    }
    //成员方法
    public void eat(){
        System.out.println(this.name + "正在吃饭");
    }
    public void show(){
        System.out.println("姓名" + this.name + "年龄" + this.age );
    }
    public static void func(){
		System.out.println("这是一个静态的方法");
	 }
}
public class Test {
	public static void main(String[] args){
		Student.func();
	}
}
- 1
- 2
- 3
- 4
- 5
- 6
- 7
- 8
- 9
- 10
- 11
- 12
- 13
- 14
- 15
- 16
- 17
- 18
- 19
- 20
- 21
- 22
- 23
- 24
- 25
- 26
- 27
- 28
- 29
- 30
- 31
- 32
- 33
- 34
- 35
- 36
- 37
- 38
- 39
- 40
- 41
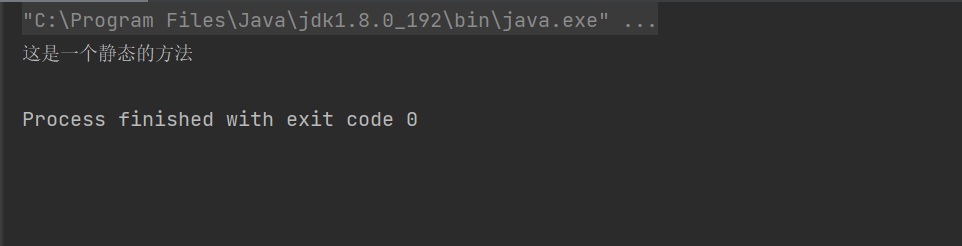
静态方法的调用也是用类名来进行调用。
当然也可以用对象的实例化,都是可以的
例如:
public class TestDemo {
    public static void main(String[] args){
        Student student = new Student();
        student.func();//对象的实例化
    }
}
- 1
- 2
- 3
- 4
- 5
- 6
public class TestDemo {
    public static void main(String[] args){
        Student student = null;//表示student这个引用不指向任何对象。所以此处可以正常访问。
        student.func();
    }
}
- 1
- 2
- 3
- 4
- 5
- 6
但是我们需要牢记,静态方法的正确访问方式应该是用类类型来访问。
静态方法不能直接调用非静态的成员方法或者调用成员变量 我们可以看接下来进行的例子
class Student{
	//成员变量
    private String name;
    private int age;
    public static String classRoom;
    //构造方法
    public Student(){

    }
    public Student(String name, int age) {
        this.name = name;
        this.age = age;
    }
    public String getName() {
        return name;
    }
    public void setName(String name) {
        this.name = name;
    }
    public int getAge() {
        return age;
    }
    public void setAge(int age) {
        this.age = age;
    }
    //成员方法
    public void eat(){
        System.out.println(this.name + "正在吃饭");
    }
    public void show(){
        System.out.println("姓名" + this.name + "年龄" + this.age );
    }
    public static void func(){
		System.out.println("这是一个静态的方法");
		 //show();//这么直接去调用的类中的非静态方法,会直接报错
        //所以在静态方法内部不能直接调用非静态方法
        //必须要通过类进行引用
		Student student = new Student();
        student.setName("A");
        student.setAge(19);
        student.show();
	 }
}
public class Test {
	public static void main(String[] args){
		Student.func();
	}
}
- 1
- 2
- 3
- 4
- 5
- 6
- 7
- 8
- 9
- 10
- 11
- 12
- 13
- 14
- 15
- 16
- 17
- 18
- 19
- 20
- 21
- 22
- 23
- 24
- 25
- 26
- 27
- 28
- 29
- 30
- 31
- 32
- 33
- 34
- 35
- 36
- 37
- 38
- 39
- 40
- 41
- 42
- 43
- 44
- 45
- 46
- 47
- 48

总结: 静态方法不能直接调用非静态的成员方法或者调用成员变量,static方法中不能使用this
一个非静态方法可以调用静态方法,因为静态方法的调用不需要对象的引用,但是我们也可以让其强制依赖
3.总结
静态成员:
- 不属于某个具体的对象,是类的方法和变量,类变量是所有对象共享的,不存储在某个对象的空间中
- 可以通过对象调用,也可以通过类名,我们更推荐后者
- 类变量存储在方法区当中,生命周期伴随类的一生(即:随类的加载而创建,随类的卸载而销毁),就执行一次
- 不能在静态方法中直接访问任何非静态成员变量,需要类的对象的引用
- 静态方法中不能直接调用任何非静态方法,因为非静态方法有this参数,在静态方法中调用时候无法传递this引用,我们可以用对象的引用来进行间接调用
比如这样:
	public static void func(){
		System.out.println("这是一个静态的方法");
		Student student = new Student();
        student.show();
	 }
- 1
- 2
- 3
- 4
- 5
static成员变量也可以进行初始化,前面已经展现一种通过赋值,另一个本地初始化,还有一种就是代码块来进行初始化
八、代码块使用
{} 定义的一段代码称为代码块。
1.代码块的分类
普通代码块
构造块
静态块
同步代码块(这个我们到多线程的部分再进行详细的讲解)
2.普通代码块
定义在方法中的代码块
public static void main(String[] args) {
{
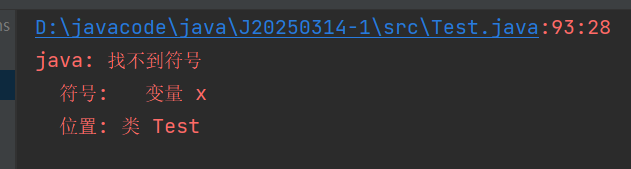
int x = 10;
System.out.println(x);
}
System.out.println(x);
//上述大括号中x的生命的周期是在{}中,所以出了作用域就用不了了
}
- 1
- 2
- 3
- 4
- 5
- 6
- 7
- 8
- 9
	public static void main(String[] args) {
        {
            int x = 10;
            System.out.println(x);
        }
        int m = 12;
        System.out.println(m);
    }
- 1
- 2
- 3
- 4
- 5
- 6
- 7
- 8
3.构造代码块
构造块:定义在类中的代码块(不加修饰符)。也叫:实例代码块。构造代码块一般用于初始化实例成员变量。
class Student{
    private String name;
    private int age;
    //静态成员变量
    public static String classRoom = "109";//就地初始化

    //构造方法
    public Student(){
        System.out.println("不带参数的构造方法");
    }
    //构造代码块
    //在方法的外面,类的里面
    {
        this.name = "WHY";
        this.age = 19;

        System.out.println("实例代码块");
    }
    public Student(String name, int age) {
        this.name = name;
        this.age = age;
    }
    public String getName() {
        return name;
    }
    public void setName(String name) {
        this.name = name;
    }
    public int getAge() {
        return age;
    }
    public void setAge(int age) {
        this.age = age;
    }
    //成员方法
    public void eat(){
        System.out.println(this.name + "正在吃饭");
    }
    public void show(){
        System.out.println("姓名:" + this.name + " " + "年龄:" + this.age );
    }
    public static void func(){
        System.out.println("这是一个静态的方法");
        Student student = new Student();
        student.show();
    }
}
public class Test {
	public static void main(String[] args) {
        //调用不带参数的构造方法
        Student student = new Student();
        student.show();
    }
}
- 1
- 2
- 3
- 4
- 5
- 6
- 7
- 8
- 9
- 10
- 11
- 12
- 13
- 14
- 15
- 16
- 17
- 18
- 19
- 20
- 21
- 22
- 23
- 24
- 25
- 26
- 27
- 28
- 29
- 30
- 31
- 32
- 33
- 34
- 35
- 36
- 37
- 38
- 39
- 40
- 41
- 42
- 43
- 44
- 45
- 46
- 47
- 48
- 49
- 50
- 51
- 52
- 53
- 54

通过打印结果可知,最先执行的是构造代码块,其次是构造方法,最后调用了show方法
4.静态代码块
使用static定义的代码块称为静态代码块。一般用于初始化静态成员变量。
class Student{
private String name;
private int age;
//静态成员变量
public static String classRoom = "109";//就地初始化
//构造方法
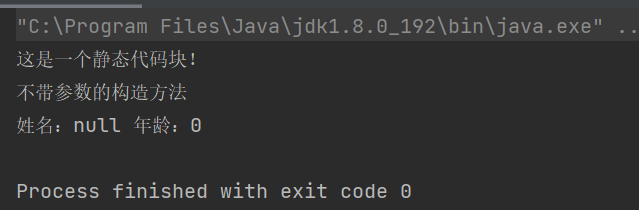
public Student(){
System.out.println("不带参数的构造方法");
}
//静态代码块
static{
classRoom = "120";
System.out.println("这是一个静态代码块!");
}
public Student(String name, int age) {
this.name = name;
this.age = age;
}
public String getName() {
return name;
}
public void setName(String name) {
this.name = name;
}
public int getAge() {
return age;
}
public void setAge(int age) {
this.age = age;
}
//成员方法
public void eat(){
System.out.println(this.name + "正在吃饭");
}
public void show(){
System.out.println("姓名:" + this.name + " " + "年龄:" + this.age );
}
public static void func(){
System.out.println("这是一个静态的方法");
Student student = new Student();
student.show();
}
}
public class Test {
public static void main(String[] args) {
//调用不带参数的构造方法
Student student = new Student();
student.show();
}
}
- 1
- 2
- 3
- 4
- 5
- 6
- 7
- 8
- 9
- 10
- 11
- 12
- 13
- 14
- 15
- 16
- 17
- 18
- 19
- 20
- 21
- 22
- 23
- 24
- 25
- 26
- 27
- 28
- 29
- 30
- 31
- 32
- 33
- 34
- 35
- 36
- 37
- 38
- 39
- 40
- 41
- 42
- 43
- 44
- 45
- 46
- 47
- 48
- 49
- 50
- 51
5.静态与构造的对比
class Student{
    private String name;
    private int age;
    //静态成员变量
    public static String classRoom = "109";//就地初始化
    //构造方法
    public Student(){
        System.out.println("不带参数的构造方法");
    }

    //(2).构造代码块
    //在方法的外面,类的里面
    {
        this.name = "ZS";
        this.age = 19;

        System.out.println("实例代码块");
    }

    //(3).静态代码块
    static{
        classRoom = "110";
        System.out.println("这是一个静态代码块!2");
    }
    static{
        classRoom = "111";
        System.out.println("这是一个静态代码块!1");
    }
    public Student(String name, int age) {
        this.name = name;
        this.age = age;
    }
    public String getName() {
        return name;
    }
    public void setName(String name) {
        this.name = name;
    }

    public int getAge() {
        return age;
    }
    public void setAge(int age) {
        this.age = age;
    }
    //成员方法
    public void eat(){
        System.out.println(this.name + "正在吃饭");
    }
    public void show(){
        System.out.println("姓名:" + this.name + " " + "年龄:" + this.age );
    }
    public static void func(){
        System.out.println("这是一个静态的方法");
        Student student = new Student();
        student.show();
    }
}
public class Test {
    public static void main(String[] args) {
        Student student = new Student();
        student.show();
    }
}
- 1
- 2
- 3
- 4
- 5
- 6
- 7
- 8
- 9
- 10
- 11
- 12
- 13
- 14
- 15
- 16
- 17
- 18
- 19
- 20
- 21
- 22
- 23
- 24
- 25
- 26
- 27
- 28
- 29
- 30
- 31
- 32
- 33
- 34
- 35
- 36
- 37
- 38
- 39
- 40
- 41
- 42
- 43
- 44
- 45
- 46
- 47
- 48
- 49
- 50
- 51
- 52
- 53
- 54
- 55
- 56
- 57
- 58
- 59
- 60
- 61
- 62
- 63
- 64
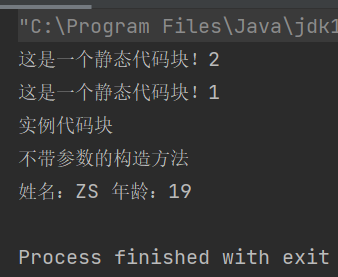
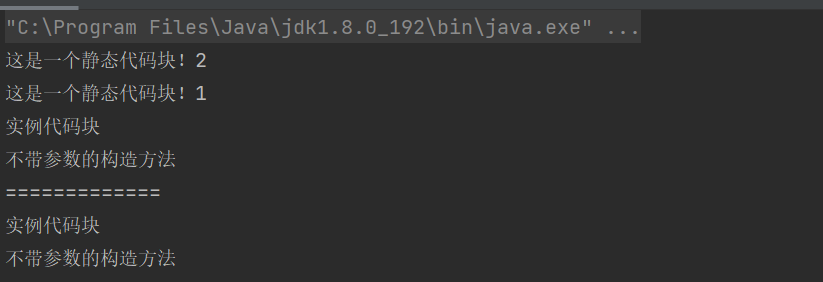
通过这个结果对比,我们发现了当静态和实例都有的时候,首先打印的是静态,然后实例,构造方法,最后再执行成员方法,但是我们发现了这里面有两个静态代码块,
然而它是按顺序执行的。可以把它们两个静态代码块看成一个
	static{
	classRoom = "110";
	System.out.println("这是一个静态代码块!2");

    classRoom = "111";
	System.out.println("这是一个静态代码块!1");
	}
- 1
- 2
- 3
- 4
- 5
- 6
- 7
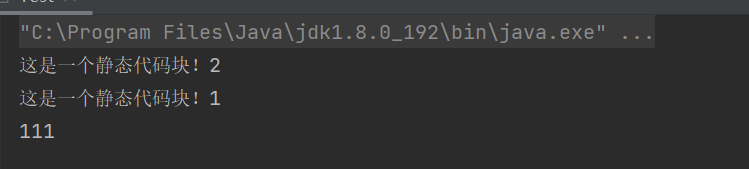
那么静态代码块会一直都执行吗?我们前面讲到过静态变量会执行一次,那么我们按这个操作一下
//类还是上述的那个
public static void main(String[] args) {
        Student student1 = new Student();
        System.out.println("=============");
        Student student2 = new Student();
}
- 1
- 2
- 3
- 4
- 5
- 6
仅有一次,原因:
是因为静态成员是类的属性,仅仅在JVM加载类的时候并开辟空间才初始化。
还有一点:实例代码块只有在创建对象时才会执行
//类还是上述的那个
public static void main(String[] args) {
        System.out.println(Student.classRoom);
}
- 1
- 2
- 3
- 4
所以只有类进行实例化之后构造代码块才能被执行。而静态代码块:
只要类被加载,那么它就会被执行
总结:
这篇文章很长,建议大家可以仔细阅读,获取自己有需要的知识,可以对你们大家有所帮助,如果还有哪些地方的不足,欢迎大家在评论区留言,下期为大家带来继承与多态的内容。
评论记录:
回复评论: