
最近在写一个自动匹配弹幕的动漫播放器,里面需要使用 FFmpeg 对视频进行解析,但发现如何根据不同的平台打包不同 FFmpeg 到 Electron 里,是个挺麻烦的问题,这篇文章就来讲述下我的解决思路。
安装
用户的电脑很有可能没有安装 FFmpeg,所以我们需要把 FFmpeg 打包进我们的应用里面。
想要在 Electron 开发环境里面导入 FFmpeg 还是比较简单的,只需要安装下面的包,然后就能够在 Electron 中使用了。
bash代码解读复制代码pnpm add -D @ffmpeg-installer/ffmpeg @ffprobe-installer/ffprobe fluent-ffmpeg
创建 ffmpeg.ts,具体使用方式可以阅读 fluent-ffmpeg。
typescript 代码解读复制代码import ffmpegPath from '@ffmpeg-installer/ffmpeg' // 安装 ffmpeg 的二进制文件
import ffprobePath from '@ffprobe-installer/ffprobe' // 安装 ffprobe 的二进制文件
import ffmpeg from 'fluent-ffmpeg' // 一个封装了 ffmpeg API 的库,当然可以选择不安装,直接使用字符串拼接的方式调用

ffmpeg.setFfmpegPath(ffmpegPath.path)
ffmpeg.setFfprobePath(ffprobePath.path)

export default class FFmpeg {
  ffmpeg: ffmpeg.FfmpegCommand

  constructor(inputPath: string) {
    this.ffmpeg = ffmpeg(inputPath)
  }
}
之后我们在开发环境里面就能正常使用 FFmpeg 了。
打包
路径问题
我的项目是使用 electron builder 进行打包的(具体的 electron-builder.yml配置可以在 Electron 代码签名和公证 中查看),打包之后你会发现项目是无法正确使用 FFmpeg,但在 dev 环境下到是正常的。
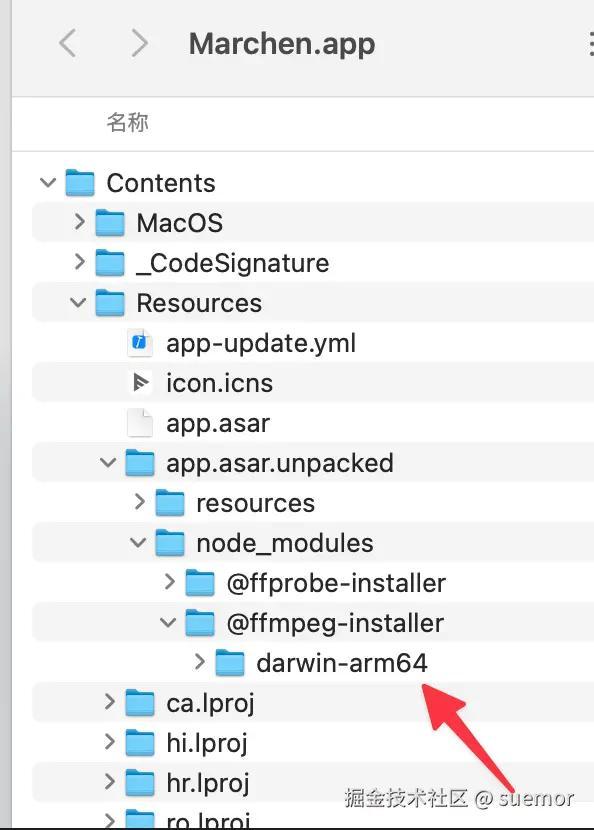
这是因为 ffmpeg 是二进制文件,会被打包进 app.asar.unpacked 而非 app.asar 从而导致 setFfmpegPath 路径出现问题,所以修改对应的 path 即可,这个问题在 @ffmpeg-installer/ffmpeg 中也有提到。
typescript 代码解读复制代码import ffmpegPath from '@ffmpeg-installer/ffmpeg'
import ffprobePath from '@ffprobe-installer/ffprobe'
import ffmpeg from 'fluent-ffmpeg'

ffmpeg.setFfmpegPath(ffmpegPath.path.replace('app.asar', 'app.asar.unpacked')) // 修改
ffmpeg.setFfprobePath(ffprobePath.path.replace('app.asar', 'app.asar.unpacked')) // 修改
export default class FFmpeg {
  ffmpeg: ffmpeg.FfmpegCommand

  constructor(inputPath: string) {
    this.ffmpeg = ffmpeg(inputPath)
  }
}
我使用的电脑是 MacBook Pro M1 Pro 即 macOS ARM64
打包完成之后,此时运行 ARM64 版本的 .app 是没有问题的,FFmpeg 也能正确运行。
FFmpeg 的架构版本问题
启动报错
但可不要高兴的太早,我们换一台运行 macOS x64 的电脑,运行刚才用 macOS ARM64 电脑打包出来的 x64 版本的 .app 就会直接报错,然后显示一个完全摸不到头脑的错误。
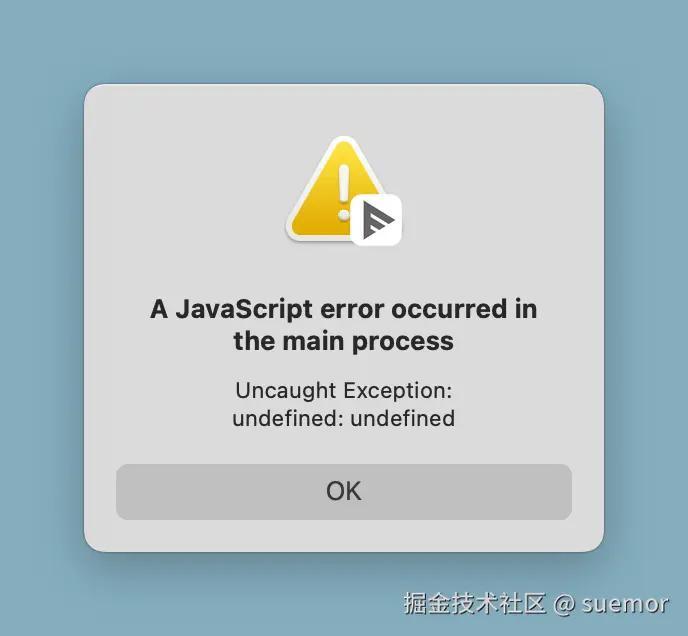
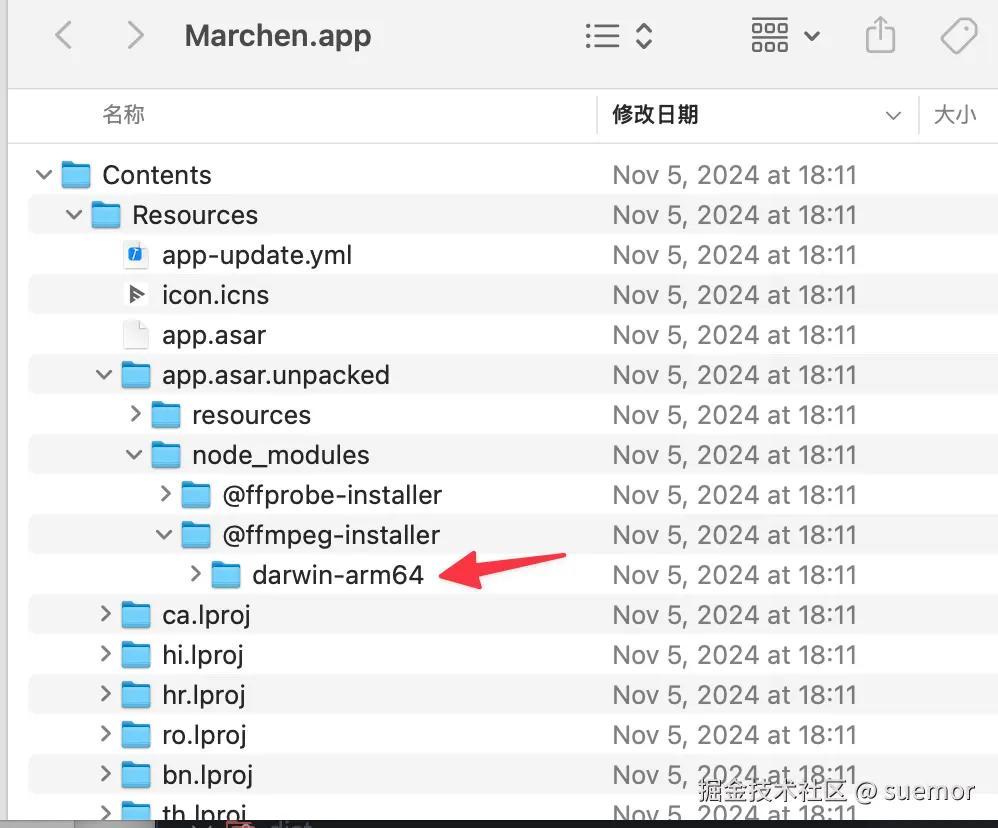
原因分析
我一开始看到这个错误也是完全懵逼的,使用 debugtron 对主线程进行调试也完全没有输出。之后尝试对包进行分析,发现 x64 版本的 .app 打包的 FFmpeg 竟然是 ARM64 版本的,这不报错才怪呢。
这里我便对 @ffmpeg-installer/ffmpeg的实现感到了好奇,他是如何匹配不同的平台,从而安装对应其平台的 FFmpeg 二进制文件。通过阅读其源码:
json 代码解读复制代码{
  "name": "@ffmpeg-installer/ffmpeg",
  "optionalDependencies": {
    "@ffmpeg-installer/darwin-arm64": "4.1.5",
    "@ffmpeg-installer/darwin-x64": "4.1.0",
    "@ffmpeg-installer/linux-arm": "4.1.3",
    "@ffmpeg-installer/linux-arm64": "4.1.4",
    "@ffmpeg-installer/linux-ia32": "4.1.0",
    "@ffmpeg-installer/linux-x64": "4.1.0",
    "@ffmpeg-installer/win32-ia32": "4.1.0",
    "@ffmpeg-installer/win32-x64": "4.1.0"
  }
}
json 代码解读复制代码{
  "name": "@ffmpeg-installer/darwin-x64",
  "os": [
    "darwin"
  ],
  "cpu": [
    "x64"
  ],
}
发现@ffmpeg-installer/ffmpeg 封装了多个平台 FFmpeg 依赖,然后放入 optionalDependencies 中。每个平台的 FFmpeg 包再通过设置 cpu + os 字段,从而实现用户安装 @ffmpeg-installer/ffmpeg 即可匹配用户系统,来安装对应的 ffmpeg,这也让我涨知识了。
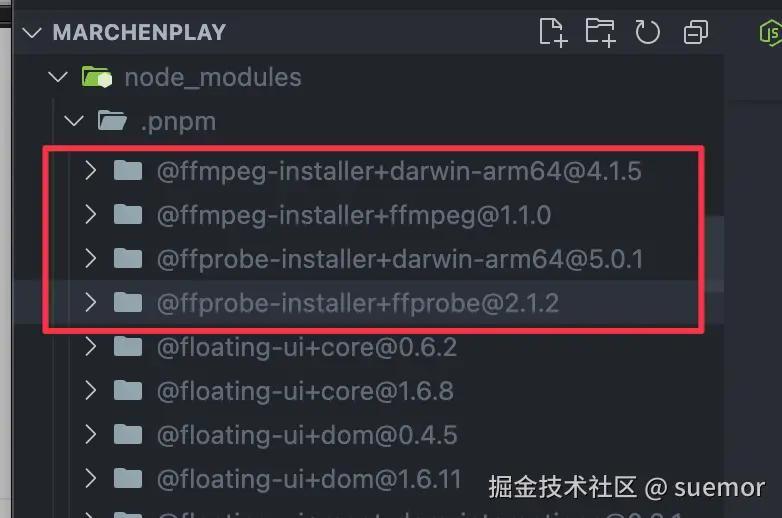
因此也难怪 x64 版本的 .app 打包的 FFmpeg 是 ARM64 版本的,因为我们在最开始 pnpm install 的时候,就只安装了对应操作系统的 FFmpeg,build 的时候也只能打包当前安装的 FFmpeg。
举个例子,我是 ARM64 macOS, pnpm install 的时候只会安装 ARM 版本 FFmpeg,打包 x64 的时候,当然也只能打包 ARM 版本 FFmpeg 了,从而导致的错误。
整理思路
那么我们的思路就很明确了:
- ARM64 macOS -> 打包 ARM64 应用 -> 使用 ARM64 FFmpeg
- ARM64 macOS -> 打包 x64 应用 -> 使用 x64 FFmpeg
同理:
- x64 macOS -> 打包 ARM64 应用 -> 使用 ARM64 FFmpeg
- x64 macOS -> 打包 x64 应用 -> 使用 x64 FFmpeg
那么如何实现呢?
这里思路完全是自己想的,或许有更好的方法,也请多多指教。
说一下我的思路,首先我们在 pnpm install 的时候只安装当前操作系统的 FFmpeg 是不变的,这样可以节约我们电脑的空间和安装依赖的速度。
之后只需要在执行 pnpm build:mac的时候,执行一个安装 mac 平台全部架构的 FFmpeg 依赖脚本就可以了。
解决问题
编写 scripts/install-darwin-deps.js
javascript 代码解读复制代码/* eslint-disable no-console */
import { exec } from 'node:child_process'
import os from 'node:os'

const platform = os.platform()

if (platform === 'darwin') {
  console.log('Detected macOS, installing darwin dependencies...')
  // 为了在 macos arm64 架构下进行打包 x64 架构的 APP, 所以需要同时安装 x64 arm64 架构的 ffmpeg 和 ffprobe
  exec(
    'pnpm i @ffmpeg-installer/darwin-x64@^4.1.0 @ffprobe-installer/darwin-x64@^5.1.0 @ffmpeg-installer/darwin-arm64@^4.1.5 @ffprobe-installer/darwin-arm64@^5.0.1 -D',
    (err, stdout, stderr) => {
      if (err) {
        console.error(`Error installing optional dependencies: ${stderr}`)
        throw new Error('Error installing optional dependencies')
      } else {
        console.log(`Optional dependencies installed: ${stdout}`)
      }
    },
  )
} else {
  console.log('Non-macOS platform detected, skipping optional darwin installation.')
}
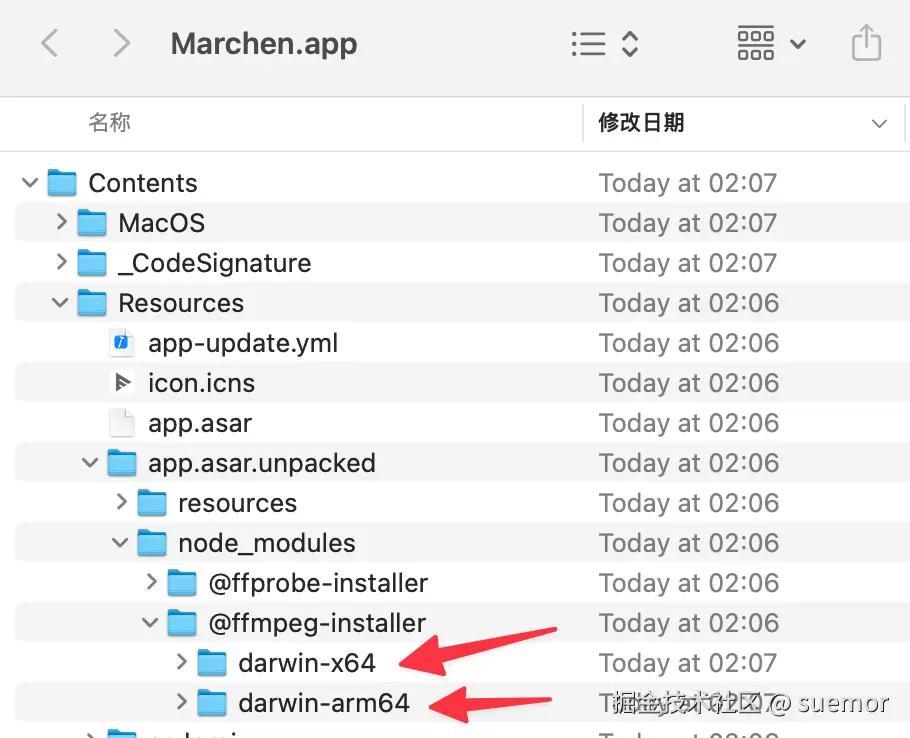
之后在 package.json 里面加上 "build:mac": "node scripts/install-darwin-deps.js && electron-vite build && electron-builder --mac --publish never" 即可。
执行打包命令之后,macOS x64 也是正确运行 macOS ARM64 打包出来的 x64 版本的 xxx.app ,不再会出现之前那个摸不着头脑报错了。
不同平台只打包对应的 FFmpeg
这里新的问题有又出现了,我们发现当前 xxx.dmg 包体积大了很多,那是因为所有平台的 FFmpeg 都被打包进去了。例如,ARM64 版本 xxx.app 把 x64 和 ARM64 FFmpeg 都打包进去了。
这里我们得写一个脚本,在 electron builder 打包之后,把与目标平台不相符的 FFmpeg 给删除掉,编写 scripts/cleaned-unused-arch-deps.js
javascript 代码解读复制代码/* eslint-disable no-console */
import fs from 'node:fs'
import path from 'node:path'

export default async function cleanDeps(context) {
  const { packager, arch, appOutDir } = context
  const platform = packager.platform.nodeName
  if (platform !== 'darwin') {
    return
  }
  const archMap = {
    1: 'x64',
    3: 'arm64',
  }
  const currentArch = archMap[arch]

  if (!currentArch) {
    return
  }

  const unpackedPath = path.resolve(
    appOutDir,
    'Marchen.app',
    'Contents',
    'Resources',
    'app.asar.unpacked',
    'node_modules',
  )
  if (!fs.existsSync(unpackedPath)) {
    return
  }

  const ffmpegPath = path.resolve(unpackedPath, '@ffmpeg-installer')
  const ffprobePath = path.resolve(unpackedPath, '@ffprobe-installer')

  if (!fs.existsSync(ffmpegPath) || !fs.existsSync(ffprobePath)) {
    return
  }

  const removeUnusedArch = (basePath, unusedArch) => {
    const unusedPath = path.resolve(basePath, `darwin-${unusedArch}`)
    if (fs.existsSync(unusedPath)) {
      fs.rmSync(unusedPath, { recursive: true })
    }
  }

  if (currentArch === 'x64') {
    removeUnusedArch(ffmpegPath, 'arm64')
    removeUnusedArch(ffprobePath, 'arm64')
  } else if (currentArch === 'arm64') {
    removeUnusedArch(ffmpegPath, 'x64')
    removeUnusedArch(ffprobePath, 'x64')
  }
  console.log('Cleaned unused arch dependencies.')
}
之后在 electron-builder.yml 里面使用 afterPack: scripts/cleaned-unused-arch-deps.js 导入脚本。
然后执行 pnpm build:mac就实现了不同平台只打包对应的 FFmpeg,并且运行都正常了。查看包内容,发现确实只包含了目标平台的 FFmpeg。
评论记录:
回复评论: