
副作用
useEffect
useEffect 是 React 中用于处理副作用的钩子。并且useEffect 还在这里充当生命周期函数,在之前你可能会在类组件中使用 componentDidMount、componentDidUpdate 和 componentWillUnmount 来处理这些生命周期事件。
什么是副作用函数,什么是纯函数?
纯函数
- 输入决定输出:相同的输入永远会得到相同的输出。这意味着函数的行为是可预测的。
- 无副作用:纯函数
不会修改外部状态,也不会依赖外部可变状态。因此,纯函数内部的操作不会影响外部的变量、文件、数据库等。
ts 代码解读复制代码function add(a: number, b: number): number {
  return a + b;
}
无论你执行多少次:
ts 代码解读复制代码add(1, 2) // 永远都是 3
没有修改任何外部变量、没有发请求、没有打印日志 —— 这就是一个纯函数。
副作用函数
-
副作用函数 指的是那些在执行时会改变外部状态或依赖外部可变状态的函数。
-
可预测性降低但是副作用不一定是坏事有时候副作用带来的效果才是我们所期待的
-
高耦合度函数非常依赖外部的变量状态紧密
- 操作引用类型
- 操作本地存储例如
localStorage - 调用外部API,例如
fetchajax - 操作
DOM - 计时器
ts 代码解读复制代码let globalVariable = 0;

function calculateDouble(number){
  globalVariable += 1; //修改函数外部环境变量

  localStorage.setItem('globalVariable', globalVariable); //修改 localStorage

  fetch(/*…*/).then((res)=>{ //网络请求
   //…
  });

  document.querySelector('.app').style.color = 'red'; //修改 DOM element

  return number *2
}
这个函数每次调用都会改变外部状态,所以它是一个副作用函数。
useEffect用法
ts 代码解读复制代码  useEffect(setup, dependencies?)
  useEffect(() => {
  	const connection = createConnection(serverUrl, roomId); // 执行副作用
    connection.connect();
  	return () => { // 清理函数
      connection.disconnect();
  	};
  }, [serverUrl, roomId]) // 依赖项列表
参数
- setup:Effect处理函数,可以返回一个清理函数。组件挂载时执行setup,依赖项更新时先执行cleanup再执行setup,组件卸载时执行cleanup。
- dependencies(可选):setup中使用到的响应式值列表(props、state等)。必须以数组形式编写如[dep1, dep2]。不传则每次重渲染都执行Effect。
返回值
useEffect 返回 undefined
tsx 代码解读复制代码let a = useEffect(() => {})
console.log('a', a) //undefined
基本使用
副作用函数能做的事情useEffect都能做,例如操作DOM、网络请求、计时器等等。
操作DOM
jsx 代码解读复制代码import { useEffect } from 'react'

function App() {
  const dom = document.getElementById('data')
  console.log(dom) // 这里的dom是null,因为useEffect是在组件渲染后执行的,此时dom还没有被渲染出来
  useEffect(() => {
    const data = document.getElementById('data')
    console.log(data) //张三 这里的data是有值的,因为useEffect是在组件渲染后执行的,此时dom已经被   渲染出来了
  }, [])
  return <div id='data'>张三div>
}
网络请求
tsx 代码解读复制代码useEffect(() => {
  fetch('http://localhost:5174/?name=AA')
}, [])
执行时机
组件挂载时执行
根据我们下面的例子可以观察到,组件在挂载的时候就执行了useEffect的副作用函数。
类似于componentDidMount
tsx 代码解读复制代码useEffect(() => {
  console.log('组件挂载时执行')
})
组件更新时执行
- 无依赖项更新
根据我们下面的例子可以观察到,当有响应式值发生改变时,useEffect的副作用函数就会执行。
类似于componentDidUpdate + componentDidMount
tsx 代码解读复制代码import { useEffect, useState } from "react"

const App = () => {
   const [count, setCount] = useState(0)
   const [name, setName] = useState('')
   useEffect(() => {
      console.log('执行了', count, name)
   }) // useEffect没有第二个参数,无依赖项
   return (
      <div id='data'>
         <div>
            <h3>count:{count}h3>
            <button onClick={() => setCount(count + 1)}>+button>
         div>
         <div>
            <h3>name:{name}h3>
            <input value={name} onChange={e => setName(e.target.value)} />
         div>
      div>
   )
}
export default App
- 有依赖项更新
根据我们下面的例子可以观察到,当依赖项数组中的count值发生改变时,useEffect的副作用函数就会执行。而当name值改变时,由于它不在依赖项数组中,所以不会触发副作用函数的执行。
tsx 代码解读复制代码import { useEffect, useState } from "react"

const App = () => {
   const [count, setCount] = useState(0)
   const [name, setName] = useState('')
   useEffect(() => {
      console.log('执行了', count, name)
   }, [count]) //当count发生改变时执行
   return (
      <div id='data'>
         <div>
            <h3>count:{count}h3>
            <button onClick={() => setCount(count + 1)}>+button>
         div>
         <div>
            <h3>name:{name}h3>
            <input value={name} onChange={e => setName(e.target.value)} />
         div>
      div>
   )
}
export default App
- 依赖项空值
根据我们下面的例子可以观察到,当依赖项为空数组时,useEffect的副作用函数只会执行一次,也就是组件挂载时执行。
适合做一些初始化的操作例如获取详情什么的。
tsx 代码解读复制代码import { useEffect, useState } from "react"

const App = () => {
   const [count, setCount] = useState(0)
   const [name, setName] = useState('')
   useEffect(() => {
      console.log('执行了', count, name)
   }, []) //只会执行一次
   return (
      <div id='data'>
         <div>
            <h3>count:{count}h3>
            <button onClick={() => setCount(count + 1)}>+button>
         div>
         <div>
            <h3>name:{name}h3>
            <input value={name} onChange={e => setName(e.target.value)} />
         div>
      div>
   )
}
export default App
组件卸载时执行
useEffect的副作用函数可以返回一个清理函数,当组件卸载时,useEffect的副作用函数就会执行清理函数。
确切说清理函数就是副作用函数运行之前,会清楚上一次的副作用函数。
根据我们下面的例子可以观察到,当组件卸载时,useEffect的副作用函数就会执行。
类似于componentWillUnmount
tsx 代码解读复制代码import { useEffect, useState } from "react"
// 子组件
const Child = (props: { name: string }) => {
   useEffect(() => {
      console.log('render', props.name)
      // 返回一个清理函数
      return () => {
         console.log('unmount', props.name) // 组件卸载时执行
      }
   }, [props.name])
   return <div>Child:{props.name}div>
}
const App = () => {
   const [show, setShow] = useState(true)
   const [name, setName] = useState('')
   return (
      <div id='data'>
         <div>
            <h3>父组件h3>
            <input value={name} onChange={e => setName(e.target.value)} />
            <button onClick={() => setShow(!show)}>显示/隐藏button>
         div>
         <hr />
         <h3>子组件h3>
         {show && <Child name={name} />}
      div>
   )
}

export default App
清理函数应用场景
例如我们下面这个例子,当name值发生改变时,useEffect的副作用函数就会执行,并且会开启一个定时器,当name值再次发生改变时,useEffect的副作用函数就会执行清理函数,清除上一次的定时器。这样就避免了接口请求的重复执行。
tsx 代码解读复制代码import { useEffect, useState } from "react"
// 子组件
const Child = (props: { name: string }) => {
   useEffect(() => {
      let timer = setTimeout(() => {
         fetch(`http://localhost:5174/?name=${props.name}`)
      }, 1000)
      return () => {
         clearTimeout(timer) // 当name值发生改变时,useEffect的副作用函数就会执行,并且会开启一个定时器,避免了接口请求的重复执行
      }
   }, [props.name])
   return <div>Childdiv>
}
const App = () => {
   const [show, setShow] = useState(true)
   const [name, setName] = useState('')
   return (
      <div id='data'>
         <div>
            <h3>父组件h3>
            <input value={name} onChange={e => setName(e.target.value)} />
            <button onClick={() => setShow(!show)}>显示/隐藏button>
         div>
         <hr />
         <h3>子组件h3>
         {show && <Child name={name} />}
      div>
   )
}

export default App
真实案例
下面是一个真实的用户信息获取案例,通过id获取用户信息,并且当id发生改变时,会获取新的用户信息。
tsx 代码解读复制代码import React, { useState, useEffect } from 'react';
interface UserData {
name: string;
email: string;
username: string;
phone: string;
website: string;
}
function App() {
const [userId, setUserId] = useState(1); // 假设初始用户ID为1
const [userData, setUserData] = useState<UserData | null>(null);
const [loading, setLoading] = useState(true);
const [error, setError] = useState(null);
/**
* 当 userId 发生变化时,触发副作用函数,从 API 获取用户数据
*/
useEffect(() => {
const fetchUserData = async () => {
setLoading(true);
try {
const response = await fetch(`https://jsonplaceholder.typicode.com/users/${userId}`); //免费api接口 可以直接使用
if (!response.ok) {
throw new Error('网络响应不正常');
}
const data = await response.json();
setUserData(data);
} catch (err: any) {
setError(err.message);
} finally {
setLoading(false);
}
};
fetchUserData();
}, [userId]);
/**
* 处理用户输入框值变化的函数,将输入的用户 ID 更新到 userId 状态中
* @param event - 输入框变化事件对象
*/
const handleUserChange = (event: React.ChangeEvent
useLayoutEffect
useLayoutEffect 是 React 中的一个 Hook,用于在浏览器重新绘制屏幕之前触发。与 useEffect 类似。
用法
jsx 代码解读复制代码useLayoutEffect(() => {
  // 副作用代码
  return () => {
    // 清理代码
  }
}, [dependencies]);
参数
- setup:Effect处理函数,可以返回一个清理函数。组件挂载时执行setup,依赖项更新时先执行cleanup再执行setup,组件卸载时执行cleanup。
- dependencies(可选):setup中使用到的响应式值列表(props、state等)。必须以数组形式编写如[dep1, dep2]。不传则每次重渲染都执行Effect。
返回值
useLayoutEffect 返回 undefined
区别(useLayoutEffect/useEffect)
| 区别 | useLayoutEffect | useEffect |
|---|---|---|
| 执行时机 | 浏览器完成布局和绘制之前执行副作用 | 浏览器完成布局和绘制之后执行副作用 |
| 执行方式 | 同步执行 | 异步执行 |
| DOM渲染 | 阻塞DOM渲染 | 不阻塞DOM渲染 |
测试DOM阻塞
下面这个例子展示了 useLayoutEffect 和 useEffect 在DOM渲染时的区别。useLayoutEffect 会阻塞DOM渲染,而 useEffect 不会。
jsx 代码解读复制代码import React, { useLayoutEffect, useEffect, useState } from 'react';

function App() {
   const [count, setCount] = useState(0)
   //不阻塞DOM
   // useEffect(() => {
   //    for (let i = 0; i < 50000; i++) {
   //       //console.log(i);
   //       setCount(count => count + 1)
   //    }
   // }, []);
   //阻塞DOM
   // useLayoutEffect(() => {
   //    for (let i = 0; i < 50000; i++) {
   //       //console.log(i);
   //       setCount(count => count + 1)
   //    }
   // }, []);
   return (
      <div>
         <div>app div>
         {
            Array.from({ length: count }).map((_, index) => (
               <div key={index}>{index}div>
            ))
         }
      div>
   );
}

export default App;
测试同步异步渲染
在下面的动画示例代码中:
- useEffect 实现的动画效果:
- 初始渲染时 opacity: 0
- 浏览器完成绘制
- useEffect 异步执行,设置 opacity: 1
- 用户可以看到完整的淡入动画过渡效果
- useLayoutEffect 实现的动画效果:
- 初始渲染时 opacity: 0
- DOM 更新后立即同步执行 useLayoutEffect
- 设置 opacity: 1
- 浏览器绘制时已经是最终状态
- 用户看不到过渡动画效果
css 代码解读复制代码#app1 {
    width: 200px;
    height: 200px;
    background: red;
}

#app2 {
    width: 200px;
    height: 200px;
    background: blue;
    margin-top: 20px;
    position: absolute;
    top: 230px;
}
tsx 代码解读复制代码import React, { useLayoutEffect, useEffect, useRef } from 'react';
function App() {
   // 使用 useEffect 实现动画效果
   useEffect(() => {
      const app1 = document.getElementById('app1') as HTMLDivElement;
      app1.style.transition = 'opacity 3s';
      app1.style.opacity = '1';
   }, []);

   // 使用 useLayoutEffect 实现动画效果
   useLayoutEffect(() => {
      const app2 = document.getElementById('app2') as HTMLDivElement;
      app2.style.transition = 'opacity 3s';
      app2.style.opacity = '1';

   }, []);

   return (
      <div>
         <div id="app1"  style={{ opacity: 0 }}>app1div>
         <div id="app2"  style={{ opacity: 0 }}>app2div>
      div>
   );
}

export default App;
应用场景
- 需要同步读取或更改DOM:例如,你需要读取元素的大小或位置并在渲染前进行调整。
- 防止闪烁:在某些情况下,异步的useEffect可能会导致可见的布局跳动或闪烁。例如,动画的启动或某些可见的快速DOM更改。
- 模拟生命周期方法:如果你正在将旧的类组件迁移到功能组件,并需要模拟 componentDidMount、componentDidUpdate和componentWillUnmount的同步行为。
案例
可以记录滚动条位置,等用户返回这个页面时,滚动到之前记录的位置。增强用户体验。
tsx 代码解读复制代码import React, { useLayoutEffect } from 'react';
function App() {
const handelScrool = (e: React.UIEvent
useRef
当你在React中需要处理DOM元素或需要在组件渲染之间保持持久性数据时,便可以使用useRef。
ts 代码解读复制代码import { useRef } from 'react';
const refValue = useRef(initialValue)
refValue.current // 访问ref的值 类似于vue的ref,Vue的ref是.value,其次就是vue的ref是响应式的,而react的ref不是响应式的
通过Ref操作DOM元素
参数
- initialValue:ref 对象的 current 属性的初始值。可以是任意类型的值。这个参数在首次渲染后被忽略。
返回值
- useRef返回一个对象,对象的current属性指向传入的初始值。
{current:xxxx}
注意
- 改变 ref.current 属性时,React 不会重新渲染组件。React 不知道它何时会发生改变,因为 ref 是一个普通的 JavaScript 对象。
- 除了 初始化 外不要在渲染期间写入或者读取 ref.current,否则会使组件行为变得不可预测。
tsx 代码解读复制代码import { useRef } from "react"
function App() {
  //首先,声明一个 初始值 为 null 的 ref 对象
  let div = useRef(null)
  const heandleClick = () => {
    //当 React 创建 DOM 节点并将其渲染到屏幕时,React 将会把 DOM 节点设置为 ref 对象的 current 属性
    console.log(div.current)
  }
  return (
    <>
      {/*然后将 ref 对象作为 ref 属性传递给想要操作的 DOM 节点的 JSX*/}
      <div ref={div}>dom元素div>
      <button onClick={heandleClick}>获取dom元素button>

  )
}
export default App
数据存储
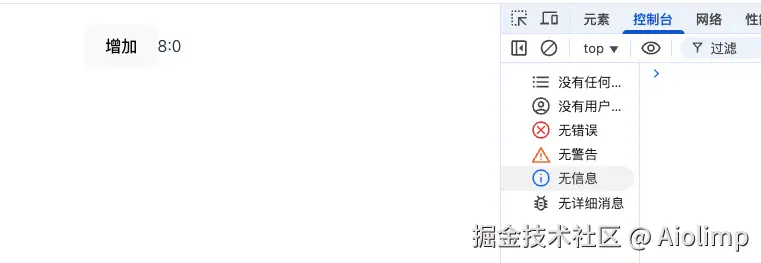
我们实现一个保存count的新值和旧值的例子,但是在过程中我们发现一个问题,就是num的值一直为0,这是为什么呢?
因为等useState的 SetCount执行之后,组件会重新rerender,num的值又被初始化为了0,所以num的值一直为0。
ts 代码解读复制代码import React, { useLayoutEffect, useRef, useState } from 'react';

function App() {
   let num = 0
   let [count, setCount] = useState(0)
   const handleClick = () => {
      setCount(count + 1)
      num = count;
   };
   return (
      <div>
         <button onClick={handleClick}>增加button>
         <div>{count}:{num}div>
      div>
   );
}

export default App;
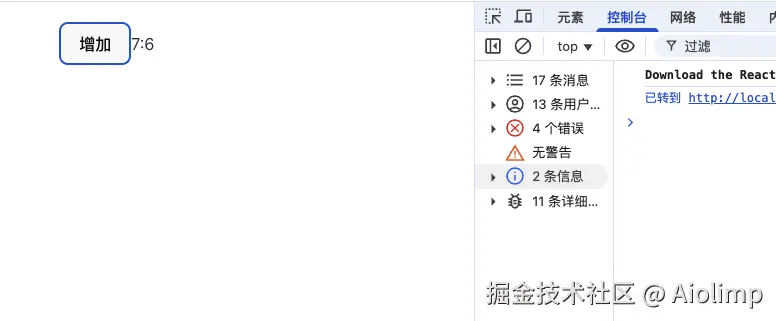
如何修改?
我们可以使用useRef来解决这个问题,因为useRef只会在初始化的时候执行一次,当组件reRender的时候,useRef的值不会被重新初始化。
tsx 代码解读复制代码import React, { useLayoutEffect, useRef, useState } from 'react';

function App() {
   let num = useRef(0) // 将num转换成useRef类型,useRef的值不会被重新初始化
   let [count, setCount] = useState(0)
   const handleClick = () => {
      setCount(count + 1)
      num.current = count;
   };
   return (
      <div>
         <button onClick={handleClick}>增加button>
         <div>{count}:{num.current}div>
      div>
   );
}

export default App;
实际应用
我们实现一个计时器的例子,在点击开始计数的时候,计时器会每300ms执行一次,在点击结束计数的时候,计时器会被清除。
问题
我们发现,点击end的时候,计时器并没有被清除,这是为什么呢?
原因
这是因为组件一直在重新ReRender,所以timer的值一直在被重新赋值为null,导致无法清除计时器。
tsx 代码解读复制代码import React, { useLayoutEffect, useRef, useState } from 'react';

function App() {
   console.log('render')
   let timer: NodeJS.Timeout | null = null
   let [count, setCount] = useState(0)
   const handleClick = () => {
      timer = setInterval(() => {
         setCount(count => count + 1)
      }, 300)
   };
   const handleEnd = () => {
      console.log(timer); //点击end的时候,计时器并没有被清除
      if (timer) {
         clearInterval(timer)
         timer = null
      }
   };
   return (
      <div>
         <button onClick={handleClick}>开始计数button>
         <button onClick={handleEnd}>结束计数button>
         <div>{count}div>
      div>
   );
}

export default App;
如何修改?
我们可以使用useRef来解决这个问题,因为useRef的值不会因为组件的重新渲染而改变。
tsx 代码解读复制代码import React, { useLayoutEffect, useRef, useState } from 'react';

function App() {
   console.log('render')
   let timer = useRef<null | NodeJS.Timeout>(null) // react里,定时器需要用uesRef定义
   let [count, setCount] = useState(0)
   const handleClick = () => {
      timer.current = setInterval(() => {
         setCount(count => count + 1)
      }, 300)
   };
   const handleEnd = () => {
      if (timer.current) {
         clearInterval(timer.current)
         timer.current = null
      }
   };
   return (
      <div>
         <button onClick={handleClick}>开始计数button>
         <button onClick={handleEnd}>结束计数button>
         <div>{count}div>
      div>
   );
}

export default App;
注意事项
- 组件在重新渲染的时候,useRef的值不会被重新初始化。
- 改变 ref.current 属性时,React 不会重新渲染组件。React 不知道它何时会发生改变,因为 ref 是一个普通的 JavaScript 对象。
- useRef的值不能作为useEffect等其他hooks的依赖项,因为它并不是一个响应式状态。
- useRef不能直接获取子组件的实例,需要使用forwardRef。
useImperativeHandle
可以在子组件内部暴露给父组件句柄,那么说人话就是,父组件可以调用子组件的方法,或者访问子组件的属性。 如果你学过Vue,就类似于Vue的defineExpose。
用法
ts 代码解读复制代码useImperativeHandle(ref, ()=>{
    return {
        // 暴露给父组件的方法或属性
    }
}, [deps])
参数
- ref: 父组件传递的ref对象
- createHandle: 返回值,返回一个对象,对象的属性就是子组件暴露给父组件的方法或属性
- deps?:[可选] 依赖项,当依赖项发生变化时,会重新调用createHandle函数,类似于
useEffect的依赖项
入门案例
[!NOTE]
useRef 在
18版本 和19版本使用方式不一样
18版本
18版本需要配合forwardRef一起使用
forwardRef包装之后,会有两个参数,第一个参数是props,第二个参数是ref
我们使用的时候只需要将ref传递给useImperativeHandle即可,然后useImperativeHandle 就可以暴露子组件的方法或属性给父组件, 然后父组件就可以通过ref调用子组件的方法或访问子组件的属性
tsx 代码解读复制代码import { useRef, forwardRef, useState, useImperativeHandle } from 'react';
interface ChildRef {
  name: string;
  count: number;
  addCount: () => void;
  subCount: () => void;
}

// React 18.2 版本使用,使用 forwardRef 可以将 ref 从父组件传递到子组件
const Child = forwardRef<ChildRef>((_, ref) => {
  const [count, setCount] = useState(0);
  /**
   * 使用 useImperativeHandle 钩子将自定义的属性和方法暴露给父组件的 ref
   * 第一个参数是传入的 ref,第二个参数是一个函数,返回一个对象,包含要暴露的属性和方法
   */
  useImperativeHandle(ref, () => {
    return {
      name: 'child',
      count,
      addCount: () => setCount(count + 1),
      subCount: () => setCount(count - 1),
    };
  });
  return (
    <div>
      <h3>我是子组件h3>
      <div>count:{count}div>
      <button onClick={() => setCount(count + 1)}>增加button>
      <button onClick={() => setCount(count - 1)}>减少button>
    div>
  );
});

function App() {
  // 创建一个 ref,类型为 ChildRef,用于引用子组件
  const childRef = useRef<ChildRef>(null);
  const showRefInfo = () => {
    console.log(childRef.current);
  };
  return (
    <div>
      <h2>我是父组件h2>
      <button onClick={showRefInfo}>获取子组件信息button>
      {/* 点击按钮调用子组件的 addCount 方法,增加计数器的值 */}
      <button onClick={() => childRef.current?.addCount()}>操作子组件+1button>
      {/* 点击按钮调用子组件的 subCount 方法,减少计数器的值 */}
      <button onClick={() => childRef.current?.subCount()}>操作子组件-1button>
      <hr />
      {/* 将 ref 传递给子组件 */}
      <Child ref={childRef}>Child>
    div>
  );
}

export default App;
19版本
- 19版本不需要配合
forwardRef一起使用,直接使用即可,他会把Ref跟props放到一起,你会发现变得更加简单了 - 19版本useRef的参数改为必须传入一个参数例如
useRef(null)
tsx 代码解读复制代码import { useRef, useState, useImperativeHandle } from 'react';
interface ChildRef {
name: string;
count: number;
addCount: () => void;
subCount: () => void;
}
//19版本不需要配合`forwardRef`一起使用,直接使用即可,他会把Ref跟props放到一起
// const Child = forwardRef((_, ref) => {
const Child = ({ ref }: { ref: React.Ref } ) => {
const [count, setCount] = useState(0);
useImperativeHandle(ref, () => {
return {
name: 'child',
count,
addCount: () => setCount(count + 1),
subCount: () => setCount(count - 1),
};
});
return (
<div>
<h3>我是子组件h3>
<div>count:{count}div>
<button onClick={() => setCount(count + 1)}>增加button>
<button onClick={() => setCount(count - 1)}>减少button>
div>
);
};
function App() {
const childRef = useRef<ChildRef>(null);
const showRefInfo = () => {
console.log(childRef.current);
};
return (
<div>
<h2>我是父组件h2>
<button onClick={showRefInfo}>获取子组件信息button>
<button onClick={() => childRef.current?.addCount()}>操作子组件+1button>
<button onClick={() => childRef.current?.subCount()}>操作子组件-1button>
<hr />
<Child ref={childRef}>Child>
div>
);
}
export default App;
执行时机
- 如果不传入第三个参数,那么
useImperativeHandle会在组件挂载时执行一次,然后状态更新时,都会执行一次
tsx 代码解读复制代码useImperativeHandle(ref, () => {

})
- 如果传入第三个参数,并且是一个空数组,那么
useImperativeHandle会在组件挂载时执行一次,然后状态更新时,不会执行
tsx 代码解读复制代码useImperativeHandle(ref, () => {

}, [])
- 如果传入第三个参数,并且有值,那么
useImperativeHandle会在组件挂载时执行一次,然后会根据依赖项的变化,决定是否重新执行
tsx 代码解读复制代码const [count, setCount] = useState(0)
useImperativeHandle(ref, () => {

}, [count])
实际案例
例如,我们封装了一个表单组件,提供了两个方法:校验和重置。使用useImperativeHandle可以将这些方法暴露给父组件,父组件便可以通过ref调用子组件的方法。
tsx 代码解读复制代码interface ChildRef {
name: string
validate: () => string | true
reset: () => void
}
const Child = ({ ref }: { ref: React.Ref } ) => {
const [form, setForm] = useState({
username: '',
password: '',
email: ''
})
const validate = () => {
if (!form.username) {
return '用户名不能为空'
}
if (!form.password) {
return '密码不能为空'
}
if (!form.email) {
return '邮箱不能为空'
}
return true
}
const reset = () => {
setForm({
username: '',
password: '',
email: ''
})
}
useImperativeHandle(ref, () => {
return {
name: 'child',
validate: validate,
reset: reset
}
})
return <div style={{ marginTop: '20px' }}>
<h3>我是表单组件h3>
<input value={form.username} onChange={(e) => setForm({ ...form, username: e.target.value })} placeholder='请输入用户名' type="text" />
<input value={form.password} onChange={(e) => setForm({ ...form, password: e.target.value })} placeholder='请输入密码' type="text" />
<input value={form.email} onChange={(e) => setForm({ ...form, email: e.target.value })} placeholder='请输入邮箱' type="text" />
div>
}
function App() {
const childRef = useRef<ChildRef>(null)
const showRefInfo = () => {
console.log(childRef.current)
}
const submit = () => {
const res = childRef.current?.validate()
console.log(res)
}
return (
<div>
<h2>我是父组件h2>
<button onClick={showRefInfo}>获取子组件信息button>
<button onClick={() => submit()}>校验子组件button>
<button onClick={() => childRef.current?.reset()}>重置button>
<hr />
<Child ref={childRef}>Child>
div>
);
}
export default App;
useContext
useContext 提供了一个无需为每层组件手动添加 props,就能在组件树间进行数据传递的方法。设计的目的就是解决组件树间数据传递的问题
用法
tsx 代码解读复制代码const MyThemeContext = React.createContext({theme: 'light'}); // 创建一个上下文
function App () {
   return (
      <MyThemeContext.Provider value={{theme: 'light'}}>
         <MyComponent />
      MyThemeContext.Provider>
   )
}
function MyComponent() {
    const themeContext = useContext(MyThemeContext); // 使用上下文
    return (<div>{themeContext.theme}div>);
}
参数
入参
- context:是 createContext 创建出来的对象,他不保持信息,他是信息的载体。声明了可以从组件获取或者给组件提供信息。
返回值
- 返回传递的Context的值,并且是只读的。如果 context 发生变化,React 会自动重新渲染读取 context 的组件
基本用法
- 18版本演示
首先我们先通过createContext创建一个上下文,然后通过createContext创建的组件包裹组件,传递值。
被包裹的组件,在任何一个层级都是可以获取上下文的值,那么如何使用呢?
使用的方式就是通过useContext这个hook,然后传入上下文,就可以获取到上下文的值。
tsx 代码解读复制代码import React, { useContext, useState } from 'react';
// 创建上下文
const ThemeContext = React.createContext<ThemeContextType>({} as ThemeContextType);
// 定义上下文类型
interface ThemeContextType {
   theme: string;
   setTheme: (theme: string) => void;
}

const Child = () => {
  const themeContext = useContext(ThemeContext); //获取上下文对象
  const styles = {
    backgroundColor: themeContext.theme === "light" ? "white" : "black",
    border: "1px solid red",
    width: 100 + "px",
    height: 100 + "px",
    color: themeContext.theme === "light" ? "black" : "white",
  };
  return (
    <div style={styles}>
      <h2>我是子组件h2>
      <button
        onClick={() =>
          themeContext.setTheme(
            themeContext.theme === "light" ? "dark" : "light"
          )
        }
      >
        子组件修改主题色:
      button>
       {/* 子组件调用父组件的方法 */}
    div>
  );
};

const Parent = () => {
    // 获取上下文
   const themeContext = useContext(ThemeContext);
   const styles = {
      backgroundColor: themeContext.theme === 'light' ? 'white' : 'black',
      border: '1px solid red',
      width: 100 + 'px',
      height: 100 + 'px',
      color: themeContext.theme === 'light' ? 'black' : 'white'
   }
   return <div>
      <div style={styles}>
         Parent
      div>
      <Child />
   div>
}

function App() {
   const [theme, setTheme] = useState('light');
   return (
      <div>
         <button onClick={() => setTheme(theme === 'light' ? 'dark' : 'light')}>切换主题button>
         <ThemeContext.Provider value={{ theme, setTheme }}>
            <Parent />
         ThemeContext.Provider>
- 19版本演示
其实19版本和18版本是差不多的,只是19版本更加简单了,不需要再使用Provider包裹,直接使用即可。
tsx 代码解读复制代码import React, { useContext, useState } from 'react';
const ThemeContext = React.createContext<ThemeContextType>({} as ThemeContextType);
interface ThemeContextType {
theme: string;
setTheme: (theme: string) => void;
}
const Child = () => {
const themeContext = useContext(ThemeContext); //获取上下文对象
const styles = {
backgroundColor: themeContext.theme === "light" ? "white" : "black",
border: "1px solid red",
width: 100 + "px",
height: 100 + "px",
color: themeContext.theme === "light" ? "black" : "white",
};
return (
<div style={styles}>
<h2>我是子组件h2>
<button
onClick={() =>
themeContext.setTheme(
themeContext.theme === "light" ? "dark" : "light"
)
}
>
子组件修改主题色:
button>
{/* 子组件调用父组件的方法 */}
div>
);
};
const Parent = () => {
const themeContext = useContext(ThemeContext); //获取上下文对象
const styles = {
backgroundColor: themeContext.theme === 'light' ? 'white' : 'black',
border: '1px solid red',
width: 100 + 'px',
height: 100 + 'px',
color: themeContext.theme === 'light' ? 'black' : 'white'
}
return <div>
<div style={styles}>
Parent
div>
<Child />
div>
}
function App() {
const [theme, setTheme] = useState('light');
return (
注意事项
- 使用 ThemeContext 时,传递的key必须为
value
tsx 代码解读复制代码// 🚩 不起作用:prop 应该是“value”
<ThemeContext theme={theme}>
   <Button />
ThemeContext>
// ✅ 传递 value 作为 prop
<ThemeContext value={theme}>
   <Button />
ThemeContext>
- 可以使用多个Context
如果使用多个Context,那么需要注意,如果使用的值是相同的,那么会覆盖。
tsx 代码解读复制代码const ThemeContext = React.createContext({theme: 'light'});

function App() {
   return (
      <ThemeContext value={{theme: 'light'}}>
         <ThemeContext value={{theme: 'dark'}}> {/* 覆盖了上面的值 */}
            <Parent />
         ThemeContext>
      ThemeContext>
   )
}
工具Hooks
useDebugValue
useDebugValue 是一个专为开发者调试自定义 Hook 而设计的 React Hook。它允许你在 React 开发者工具中为自定义 Hook 添加自定义的调试值。
用法
ts 代码解读复制代码const debugValue = useDebugValue(value)
参数说明
入参
-
value: 要在 React DevTools 中显示的值 -
ts代码解读复制代码
formatter?: (可选) 格式化函数
- 作用:自定义值的显示格式
- 调用时机:仅在 React DevTools 打开时才会调用,可以进行复杂的格式化操作
- 参数:接收 value 作为参数
- 返回:返回格式化后的显示值
返回值
- 无返回值(void)
获取 React DevTools
1.Chrome 商店安装
- 访问 React Developer Tools
- 点击"添加至 Chrome"即可安装
2.在微信公众号(小满zs) 回复 React/React工具 获取安装包
离线安装步骤
- 打开 Chrome 浏览器,点击右上角三个点 → 更多工具 → 扩展程序
- 开启右上角的"开发者模式"
- 将下载的 .crx 文件直接拖拽到扩展程序页面
- 在弹出的确认框中点击"添加扩展程序"
实战案例:自定义 useCookie Hook
下面通过实现一个 useCookie Hook 来展示 useDebugValue 的实际应用。这个 Hook 提供了完整的 cookie 操作功能,并通过 useDebugValue 来增强调试体验。
tsx 代码解读复制代码
import React, { useState, useDebugValue } from 'react';

/**
 * 自定义 Hook,用于管理浏览器的 cookie。
 * @param {string} name - cookie 的名称。
 * @param {string} [initialValue=''] - cookie 的初始值,默认为空字符串。
 * @returns {[string, (value: string, options?: any) => void, () => void]} - 返回一个数组,包含当前 cookie 的值、更新 cookie 的函数和删除 cookie 的函数。
 */
const useCookie = (name: string, initialValue: string = '') => {
  const getCookie = () => {
    // 使用正则表达式匹配 cookie 字符串中指定名称的值
    const match = document.cookie.match(new RegExp(`(^| )${name}=([^;]*)(;|$)`))
    return match ? match[2] : initialValue
  }
  const [cookie, setCookie] = useState(getCookie())

  /**
   * 更新指定名称的 cookie 值。
   * @param {string} value - 要设置的新的 cookie 值。
   * @param {any} [options] - 可选的 cookie 选项,如过期时间、路径等。
   */
  const updateCookie = (value: string, options?: any) => {
    // 设置新的 cookie 值
    document.cookie = `${name}=${value};${options}`
    // 更新状态中的 cookie 值
    setCookie(value)
  }

  /**
   * 删除指定名称的 cookie。
   */
  const deleteCookie = () => {
    // 通过设置过期时间为过去的时间来删除 cookie
    document.cookie = `${name}=;expires=Thu, 01 Jan 1970 00:00:00 GMT`
    // 将状态中的 cookie 值重置为初始值
    setCookie(initialValue)
  }

  /**
   * 使用 useDebugValue Hook 在 React DevTools 中显示调试信息。
   * 这里将 cookie 的值格式化为 "cookie: {value}" 的形式。
   */
  useDebugValue(cookie, (value) => {
    return `cookie: ${value}`
  })
  return [cookie, updateCookie, deleteCookie] as const
}

/**
 * 主应用组件,演示如何使用 useCookie Hook 管理 cookie。
 * @returns {JSX.Element} - 返回一个包含显示 cookie 值和操作按钮的 JSX 元素。
 */
const App: React.FC = () => {
  const [cookie, updateCookie, deleteCookie] = useCookie('key', 'value')

  return (
    <div>
      <div>{cookie}div>
      <button onClick={() => { updateCookie('update-value') }}>设置cookiebutton>
      <button onClick={() => { deleteCookie() }}>删除cookiebutton>
    div>
  );
}

export default App;
Hook 功能说明
- getCookie: 获取指定名称的 cookie 值
- updateCookie: 更新或创建新的 cookie
- deleteCookie: 删除指定的 cookie
useDebugValue 的应用
在这个例子中,我们使用 useDebugValue 来显示当前 cookie 的值:
tsx 代码解读复制代码useDebugValue(cookie, (value) => `cookie: ${value}`)
调试效果展示
在 React DevTools 中的显示效果:

使用建议
- 仅在自定义 Hook 中使用
useDebugValue - 对于简单的值,可以省略 formatter 函数
- 当格式化值的计算比较昂贵时,建议使用 formatter 函数,因为它只在开发者工具打开时才会执行
useId
useId 是 React 18 新增的一个 Hook,用于生成稳定的唯一标识符,主要用于解决 SSR 场景下的 ID 不一致问题,或者需要为组件生成唯一 ID 的场景。
使用场景
- 为组件生成唯一 ID
- 解决 SSR 场景下的 ID 不一致问题
- 无障碍交互唯一ID
用法
ts 代码解读复制代码const id = useId()
// 返回值: :r0: 多次调用值递增
参数说明
入参
- 无入参
返回值
- 唯一标识符 例如
:r0:
案例
1.为组件生成唯一 ID
比如表单元素,label 需要和 input 绑定,如果使用 id 属性,需要手动生成唯一 ID,使用 useId 可以自动生成唯一 ID,这就非常方便。
tsx 代码解读复制代码/**
 * App 组件,创建一个带标签的输入框,使用 useId 生成唯一的 ID 以关联标签和输入框。
 * @returns {JSX.Element} 返回一个包含标签和输入框的 JSX 元素。
 */
export const App = () => {
  // 使用 useId 钩子生成一个唯一的 ID,用于关联标签和输入框
  const id = useId()
  return (
    <>
      {/* 使用生成的唯一 ID 关联标签和输入框,提升可访问性 */}
      <label htmlFor={id}>Namelabel>
      {/* 为输入框设置唯一的 ID,与标签关联 */}
      <input id={id} type="text" />

  )
}
2. 解决 SSR 场景下的 ID 不一致问题
在服务端渲染(SSR)场景下,组件会在服务端和客户端分别渲染一次。如果使用随机生成的 ID,可能会导致两端渲染结果不一致,引发 hydration 错误。useId 可以确保生成确定性的 ID。
tsx 代码解读复制代码// 一个常见的 SSR 场景:带有工具提示的导航栏组件
const NavItem = ({ text, tooltip }) => {
  // ❌ 错误做法:使用随机值或递增值
  const randomId = `tooltip-${Math.random()}`
  // 在 SSR 时服务端可能生成 tooltip-0.123
  // 在客户端可能生成 tooltip-0.456
  // 导致 hydration 不匹配

  return (
    <li>
      <a
        aria-describedby={randomId}
        href="#"
      >
        {text}
      a>
      <div id={randomId} role="tooltip">
        {tooltip}
      div>
    li>
  )
}

// ✅ 正确做法:使用 useId
const NavItemWithId = ({ text, tooltip }) => {
  const id = useId()
  const tooltipId = `${id}-tooltip`

  return (
    <li>
      <a
        href="#"
        aria-describedby={tooltipId}
        className="nav-link"
      >
        {text}
      a>
      <div
        id={tooltipId}
        role="tooltip"
        className="tooltip"
      >
        {tooltip}
      div>
    li>
  )
}

// 使用示例
const Navigation = () => {
  return (
    <nav>
      <ul>
        <NavItemWithId
          text="首页"
          tooltip="返回首页"
        />
        <NavItemWithId
          text="设置"
          tooltip="系统设置"
        />
        <NavItemWithId
          text="个人中心"
          tooltip="查看个人信息"
        />
      ul>
    nav>
  )
}
3. 无障碍交互唯一ID
aria-describedby 是一个 ARIA 属性,用于为元素提供额外的描述性文本。它通过引用其他元素的 ID 来关联描述内容,帮助屏幕阅读器为用户提供更详细的信息。
当视障用户使用屏幕阅读器浏览网页时:
- 读到输入框时会先读出输入框的标签
- 然后会读出通过
aria-describedby关联的描述文本 - 用户就能知道这个输入框需要输入什么内容,有什么要求
tsx 代码解读复制代码export const App = () => {
  const id = useId()
  return (
    <div>
      <input
        type="text"
        aria-describedby={id}
      />
      <p id={id}>
        请输入有效的电子邮件地址,例如:[email protected]
      p>
    div>
  )
}
总结
基本介绍
useId 是 React 18 引入的新 Hook,用于生成稳定且唯一的标识符
使用特点
- 无需传入参数
- 返回确定性的唯一字符串(如
:r0:) - 同一组件多次调用会生成递增的 ID
- 适合在需要稳定 ID 的场景下使用,而不是用于视觉或样式目的
最佳实践
- 当需要多个相关 ID 时,应该使用同一个 useId 调用,并添加后缀
- 不要用于列表渲染的 key 属性
- 优先用于可访问性和 SSR 场景
[!CAUTION]
本文内容参考小满大佬
评论记录:
回复评论: