
特别声明
从第二个驱动程序开始(http://iyenn.com/rec/1709453.html),直接用函数register_chrdev打包完成了本博文中进行驱动注册的前几个步骤,所以这篇博文只作为了解Linux的驱动注册的过程,真正的工作中建议使用函数register_chrdev。
准备工作
先把Linux的源码导入代码阅读编辑器中【如果你对驱动开发中涉及到的结构体都比较熟悉,其实不一定要导入】。详情见 http://iyenn.com/rec/1709616.html
建议先阅读的博文
然后最好先读一下我写的关于嵌入式Linux驱动开发的基本知识的两篇博文,链接 http://iyenn.com/rec/1709451.html
http://iyenn.com/rec/1709535.html
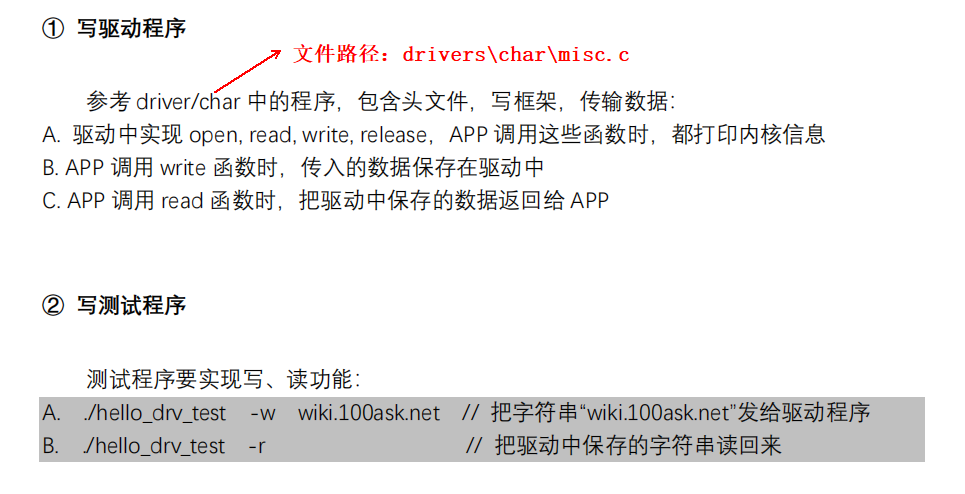
任务需求
完整驱动程序源代码
#include 
- 1
- 2
- 3
- 4
- 5
- 6
- 7
- 8
- 9
- 10
- 11
- 12
- 13
- 14
- 15
- 16
- 17
- 18
- 19
- 20
- 21
- 22
- 23
- 24
- 25
- 26
- 27
- 28
- 29
- 30
- 31
- 32
- 33
- 34
- 35
- 36
- 37
- 38
- 39
- 40
- 41
- 42
- 43
- 44
- 45
- 46
- 47
- 48
- 49
- 50
- 51
- 52
- 53
- 54
- 55
- 56
- 57
- 58
- 59
- 60
- 61
- 62
- 63
- 64
- 65
- 66
- 67
- 68
- 69
- 70
- 71
- 72
- 73
- 74
- 75
- 76
- 77
- 78
- 79
- 80
- 81
- 82
- 83
- 84
- 85
- 86
- 87
- 88
- 89
- 90
- 91
- 92
- 93
- 94
- 95
- 96
- 97
- 98
- 99
- 100
- 101
- 102
- 103
- 104
- 105
- 106
- 107
- 108
- 109
- 110
- 111
- 112
- 113
- 114
- 115
新建驱动程序源文件
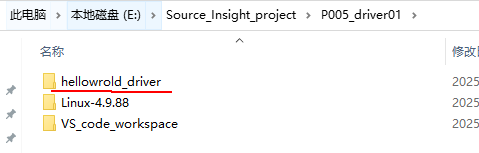
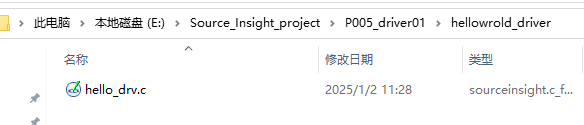
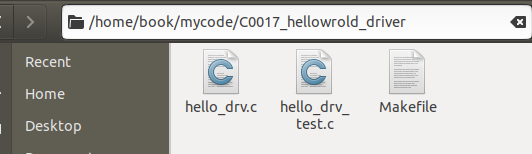
不妨在工程根目录下建立一个名为hellowrold_driver的目录,然后在里面新建文件hello_drv.c,如下图所示:
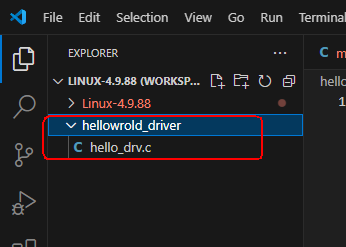
然后把这个目录加到VScode的Workspace中。
头文件的包含
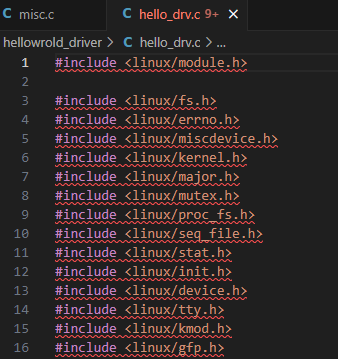
仿照drivers\char\misc.c中的代码,drivers\char\misc.c里面需要的头文件如下:
#include - 1
- 2
- 3
- 4
- 5
- 6
- 7
- 8
- 9
- 10
- 11
- 12
- 13
- 14
- 15
- 16
我们也就把这些头文件加到我们的驱动程序代码中:
定义主设备号存储变量major
static int major = 0;
- 1
major用于存储系统分配的主设备号,在初始化函数 hello_init 中,通过调用 alloc_chrdev_region:
rc = alloc_chrdev_region(&devid, 0, 1, "hello");
major = MAJOR(devid);
- 1
- 2
来将系统自动分配的主设备号和次设备号存储在变量major中。
关于函数alloc_chrdev_regio()的介绍,可参考博文 http://iyenn.com/rec/1709451.html
初始化描述设备实例信息的核心结构体struct cdev hello_cdev
static struct cdev hello_cdev;
- 1
关于这个结构体的讲解,请参考博文:
http://iyenn.com/rec/1709451.html
上面这篇博文里我已把它分析得比较清楚了。
驱动程序模块加载时的入口函数hello_init
如果已经阅读了下面两篇博文
http://iyenn.com/rec/1709451.html
http://iyenn.com/rec/1709535.html
那这个函数就没啥好说的了,源码如下:
static int __init hello_init(void)
{
	int err;
	int rc;
	dev_t devid;

	printk("%s %s line %d\n", __FILE__, __FUNCTION__, __LINE__);
	//major = register_chrdev(0, "hello", &hello_drv);  /* /dev/hello */
	rc = alloc_chrdev_region(&devid, 0, 1, "hello");
	major = MAJOR(devid);
	cdev_init(&hello_cdev, &hello_drv);
	cdev_add(&hello_cdev, devid, 1);

	hello_class = class_create(THIS_MODULE, "hello_class");
	err = PTR_ERR(hello_class);
	if (IS_ERR(hello_class)) {
		printk("%s %s line %d\n", __FILE__, __FUNCTION__, __LINE__);
		unregister_chrdev(major, "hello");
		return -1;
	}

	device_create(hello_class, NULL, MKDEV(major, 0), NULL, "hello_01"); /* /dev/hello_01 */

	return 0;
}
- 1
- 2
- 3
- 4
- 5
- 6
- 7
- 8
- 9
- 10
- 11
- 12
- 13
- 14
- 15
- 16
- 17
- 18
- 19
- 20
- 21
- 22
- 23
- 24
- 25
驱动程序模块卸载函数hello_exit
这个函数也没啥好说的,代码如下:
static void __exit hello_exit(void)
{
	printk("%s %s line %d\n", __FILE__, __FUNCTION__, __LINE__);
	device_destroy(hello_class, MKDEV(major, 0));
	class_destroy(hello_class);

	//unregister_chrdev(major, "hello");
	cdev_del(&hello_cdev);
	unregister_chrdev_region(MKDEV(major,0), 1);
}
- 1
- 2
- 3
- 4
- 5
- 6
- 7
- 8
- 9
- 10
文件操作file_operations结构体hello_drv
/* 2. 定义自己的file_operations结构体                                              */
static struct file_operations hello_drv = {
	.owner	 = THIS_MODULE,
	.open    = hello_drv_open,
	.read    = hello_drv_read,
	.write   = hello_drv_write,
	.release = hello_drv_close,
};
- 1
- 2
- 3
- 4
- 5
- 6
- 7
- 8
如果看了博文:
http://iyenn.com/rec/1709451.html
中关于函数cdev_init()的介绍里的内容,就很清楚这个结构体的作用了,实际上这个结构体中就是存储了模块信息和驱动程序的底层操作函数。【为什么可以称为设备结构体?因为设备最终在Linux系统中被抽象为设备文件,而file_operations正是记录了这个设备文件能有的操作对应的是哪些函数。】
关于这个结构体的第1个成员owner的介绍,见:
http://iyenn.com/rec/1709537.html
设备文件操作函数之打开函数hello_drv_open
源码如下:
static int hello_drv_open (struct inode *node, struct file *file)
{
	printk("%s %s line %d\n", __FILE__, __FUNCTION__, __LINE__);
	return 0;
}
- 1
- 2
- 3
- 4
- 5
注意:结构体的file_operations的open成员函数的参数和返回值类型是已经定义好了的,这样内核函数open才能正确调用它。详情见 http://iyenn.com/rec/1709538.html
这里面的难点就是理解两个参数struct inode *node和 struct file *file,我在下面这篇博文中把这两个参数的来历和作用已经讲得非常清楚了:
Linux驱动程序中file_operations中定义的底层操作函数常用到的参数struct inode *node、struct file *file是怎么回事儿?
这里不再赘述了~
当系统函数open()打开这个设备的设备文件时,便会去调用这个hello_drv_open函数。
所以当测试函数运行下面的语句时:
fd = open("/dev/hello", O_RDWR);
- 1
系统内核日志中会通过函数printk增加相应的记录。可以用命令:dmesg查看内核日志。关于如何让printk函数的日志打印输出到控制台,可以参看我的另一篇博文 http://iyenn.com/rec/1709448.html
设备文件操作函数之读函数hello_drv_read
static ssize_t hello_drv_read (struct file *file, char __user *buf, size_t size, loff_t *offset)
{
	int err;
	printk("%s %s line %d\n", __FILE__, __FUNCTION__, __LINE__);
	err = copy_to_user(buf, kernel_buf, MIN(1024, size));
	return MIN(1024, size);
}
- 1
- 2
- 3
- 4
- 5
- 6
- 7
注意:结构体的file_operations的read成员函数的参数和返回值类型是已经定义好了的,这样内核函数read才能正确调用它。详情见 http://iyenn.com/rec/1709538.html
关于为什么函数体中不用函数strcpy()去对数组中的数据进行拷贝,而要用函数copy_to_user()请参考博文 http://iyenn.com/rec/1709534.html
在上层代码中,通过内核函数read()去调用这个函数,示例代码如下:
len = read(fd, buf, 1024);
- 1
函数体中实现了将内核态的数据拷贝到用户态提供的缓冲区 buf,拷贝的长度值为MIN(1024, size),并且把拷贝的长度值作为返回值返回,这样内核函数read也有返回值了。
设备文件操作函数之写函数hello_drv_write
static ssize_t hello_drv_write (struct file *file, const char __user *buf, size_t size, loff_t *offset)
{
	int err;
	printk("%s %s line %d\n", __FILE__, __FUNCTION__, __LINE__);
	// 从用户空间缓冲区复制数据到内核缓冲区kernel_buf
	err = copy_from_user(kernel_buf, buf, MIN(1024, size));
	return MIN(1024, size);
}
- 1
- 2
- 3
- 4
- 5
- 6
- 7
- 8
注意:结构体的file_operations的write成员函数的参数和返回值类型是已经定义好了的,这样内核函数write才能正确调用它。详情见 http://iyenn.com/rec/1709538.html
关于为什么函数体中不用函数strcpy()去对数组中的数据进行拷贝,而要用函数copy_from_user()请参考博文 http://iyenn.com/rec/1709534.html
在上层代码中,通过内核函数write()去调用这个函数,示例代码如下:
		len = strlen(argv[2]) + 1;
		len = len < 1024 ? len : 1024;
		write(fd, argv[2], len);
- 1
- 2
- 3
在这个代码中,把主函数运行时索引值为2的字符串参数写入到这个设备的缓冲区中。
函数体中实现了将系统函数write提供的内容写入到内核缓冲区kernel_buf中,写入的最大允许字节数为1024字节,并且把最终写入的长度值为返回值返回,这样系统函数write也有了返回值。
设备文件操作函数之释放函数hello_drv_close
static int hello_drv_close (struct inode *node, struct file *file)
{
	printk("%s %s line %d\n", __FILE__, __FUNCTION__, __LINE__);
	return 0;
}
- 1
- 2
- 3
- 4
- 5
注意:结构体的file_operations的release成员函数的参数和返回值类型是已经定义好了的,这样内核函数close才能正确调用它。详情见 http://iyenn.com/rec/1709538.html
在上层代码中,通过内核函数close()去调用这个函数,示例代码如下:
close(fd);
- 1
由于这里只是个简单的例子,所以在hello_drv_close的函数体中没有执行什么实际的操作。
测试程序源码分析
上面已经把驱动程序的源码分析完了,当我们把驱动程序编译成模块,并加载后,就在系统目录/dev/下生成了相应的设备文件,我们通过这个设备文件就可以使用这个驱动序操作这个设备了。
以下是简单的使用示例代码:
#include \n" , argv[0]);
printf(" %s -r\n", argv[0]);
return -1;
}
/* 2. 打开文件 */
fd = open("/dev/hello_01", O_RDWR);
if (fd == -1)
{
printf("can not open file /dev/hello_01\n");
return -1;
}
/* 3. 写文件或读文件 */
if ((0 == strcmp(argv[1], "-w")) && (argc == 3))
{
len = strlen(argv[2]) + 1;
len = len < 1024 ? len : 1024;
write(fd, argv[2], len);
}
else
{
len = read(fd, buf, 1024);
buf[1023] = '\0';
printf("APP read : %s\n", buf);
}
close(fd);
return 0;
}
- 1
- 2
- 3
- 4
- 5
- 6
- 7
- 8
- 9
- 10
- 11
- 12
- 13
- 14
- 15
- 16
- 17
- 18
- 19
- 20
- 21
- 22
- 23
- 24
- 25
- 26
- 27
- 28
- 29
- 30
- 31
- 32
- 33
- 34
- 35
- 36
- 37
- 38
- 39
- 40
- 41
- 42
- 43
- 44
- 45
- 46
- 47
- 48
- 49
- 50
- 51
- 52
- 53
- 54
- 55
- 56
把上面的内容读完,再看这个代码就非常简单了,没啥好说的了。
用法的话在测试示例代码中也以注释的形式写出了:
/*
 * ./hello_drv_test -w abc
 * ./hello_drv_test -r
 */
- 1
- 2
- 3
- 4
./hello_drv_test -w abc表示写入字符串abc到位于内核空间的数组static char kernel_buf[1024];中。
./hello_drv_test -r 表示从内核空间的数组static char kernel_buf[1024];中读出1024个字节的数据。
利用Makefile交叉编译驱动模块和测试程序
关于Makefile文件的解读见下面这篇博文:
http://iyenn.com/rec/1709543.html
注意:官方提供的Makefile文件有点瑕疵,最好是用我修改过的,如下:
# 使用不同的Linux内核时, 一定要修改KERN_DIR,KERN_DIR代表已经配置、编译好的Linux源码的根目录

KERN_DIR = /home/book/100ask_imx6ull-sdk/Linux-4.9.88

all:
	make -C $(KERN_DIR) M=`pwd` modules
	$(CROSS_COMPILE)gcc -o hello_drv_test hello_drv_test.c

clean:
	make -C $(KERN_DIR) M=`pwd` clean
	rm -rf modules.order
	rm -f hello_drv_test

obj-m += hello_drv.o
- 1
- 2
- 3
- 4
- 5
- 6
- 7
- 8
- 9
- 10
- 11
- 12
- 13
- 14
写好了Makefile后就可以交叉编译了。
把源码复制到Ubuntu中~
cd /home/book/mycode/C0017_hellowrold_driver
- 1
然后 make
make
- 1
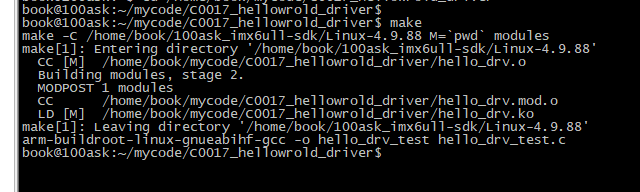
可见成功生成了我们需要的驱动程序模块文件hello_drv.ko和测试程序hello_drv_test
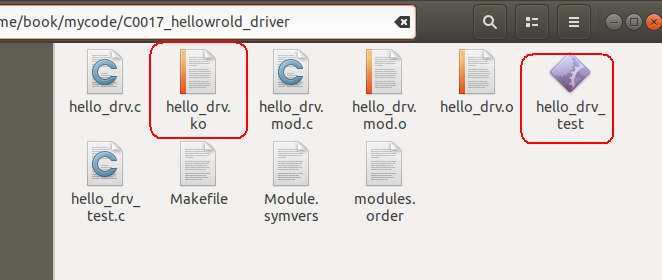
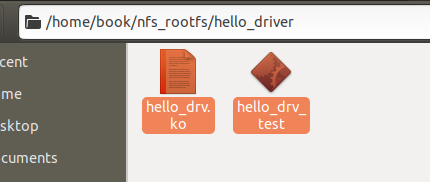
把红框中的两个文件复制到网络文件系统的目录中备,如下图所示:
程序上板测试
加载驱动模块文件
启动开发板,挂载网络文件系统…
进入网络文件目录
cd /mnt/hello_driver
- 1
先加载驱动程序模块hello_drv.ko
insmod hello_drv.ko
- 1

查看系统中是否增加了名字为hello的驱动
可以用下面这条命令看下系统中是否增加了名字为hello的驱动:
cat /proc/devices
- 1
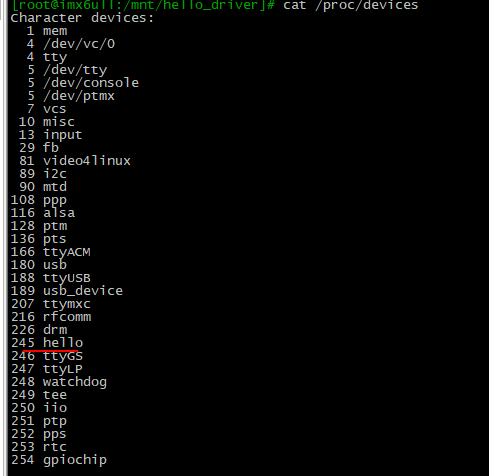
从上面我们可以看出,主设备号为245的驱动程序实例已经存在于系统中了。
这个名字来源于下面这条代码:
rc = alloc_chrdev_region(&devid, 0, 1, "hello");
- 1
查看系统中加载的模块文件
lsmod
- 1
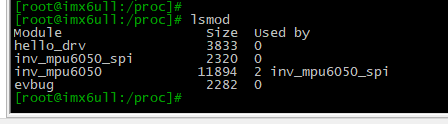
上图中的hello_drv表示系统中加载了一个文件名为hello_drv.ko的模块文件,注意这个模块文件中对应的驱动程序的名字不一定为hello_drv,具体的驱动程序的名字由上面这句代码指定:
rc = alloc_chrdev_region(&devid, 0, 1, "hello");
- 1
查看设备文件的属性
用ls命令查看设备文件hello_01的详细信息,命令如下:
ls /dev/hello_01 -l
- 1
输出信息如下:
 解解释如下:
这个命令的输出信息提供了文件 /dev/hello_01 的详细属性。以下是逐项解释:
crw------- 1 root root 245, 0 Jan 1 04:46 /dev/hello_01
- 1
输出内容解析:
-
文件类型和权限 (
crw-------):c:表示这是一个字符设备文件(character device),通常用于表示设备驱动程序接口,如终端、串口等。rw-------:文件权限部分,共分为三组,每组三位,表示所有者、所属组和其他用户的权限:rw-(所有者):表示所有者有读(r)和写(w)权限,但无执行(x)权限。---(所属组):表示所属组用户没有任何权限。---(其他用户):表示其他用户没有任何权限。
-
硬链接数 (
1):- 表示有多少个硬链接指向这个文件。对于设备文件来说,通常是
1。
- 表示有多少个硬链接指向这个文件。对于设备文件来说,通常是
-
所有者 (
root):- 这个文件的所有者是用户
root。
- 这个文件的所有者是用户
-
所属组 (
root):- 这个文件的所属组是用户组
root。
- 这个文件的所属组是用户组
-
设备号 (
245, 0):- 设备号分为两个部分,用逗号分隔:
- 主设备号(
245):标识设备的类型或驱动程序。主设备号由内核分配,用于指向设备的驱动程序。 - 次设备号(
0):标识具体的设备实例,用于区分同一驱动程序下的不同设备。
- 主设备号(
- 设备号分为两个部分,用逗号分隔:
-
最后修改时间 (
Jan 1 04:46):- 表示文件的最后修改时间,包括月、日、时间。
- 在这里是 1 月 1 日,04:46。
-
文件名 (
/dev/hello_01):- 表示设备文件的名称和路径。
执行测试程序
我们先向驱动程序中的数组kernel_buf中写入字符串“SuWenhaoloveWanghong”
./hello_drv_test -w SuWenhaoloveWanghong
- 1
然后再读出驱动程序中的数组kernel_buf中的内容:
./hello_drv_test -r
- 1

测试成功!
卸载驱动程序
rmmod hello_drv
- 1
执行完这条命令,再执行命令:
lsmod
- 1
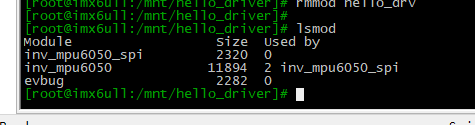
发现没有了对应的驱动程序。
查看printk向内核日志中输出的打印信息
dmesg
- 1
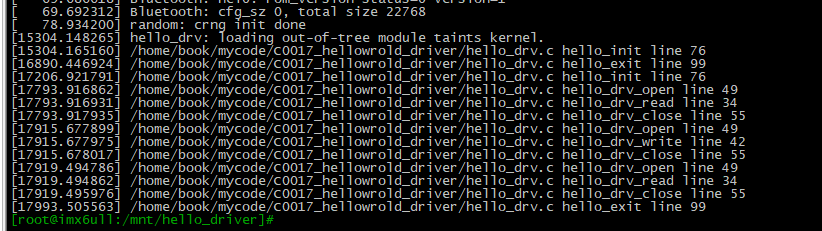
关于如何让printk函数的日志打印输出到控制台,可以参看我的另一篇博文 http://iyenn.com/rec/1709448.html
附完整源码
https://pan.baidu.com/s/1ODCAy8FLapd8tHGk5iR1JQ?pwd=pu55
【END】

 QQ群名片
QQ群名片

评论记录:
回复评论: