
目录
tslib的简介
tslib 是一个用于 Linux 系统中触摸屏输入设备的轻量级库,特别常用于嵌入式开发。它主要提供了一组工具和 API,用于对触摸屏输入事件进行校准、过滤和处理,使得触摸屏可以更精确、更稳定地与系统交互。
应用场景如下:
- 嵌入式 Linux 设备(如工业控制、车载系统、POS 终端)。
- 需要轻量级触摸屏处理库的开发环境。
- 与 Qt、SDL 等图形界面结合使用。
tslib的源码和make及make install后得到的文件下载
tslib-1.21的源码下载地址:
https://pan.baidu.com/s/1Yc1IiRqECn6SyJHI9-6Ksg?pwd=t4zj
附:tslib-1.21make及make install后得出的输入文件下载地址:
https://pan.baidu.com/s/1U6_JUJEiJLAdniZW5wLEoQ?pwd=x4w6
tslib的主要功能
-
校准 (Calibration)
提供ts_calibrate工具,可以对触摸屏进行几何校准,解决触摸位置和显示坐标不匹配的问题。 -
事件过滤 (Filtering)
提供了一系列的过滤器,比如去抖动、线性化等,保证输入事件的平滑性和准确性。 -
事件捕获 (Event Capture)
捕获触摸屏输入设备(如/dev/input/eventX或/dev/tsX)的触摸事件,并转化为标准格式供上层应用使用。 -
兼容性强
支持多种触摸屏控制器(例如 eGalax、Goodix 等)和多种 Linux 输入子系统。
tslib的工作原理
- 应用程序通过调用
tslib的 API 读取触摸事件。 - tslib 内部从触摸屏设备获取原始事件。
- 通过过滤器链对原始事件进行处理(如校准、去抖动)。
- 输出处理后的事件数据供应用程序使用。
tslib的核心组成部分
-
库文件
提供了核心的触摸屏数据处理和 API,比如ts_read()、ts_config()。 -
工具程序
ts_calibrate: 校准工具,用于生成校准数据。ts_test: 用于测试触摸屏事件和显示触摸点。ts_print: 打印触摸事件的工具。
-
配置文件
通常是/etc/ts.conf,可以配置过滤器、设备路径等。
tslib的框架和核心函数分析
tslib的框架
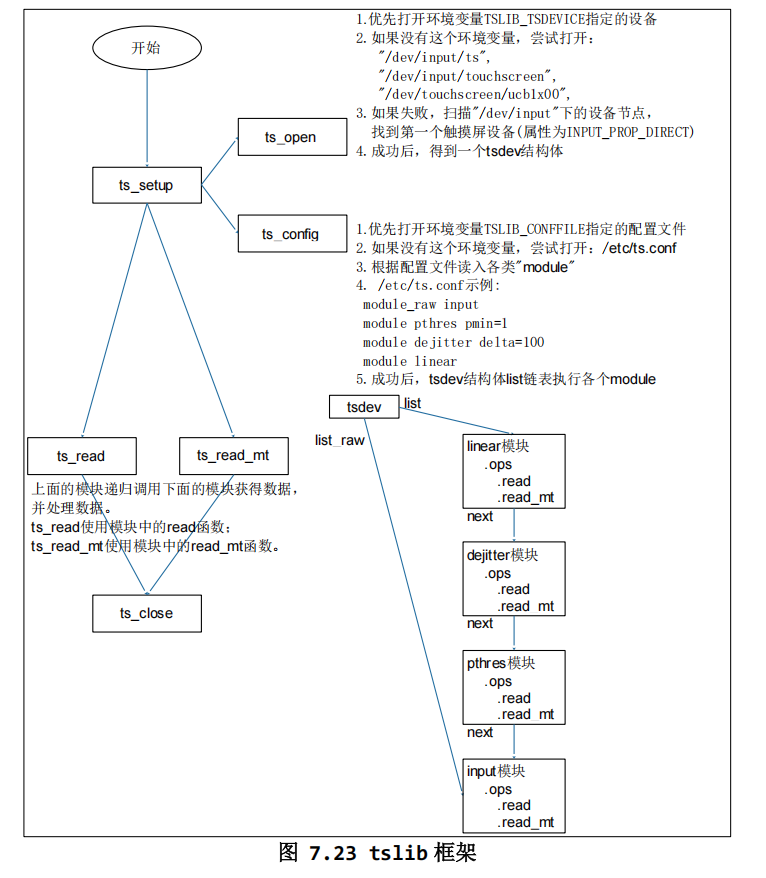
从上面的框架可以看出,tslib有三个核心函数,分别为ts_setup、ts_read、ts_read_mt。其中ts_setup依靠两个核心函数分别为ts_open和ts_config来实现。
tslib的核心函数ts_setup()的分析(对如何获取设备名和数据处理流程的分析)
函数ts_setup()自身的主要代码
我们打开源码\tslib-1.21\tests\ts_test.c,转到主函数,发现第134有如下代码:
ts = ts_setup(NULL, 0);
- 1
我们转到函数ts_setup()的定义,如下:
位置:\tslib-1.21\src\ts_setup.c
struct tsdev *ts_setup(const char *dev_name, int nonblock)
{
	const char * const *defname;
	struct tsdev *ts = NULL;
#if defined (__linux__)
	char *fname = NULL;
#endif /* __linux__ */

	dev_name = dev_name ? dev_name : getenv("TSLIB_TSDEVICE");

	if (dev_name != NULL) {
		ts = ts_open(dev_name, nonblock);
	} else {
		defname = &ts_name_default[0];
		while (*defname != NULL) {
			ts = ts_open(*defname, nonblock);
			if (ts != NULL)
				break;

			++defname;
		}
	}

#if defined (__linux__)
	if (!ts) {
		fname = scan_devices();
		if (!fname)
			return NULL;

		ts = ts_open(fname, nonblock);
		free(fname);
	}
#endif /* __linux__ */

	/* if detected try to configure it */
	if (ts && ts_config(ts) != 0) {
		ts_error("ts_config: %s\n", strerror(errno));
		ts_close(ts);
		return NULL;
	}

	return ts;
}

- 1
- 2
- 3
- 4
- 5
- 6
- 7
- 8
- 9
- 10
- 11
- 12
- 13
- 14
- 15
- 16
- 17
- 18
- 19
- 20
- 21
- 22
- 23
- 24
- 25
- 26
- 27
- 28
- 29
- 30
- 31
- 32
- 33
- 34
- 35
- 36
- 37
- 38
- 39
- 40
- 41
- 42
- 43
- 44
我们可以看到它有两个输入参数,一个是dev_name,另一个是nonblock。
dev_name显然是表示设备名。
nonblock表示读取数据的时候是阻塞方式还是非阻塞方式,当nonblock的值为1(或非 0)时,表示非阻塞模式,当nonblock的值为0时,为阻塞方式,所以在文件ts_test.c中,是以阻塞方式打开触摸屏设置的,因为给的参数值为0嘛,这意味着从触摸屏读取数据时,如果数据尚未准备好,进程会阻塞,直到数据可用。延伸阅读:Linux系统的阻塞方式和非阻塞方式是什么意思?
在这里,参数dev_name的值传递为NULL,即空指针,那么在函数ts_setup()里有下在这一行:
dev_name = dev_name ? dev_name : getenv("TSLIB_TSDEVICE");
- 1
可见,如果有值,则用它本身的值,如果值为NULL,那么 getenv("TSLIB_TSDEVICE") 的结果将作为 dev_name 的值。
所以源码\tslib-1.21\tests\ts_test.c里会去取 getenv("TSLIB_TSDEVICE") 的结果作为设备名。函数getenv()的意思是从环境变量里获取设备名,比如这里会从环境变量TSLIB_TSDEVICE里获取设备名。
那如果既没有传递设备名,也没有设置环境变,函数ts_setup()它会像下面这样做:
static const char * const ts_name_default[] = {
		"/dev/input/ts",
		"/dev/input/touchscreen",
		"/dev/touchscreen/ucb1x00",
		NULL
};
- 1
- 2
- 3
- 4
- 5
- 6
	if (dev_name != NULL) {
		ts = ts_open(dev_name, nonblock);
	} else {
		defname = &ts_name_default[0];
		while (*defname != NULL) {
			ts = ts_open(*defname, nonblock);
			if (ts != NULL)
				break;

			++defname;
		}
	}
- 1
- 2
- 3
- 4
- 5
- 6
- 7
- 8
- 9
- 10
- 11
- 12
即,它会去遍历字符串数组ts_name_default中的各个成员,发现第一个不为NULL值的成员并且能够打开成功的话,即用这个成员作为设备名。
如果到这里还没有成功打开设备,在定义了宏__linux__的情况下,它会去扫描系统中的设备,代码如下:
#if defined (__linux__)
	if (!ts) {
		fname = scan_devices();
		if (!fname)
			return NULL;

		ts = ts_open(fname, nonblock);
		free(fname);
	}
#endif /* __linux__ */
- 1
- 2
- 3
- 4
- 5
- 6
- 7
- 8
- 9
- 10
在scan_devices()函数中有下面的代码:
ndev = scandir(DEV_INPUT_EVENT, &namelist, is_event_device, alphasort);
- 1
DEV_INPUT_EVENT的宏定义如下:
#define DEV_INPUT_EVENT "/dev/input"
- 1
即它会去目录/dev/input下去扫描设备。扫描到的设备列表存放在ndev中,然后一个个去判断是设是触摸类型的设备,通过下面这句代码来判断:
		if ((ioctl(fd, EVIOCGPROP(sizeof(propbit)), propbit) < 0) ||
			!(propbit[BIT_WORD(INPUT_PROP_DIRECT)] &
				  BIT_MASK(INPUT_PROP_DIRECT)))
- 1
- 2
- 3
ioctl()函数会获取到设备信息,这段代码通过查询设备属性位 INPUT_PROP_DIRECT,判断设备是否为触摸屏类型设备。如果设备支持 INPUT_PROP_DIRECT 属性,则认为是直接输入设备(如触摸屏)。否则,它可能是间接输入设备或其他设备。具体的这段代码的详解这里就不展开了。
如果扫描到某个设备是触摸型输入设备,它就会去在tslib库的层面上利用函数ts_open()去打开它,具体的代码是下面的代码:
ts_setup()对ts_open()的调用
ts = ts_open(fname, nonblock);
- 1
可见,核心函数ts_setup()是依靠ts_open()函数实现的。另外,核心函数ts_setup()还要依靠函数ts_config(),那我们来看下是怎么依靠函数ts_config()的。
ts_setup()对ts_config()的调用
接下来的代码:
	/* if detected try to configure it */
	if (ts && ts_config(ts) != 0) {
		ts_error("ts_config: %s\n", strerror(errno));
		ts_close(ts);
		return NULL;
	}
- 1
- 2
- 3
- 4
- 5
- 6
可见,设备打开之后,就开始配置,函数ts_config()的定义如下:
int ts_config(struct tsdev *ts)
{
	return __ts_config(ts, NULL, NULL, NULL);
}
- 1
- 2
- 3
- 4
可见,它以设备打开获得的结构体ts为输入参数,并对这个结构体ts进行配置。具体的配置是在函数__ts_config()中进行的。函数__ts_config()以“__”开头,说明它是一个内部函数,供库或框架的内部代码调用。
函数__ts_config()的定义如下:
static int __ts_config(struct tsdev *ts, char **conffile_modules,
		       char **conffile_params, int *raw)
{
	char buf[BUF_SIZE], *p;
	FILE *f;
	int line = 0;
	int ret = 0;
	short strdup_allocated = 0;

	char *conffile;

	if ((conffile = getenv("TSLIB_CONFFILE")) == NULL) {
		conffile = strdup(TS_CONF);
		if (conffile) {
			strdup_allocated = 1;
		} else {
			ts_error("Couldn't find tslib config file: %s\n",
				 strerror(errno));
			return -1;
		}
	}

	f = fopen(conffile, "r");
	if (!f) {
		if (strdup_allocated)
			free(conffile);

		ts_error("Couldn't open tslib config file %s: %s\n",
			 conffile, strerror(errno));
		return -1;
	}

	buf[BUF_SIZE - 2] = '\0';
	while ((p = fgets(buf, BUF_SIZE, f)) != NULL) {
		char *e;
		char *tok;
		char *module_name;

		line++;

		/* Chomp */
		e = strchr(p, '\n');
		if (e)
			*e = '\0';

		/* Did we read a whole line? */
		if (buf[BUF_SIZE - 2] != '\0') {
			ts_error("%s: line %d too long\n", conffile, line);
			break;
		}

	#if !defined HAVE_STRSEP
		tok = ts_strsep(&p, " \t");
	#else
		tok = strsep(&p, " \t");
	#endif
		discard_null_tokens(&p, &tok);

		/* Ignore comments or blank lines.
		 * Note: strsep modifies p (see man strsep)
		 */
		if (p == NULL || *tok == '#')
			continue;

		/* Search for the option. */
		if (strcasecmp(tok, "module") == 0) {
		#if !defined HAVE_STRSEP
			module_name = ts_strsep(&p, " \t");
		#else
			module_name = strsep(&p, " \t");
		#endif
			discard_null_tokens(&p, &module_name);
			if (!conffile_modules) {
				ret = ts_load_module(ts, module_name, p);
			} else {
			#ifdef DEBUG
				printf("TSLIB_CONFFILE: module %s %s\n",
					module_name, p);
			#endif
				sprintf(conffile_modules[line], "%s", module_name);
				if (conffile_params)
					sprintf(conffile_params[line], "%s", p);
			}
		} else if (strcasecmp(tok, "module_raw") == 0) {
		#if !defined HAVE_STRSEP
			module_name = ts_strsep(&p, " \t");
		#else
			module_name = strsep(&p, " \t");
		#endif
			discard_null_tokens(&p, &module_name);
			if (!conffile_modules) {
				ret = ts_load_module_raw(ts, module_name, p);
			} else {
			#ifdef DEBUG
				printf("TSLIB_CONFFILE: module_raw %s %s\n",
					module_name, p);
			#endif
				sprintf(conffile_modules[line], "%s", module_name);
				if (conffile_params)
					sprintf(conffile_params[line], "%s", p);

				if (raw)
					raw[line] = 1;
			}
		} else {
			ts_error("%s: Unrecognised option %s:%d:%s\n",
				 conffile, line, tok);
			break;
		}
		if (ret != 0) {
			ts_error("Couldn't load module %s\n", module_name);
			break;
		}
	}

	if (ts->list_raw == NULL) {
		ts_error("No raw modules loaded.\n");
		ret = -1;
	}

	fclose(f);

	if (strdup_allocated)
		free(conffile);

	return ret;
}
- 1
- 2
- 3
- 4
- 5
- 6
- 7
- 8
- 9
- 10
- 11
- 12
- 13
- 14
- 15
- 16
- 17
- 18
- 19
- 20
- 21
- 22
- 23
- 24
- 25
- 26
- 27
- 28
- 29
- 30
- 31
- 32
- 33
- 34
- 35
- 36
- 37
- 38
- 39
- 40
- 41
- 42
- 43
- 44
- 45
- 46
- 47
- 48
- 49
- 50
- 51
- 52
- 53
- 54
- 55
- 56
- 57
- 58
- 59
- 60
- 61
- 62
- 63
- 64
- 65
- 66
- 67
- 68
- 69
- 70
- 71
- 72
- 73
- 74
- 75
- 76
- 77
- 78
- 79
- 80
- 81
- 82
- 83
- 84
- 85
- 86
- 87
- 88
- 89
- 90
- 91
- 92
- 93
- 94
- 95
- 96
- 97
- 98
- 99
- 100
- 101
- 102
- 103
- 104
- 105
- 106
- 107
- 108
- 109
- 110
- 111
- 112
- 113
- 114
- 115
- 116
- 117
- 118
- 119
- 120
- 121
- 122
- 123
- 124
- 125
- 126
- 127
从这个代码中我们可以看出,我们可以使用环境变量TSLIB_CONFFILE来确定使用哪个配置文件,相关代码如下:
if ((conffile = getenv("TSLIB_CONFFILE")) == NULL) {
- 1
如果环境变量TSLIB_CONFFILE为空,那么就会使用 strdup(TS_CONF)的返回值作为配置文件,这个配置文件其实就是/etc/ts.conf
这里,我们打开tslib源码里配的\tslib-1.21\etc\ts.conf"文件,看一下:
打开它后,把被注释的去掉,没有注释的提取出来,如下:
module_raw input
module pthres pmin=1
module dejitter delta=100
module linear
- 1
- 2
- 3
- 4
其中,input、pthres、dejitter、linear都是模块名。pthres会处理input得到的数据、 dejitter会处理pthres得到的数据,linear会处理dejitter得到的数据。具体的逻辑关系可以通过分析函数__ts_config()下面的代码得到:
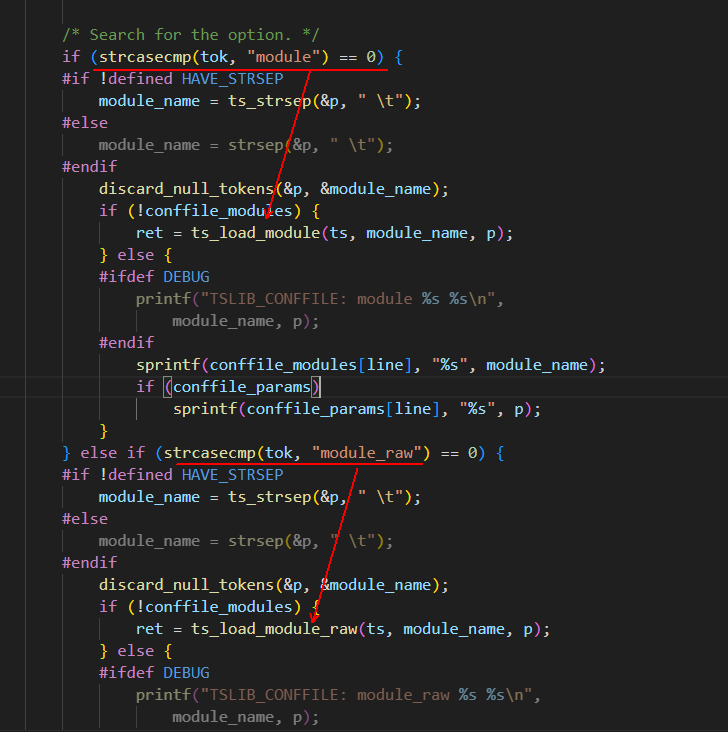
从这个关系我们可以看出,当模块类型为module_raw时,调用函数ts_load_module_raw(),当模块类型为module时,调用函数ts_load_module(),这两个被调用的函数分别如下:
int ts_load_module(struct tsdev *ts, const char *module, const char *params)
{
	return __ts_load_module(ts, module, params, 0);
}

int ts_load_module_raw(struct tsdev *ts, const char *module, const char *params)
{
	return __ts_load_module(ts, module, params, 1);
}
- 1
- 2
- 3
- 4
- 5
- 6
- 7
- 8
- 9
可见,它们其实都是调用的__ts_load_module(),只是最后一个参数不一样,一个最后为0,一个最后为1,再接着看__ts_load_module(),它与这个问题相关的核心代码在:
	if (raw)
		ret = __ts_attach_raw(ts, info);
	else
		ret = __ts_attach(ts, info);
- 1
- 2
- 3
- 4
这里面raw的值就是其最后一个参数的值,info表示模块信息。
所以我们需要看去函数__ts_attach_raw()和__ts_attach(),
int __ts_attach(struct tsdev *ts, struct tslib_module_info *info)
{
	info->dev = ts;
	info->next = ts->list;
	ts->list = info;

	return 0;
}

int __ts_attach_raw(struct tsdev *ts, struct tslib_module_info *info)
{
	struct tslib_module_info *next, *prev, *prev_list = ts->list_raw;

	info->dev = ts;
	info->next = prev_list;
	ts->list_raw = info;

	/*
	 * ensure the last item in the normal list now points to the
	 * top of the raw list.
	 */
	if (ts->list == NULL || ts->list == prev_list) {
		/* main list is empty, ensure it points here */
		ts->list = info;
		return 0;
	}

	for (next = ts->list, prev = next;
	     next != NULL && next != prev_list;
	     next = prev->next, prev = next);

	prev->next = info;
	return 0;
}
- 1
- 2
- 3
- 4
- 5
- 6
- 7
- 8
- 9
- 10
- 11
- 12
- 13
- 14
- 15
- 16
- 17
- 18
- 19
- 20
- 21
- 22
- 23
- 24
- 25
- 26
- 27
- 28
- 29
- 30
- 31
- 32
- 33
- 34
- 35
函数__ts_attach_raw()和__ts_attach()的输入参数都有一个关键结构体 tsdev:
struct tsdev {
	int fd;
	char *eventpath;
	struct tslib_module_info *list;
	/* points to position in 'list' where raw reads
	 * come from.  default is the position of the
	 * ts_read_raw module.
	 */
	struct tslib_module_info *list_raw;
	unsigned int res_x;
	unsigned int res_y;
	int rotation;
};
- 1
- 2
- 3
- 4
- 5
- 6
- 7
- 8
- 9
- 10
- 11
- 12
- 13
可见,这个结构体有两个与模块信息有关的成员,分别为list和list_raw。
当处理第一个模块时,即语句:
module_raw input
- 1
时,__ts_attach_raw()会把ts->list_raw的值设为input模块,同时把ts->list的第一个值也设为input模块,然后后面的几个模块配置语句:
module pthres pmin=1
module dejitter delta=100
module linear
- 1
- 2
- 3
由于不是raw类型,所以__ts_attach()去执行相应的链接操作,说白了就是把这些模块按顺序连接起来,形成一个链表,具体来说,在ts->list_raw中存储了module_raw模块的信,而在ts->list则把所有的模块以列表的形式存储起来,示意图如下:
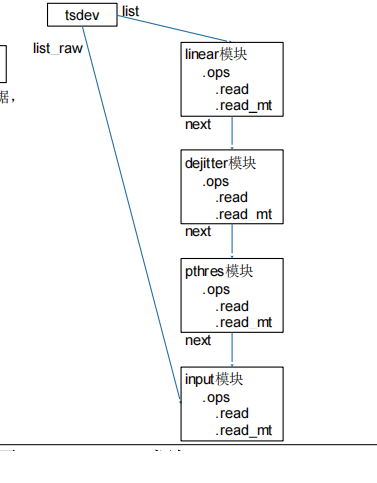
通过这个示意图可以看出,数据是一层一层地被处理和过滤,这就是tslib对数据的核心处理流程,即通过配置文件去配置对数据的处理流程。
tslib的核心函数ts_read()的分析
我们打开源码\tslib-1.21\tests\ts_test.c,转到主函数,发现第174有如下代码:
ret = ts_read(ts, &samp, 1);
- 1
我们进入函数ts_read(),来看下它的流程:
int ts_read(struct tsdev *ts, struct ts_sample *samp, int nr)
{
	int result;
#ifdef DEBUG
	int i;
#endif

	result = ts->list->ops->read(ts->list, samp, nr);
#ifdef DEBUG
	for (i = 0; i < result; i++) {
		fprintf(stderr, "TS_READ----> x = %d, y = %d, pressure = %d\n",
			samp->x, samp->y, samp->pressure);

		samp++;
	}
#endif
	return result;

}
- 1
- 2
- 3
- 4
- 5
- 6
- 7
- 8
- 9
- 10
- 11
- 12
- 13
- 14
- 15
- 16
- 17
- 18
- 19
关键语如下:
result = ts->list->ops->read(ts->list, samp, nr);
- 1
我们可以看到,它是调取linear模块的ops成员的read()成员函数
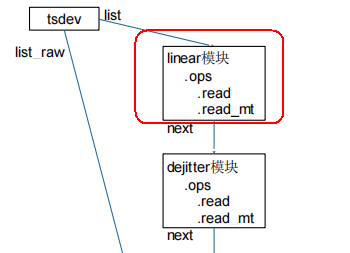
然后我们再看下ts->list->ops->read()函数的定义:
这个read()函数实际上是在文件\tslib-1.21\plugins\linear.c中定义的函数linear_read(),然后它作为结构体ops的成员函数,如下面的代码所示:
static const struct tslib_ops linear_ops = {
	.read		= linear_read,
	.read_mt	= linear_read_mt,
	.fini		= linear_fini,
};
- 1
- 2
- 3
- 4
- 5
在文件\tslib-1.21\plugins\linear.c的第55行,有对函数linear_read()定义的代码如下:
ret = info->next->ops->read(info->next, samp, nr_samples);
- 1
我们看到,它实际上是去调用下一个模块中成员ops中的read()函数,实际上就是dejitter模块中的read()函数,以此类推,最终是去调用模块input中的read()函数。
可以推测,模块input中的read()函数是直接去操作设备读取信息了,我们看下是不是这样,打开源文件:\tslib-1.21\plugins\input-raw.c,然后去看里面的函数ts_input_read(),发现关键代码如下:
ret = read(ts->fd, &ev, sizeof(struct input_event));
- 1
这个显然就是系统里的符合POSIX标准read()函数了, 关于这个函数的介绍,请参见我的另一篇博文 http://iyenn.com/rec/1709219.html
tslib的交叉编译
首先把tslib的源码放到目录/home/book/usedlib下:
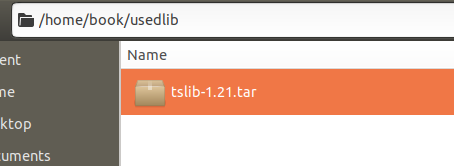
然后解压:
tar xjf tslib-1.21.tar
- 1
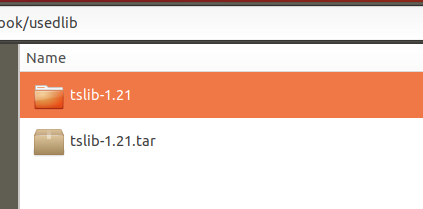
进入目录:
cd /home/book/usedlib/tslib-1.21
- 1
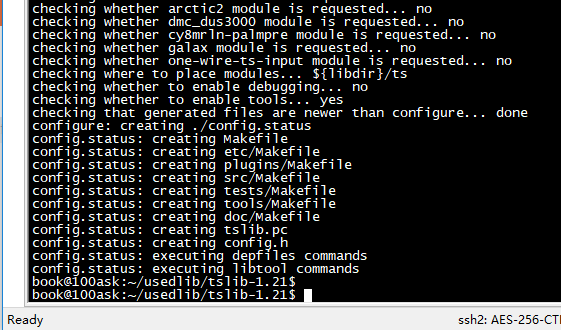
配置编译(生成Makefile文件):
./configure --host=arm-buildroot-linux-gnueabihf --prefix=/
- 1
注意:这里一定要根据自己系统中的交叉编译器的前缀来填,可用下面的命令来测试自己的交叉编译器的前缀:
arm-buildroot-linux-gnueabihf-gcc -v
- 1
如果有结果返回,则这里--host的值该为arm-buildroot-linux-gnueabihf
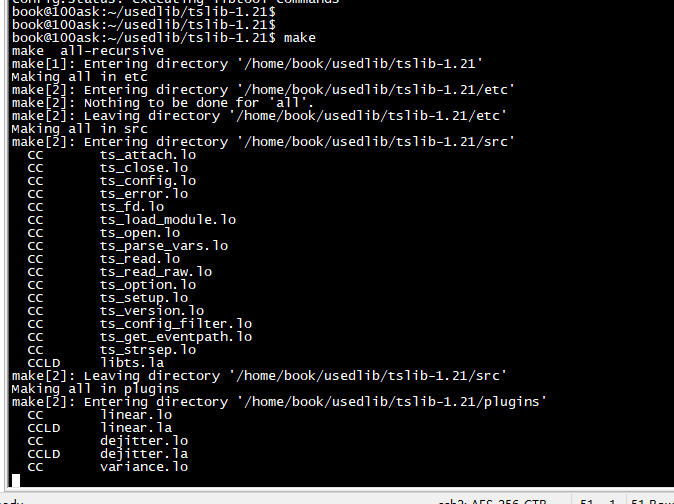
执行make命令:
make
- 1
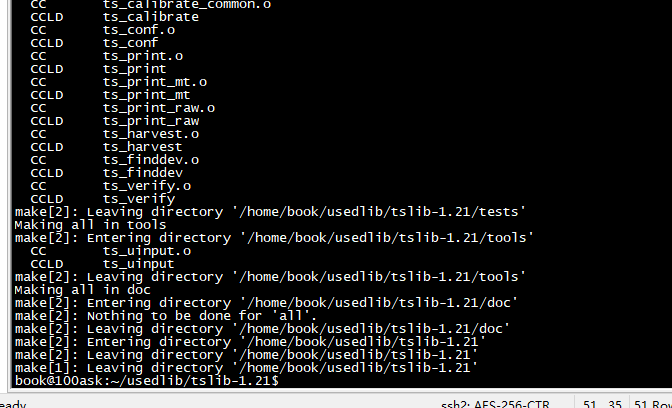
安装到当前目录下的子目录tmp中
make install DESTDIR=$PWD/tmp
- 1
运行之后就在tmp目录下生成了如下目录:
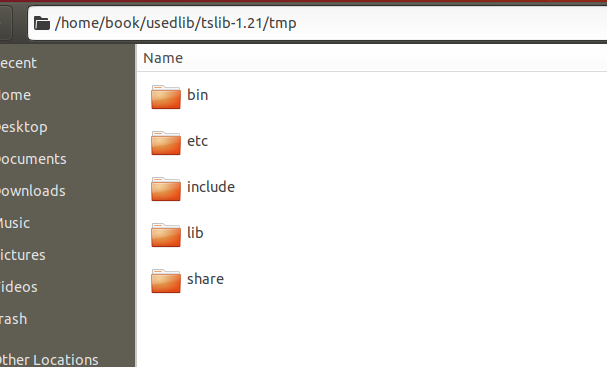
make install后得到的目录和文件
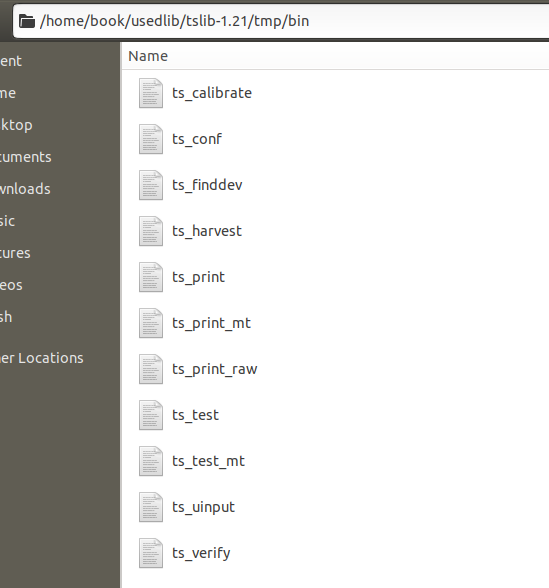
bin目录
其中bin目录中是生成的可执行程序,主要是一些测试实例:
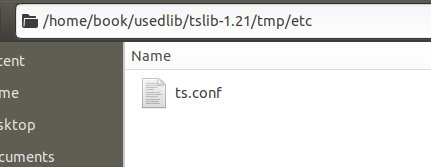
etc目录
etc目录里的文件自然就是配置文件了,因为我的前缀设置为根目录(--prefix=/),这个得复制到开发板上的linux系统下的etc目录下,因为根据上面的分析,函数ts_config()在运行时需要使用到这个文件。
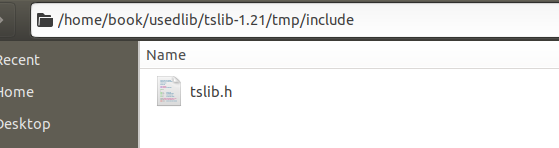
include目录
inlude目录里是头文件,如果你在开发别的项目时用到了这个库,那得在你的工程的include目录中放上这个头文件:
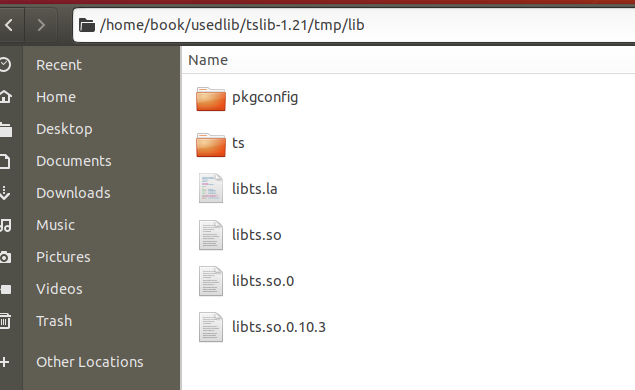
lib目录里就是库文件了,如果你在开发别的项目时用到了这个库,那链接器就需要用到这个库里面的相关文件。
这里,我们不妨把头文件放到gcc交叉链接编译器的include文件扫描路径中,免得以后每次的工程都去添加这个头文件。如何查看gcc交叉链接编译器的默认搜索目录,请看我的另一篇博文:
http://iyenn.com/rec/1709220.html
在这里,由于tslib库的头文件只有一个文件,所以我们可以直接放到下面这个编译器默认搜索的头文件目录中(注意:编译器默认不会搜索头文件目录的子目录,所以如果头文件有很多文件并装于一个目录中,请不要像下面这样搞,否则会搜索不到,详情见 http://iyenn.com/rec/1709220.html):
/home/book/100ask_imx6ull-sdk/ToolChain/arm-buildroot-linux-gnueabihf_sdk-buildroot/arm-buildroot-linux-gnueabihf/sysroot/usr/include
- 1
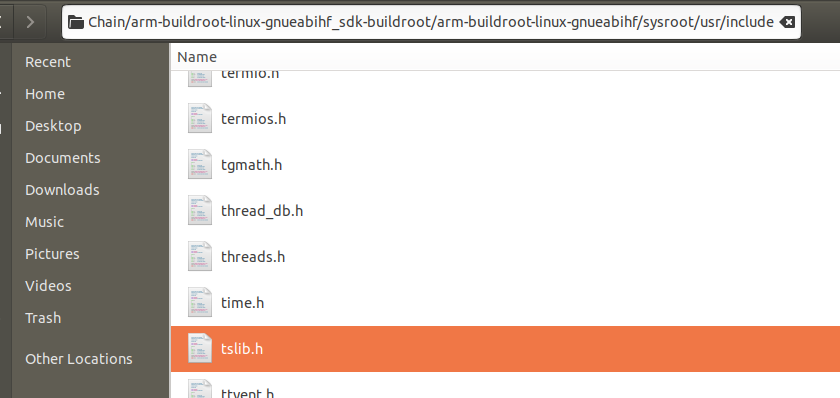
这样以后就不用每次编译工程时都在工程的include目录中去添加头文件了。
lib目录
在这里,我们首先要看下我们生成的二进制可执行文件或动态库是否是适用于ARM架构的,因为如果你前边的编译器前缀填错了,它并不会报错,而会去用系统中其它的编译器,比如×86架构的编译器。
运行下面的命令去读取ELF文件的header信息:
readelf -h /home/book/usedlib/tslib-1.21/tmp/bin/ts_test_mt
- 1
运行结果如下:
ELF Header:
  Magic:   7f 45 4c 46 01 01 01 00 00 00 00 00 00 00 00 00
  Class:                             ELF32
  Data:                              2's complement, little endian
  Version:                           1 (current)
  OS/ABI:                            UNIX - System V
  ABI Version:                       0
  Type:                              EXEC (Executable file)
  Machine:                           ARM
  Version:                           0x1
  Entry point address:               0x1157c
  Start of program headers:          52 (bytes into file)
  Start of section headers:          29524 (bytes into file)
  Flags:                             0x5000400, Version5 EABI, hard-float ABI
  Size of this header:               52 (bytes)
  Size of program headers:           32 (bytes)
  Number of program headers:         9
  Size of section headers:           40 (bytes)
  Number of section headers:         29
- 1
- 2
- 3
- 4
- 5
- 6
- 7
- 8
- 9
- 10
- 11
- 12
- 13
- 14
- 15
- 16
- 17
- 18
- 19
上面的Machine项显示这个文件的架构是ATM架构,这就说明下面这条命令中,参数 --host的设置是正确的。:
./configure --host=arm-buildroot-linux-gnueabihf --prefix=/
- 1
当然,也可以通过读动态链接库文件的heade信息来看架构,详情见:
http://iyenn.com/rec/1709221.html
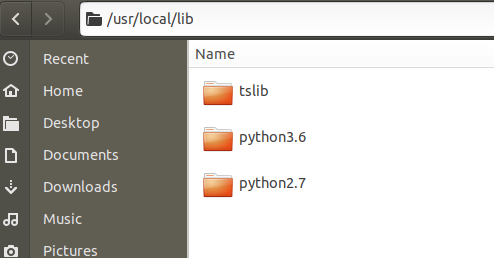
在这里,我们把它复制到目录/usr/local/lib中,并重命为tslib,这样编译器编译别的工程时就能用到这个库了,这里得能命令复制,因为目录/usr/local/lib不是能随便写文件的,运行下面的命令:
sudo cp -rfd /home/book/usedlib/tslib-1.21/tmp/lib /usr/local/lib/tslib
- 1
附make install后得到的文件的下载地址
附:tslib-1.21make及make install后得出的输入文件下载地址:
https://pan.baidu.com/s/1U6_JUJEiJLAdniZW5wLEoQ?pwd=x4w6
tslib库安装到开发板上并进行测试
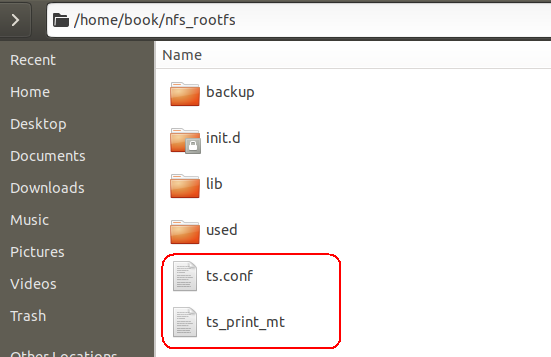
把文件
/home/book/usedlib/tslib-1.21/tmp/etc/ts.conf
/home/book/usedlib/tslib-1.21/tmp/bin/ts_print_mt
复制到NFS文件中:
打开开发板的串口终端→打开开发板→挂载网络文件:
mount -t nfs -o nolock,vers=3 192.168.5.11:/home/book/nfs_rootfs /mnt
- 1
复制ts.conf到开发板的ect目录:
cp /mnt/ts.conf /etc/
- 1
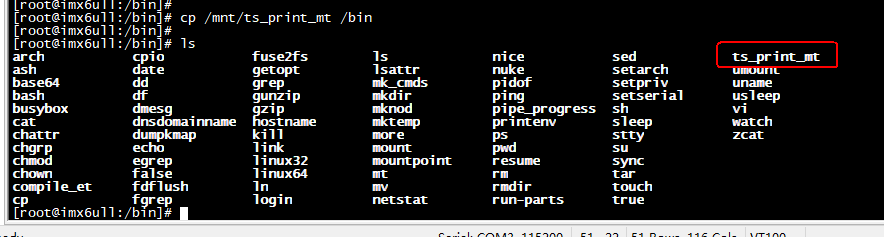
复制文件ts_print_mt到开发板的/bin目录下:
cp /mnt/ts_print_mt /bin
- 1
为文件ts_print_mt添加执行权限:
chmod +x ts_print_mt
- 1
由于ts_print_mt这个文件需要动态库支持,所以我们还需要把生成的动态库复制到对应目录下:
按下面的操作复制库,先把整个make install命令生成的目录tmp复制到NFS文件中:
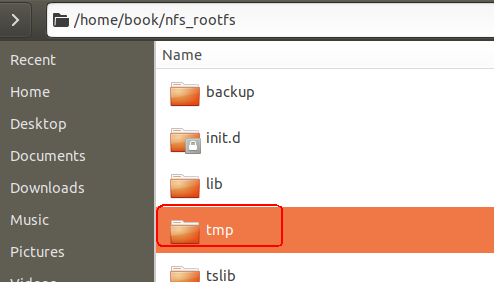
然后按下面的命令复制:
cp /mnt/tmp/lib/ts -rfd /lib
cp /mnt/tmp/lib/*so* -fd /lib
- 1
- 2
其中的参数r表示递归复制,f表示强制覆盖,d表示保留符号链接,而不是把符号链接所指向的文件进行复制。
复制完了运行可执行文件:
/bin/ts_print_mt
- 1

用手指在触摸屏上划一下:
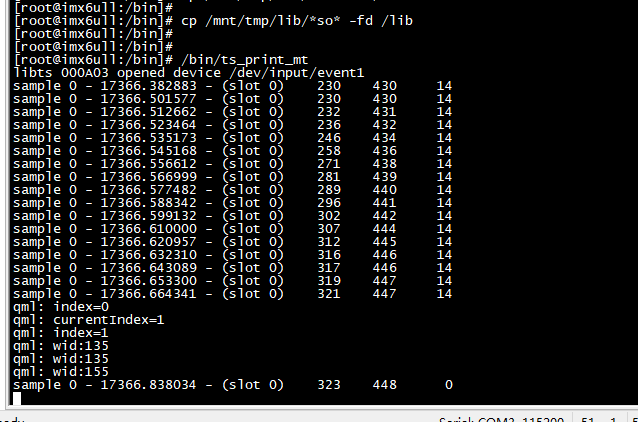
这样就完美运行了~
延伸阅读

 QQ群名片
QQ群名片

评论记录:
回复评论: