
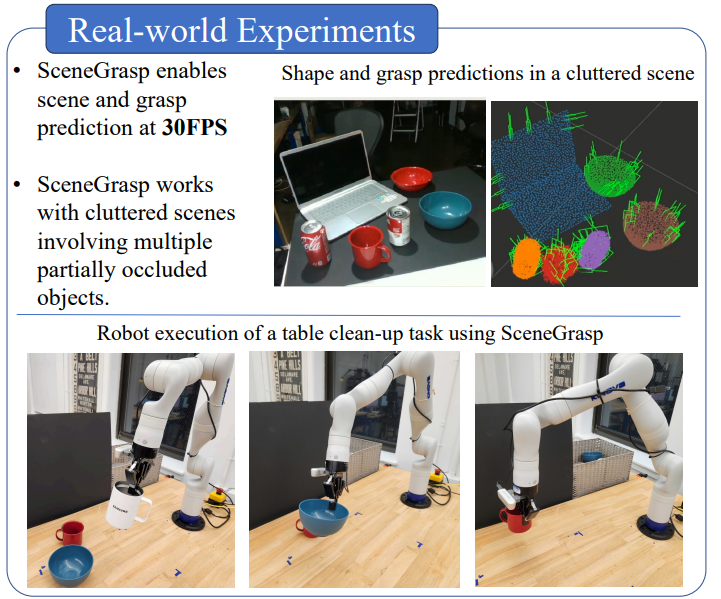
SceneGrasp 是机器人场景的多物体理解与抓取预测方法,通过单帧RGB-D 图像实现:
实时物体分类、三维重建、6D姿态估计和密集抓取预测,运行速度可达30FPS。
本文主要分享SceneGrasp的环境搭建,然后进行模型推理,看看效果。
开源地址:https://github.com/SamsungLabs/SceneGrasp
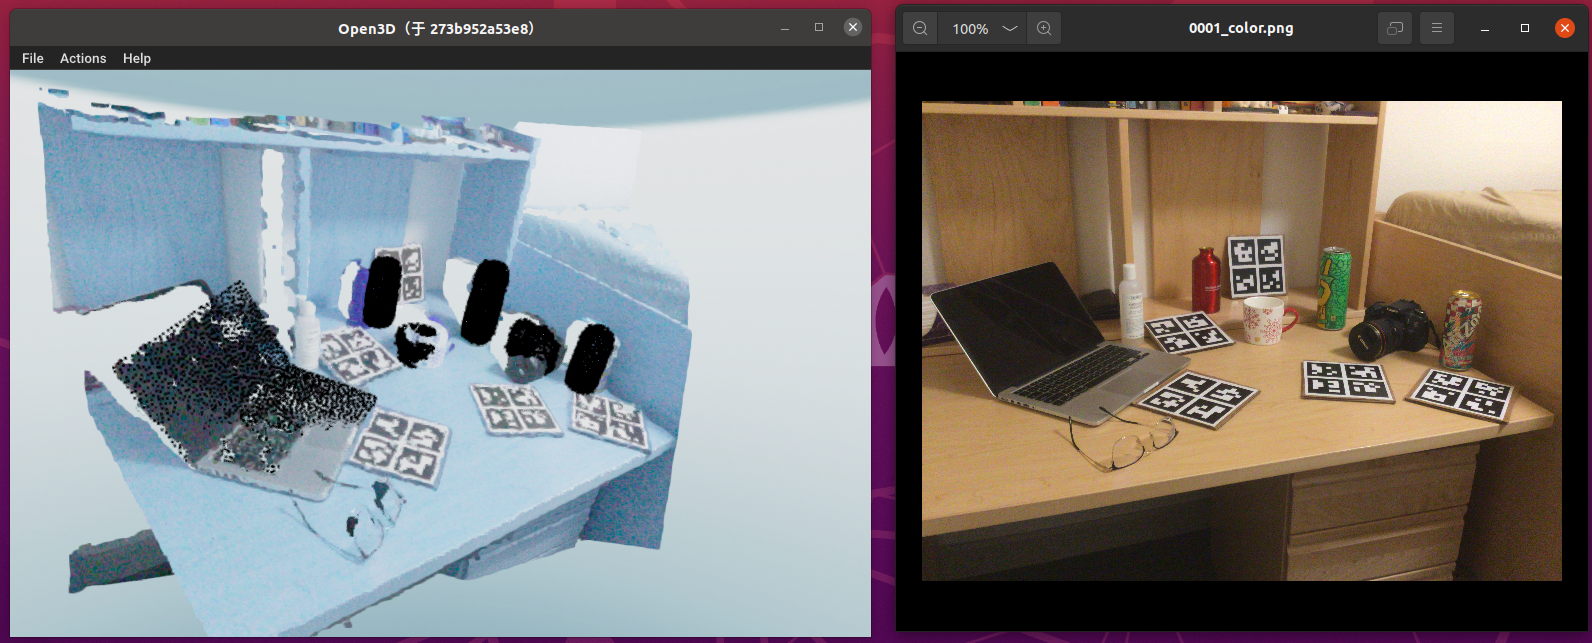
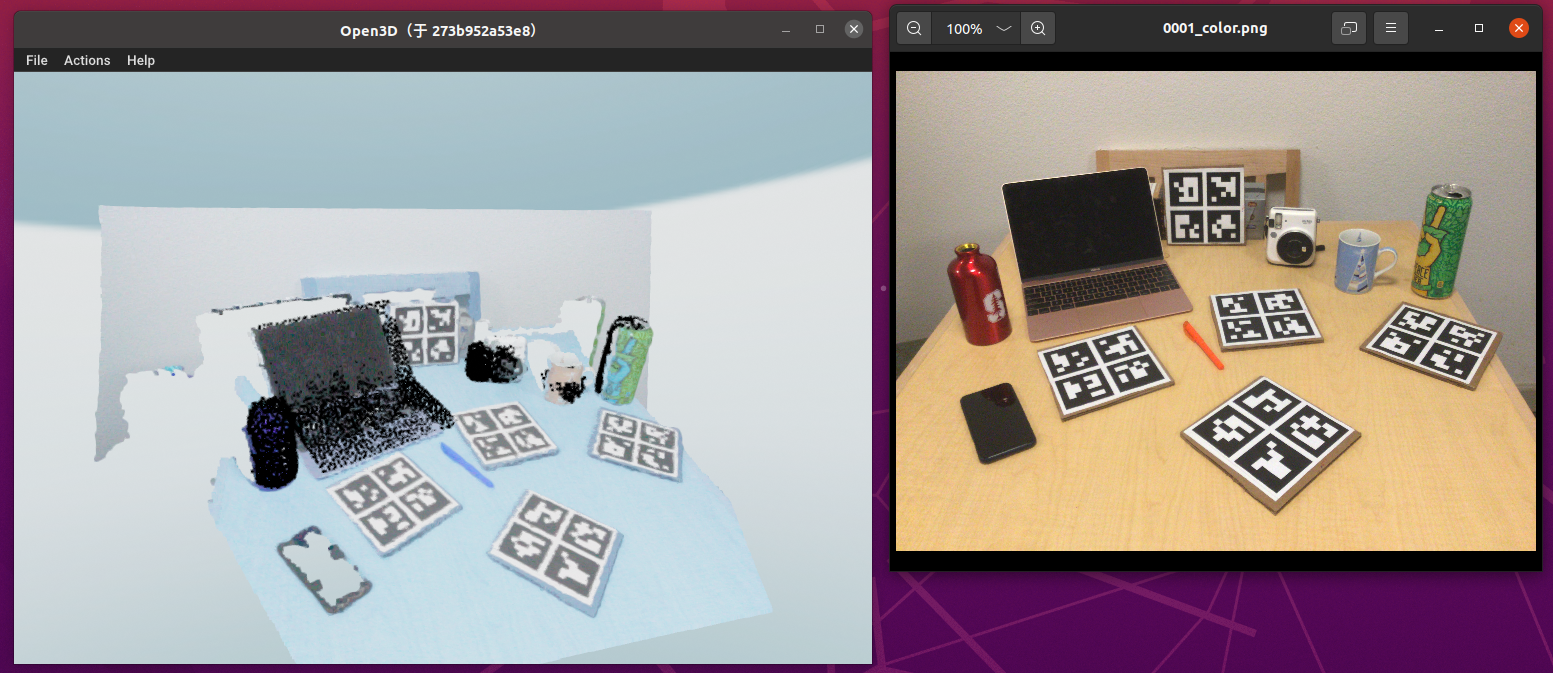
看看3D点云的效果(左侧),右侧是彩色图
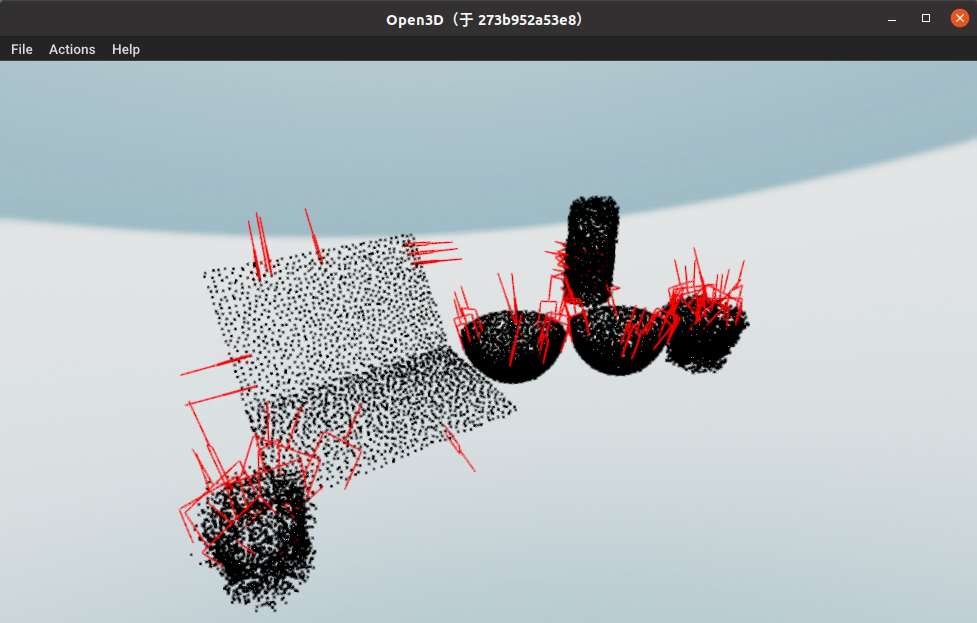
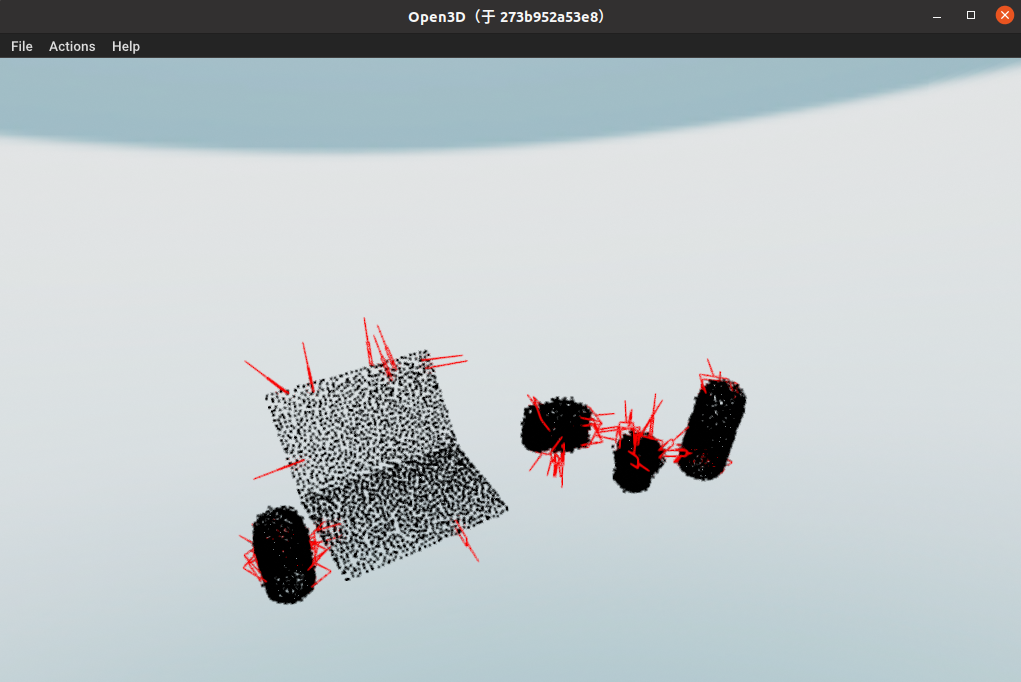
再看看物体重建的效果、抓取估计(红色框)
1、创建Conda环境,安装PyTorch和CUDA
首先创建一个Conda环境,名字为SceneGrasp,python版本为3.8
然后进入SceneGrasp环境
- conda create -n SceneGrasp python=3.8
- conda activate SceneGrasp
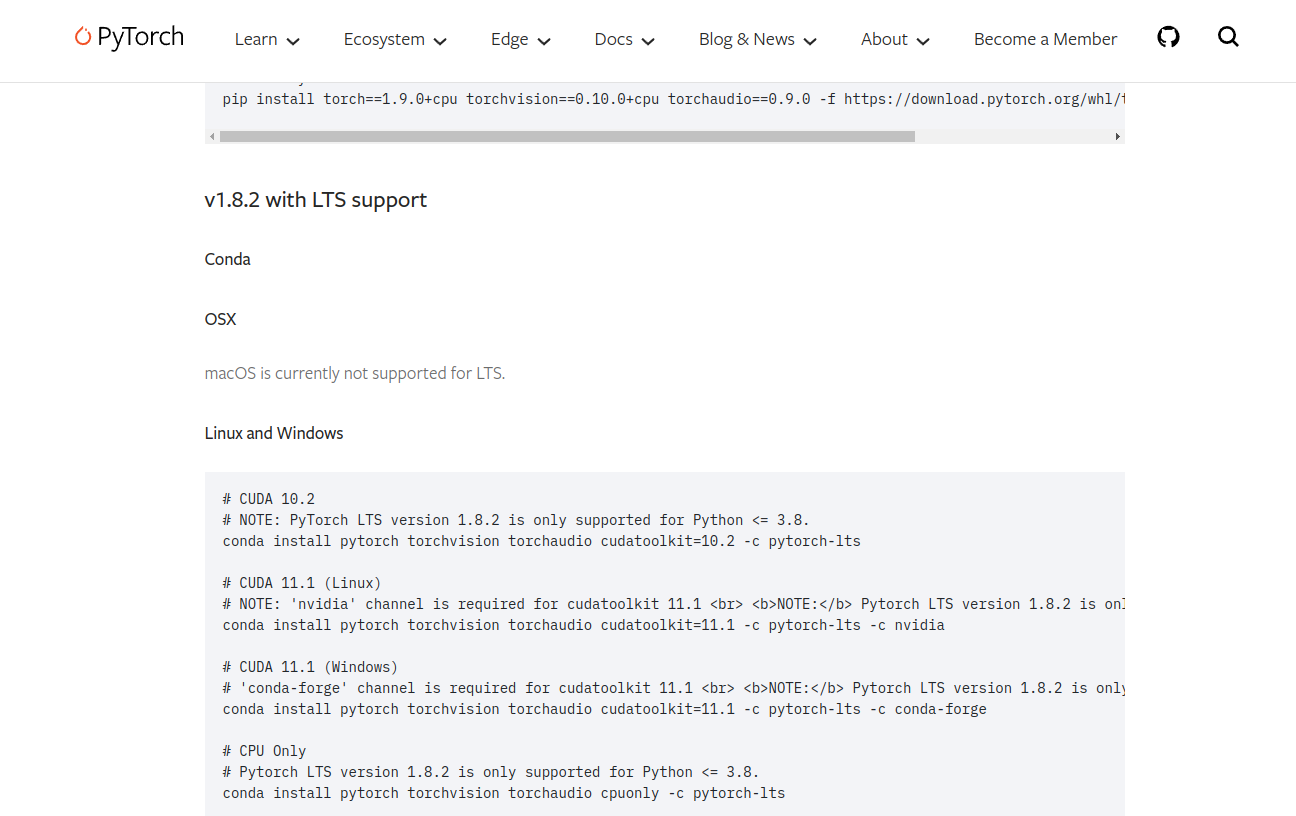
然后需要安装pytorch1.8.2,cudatoolkit=11.1
conda install pytorch torchvision torchaudio cudatoolkit=11.1 -c pytorch-lts -c nvidiapytorch1.8.2官网地址:Previous PyTorch Versions | PyTorch
2、安装SceneGrasp相关依赖库
下载SceneGrasp代码,然后进行SceneGrasp-master目录中
代码地址:https://github.com/SamsungLabs/SceneGrasp
编辑 requirements.txt,注释torch和torchvision等
- # pip install -r requirements.txt -i https://pypi.tuna.tsinghua.edu.cn/simple
- numpy
- matplotlib
- open3d
- scipy
- # torch
- # torchvision
- opencv-contrib-python==4.6.0.66
-
- # centersnap
- shortuuid
- boto3
- zstandard
- colour
- pytorch_lightning==0.7.5
- fvcore
- pygifsicle
- wandb
- imageio
- trimesh[easy]
- scikit-image
-
- # scenegrasp
- pyrender
- dominate

开始安装SceneGrasp相关依赖库
pip install -r requirements.txt -i https://pypi.tuna.tsinghua.edu.cn/simple3、安装PyTorch3d
来到PyTorch3d的官网地址:https://anaconda.org/pytorch3d/pytorch3d/files?page=11
选择pytorch3d-0.7.0-py38_cu111_pyt181.tar.bz2,然后下载
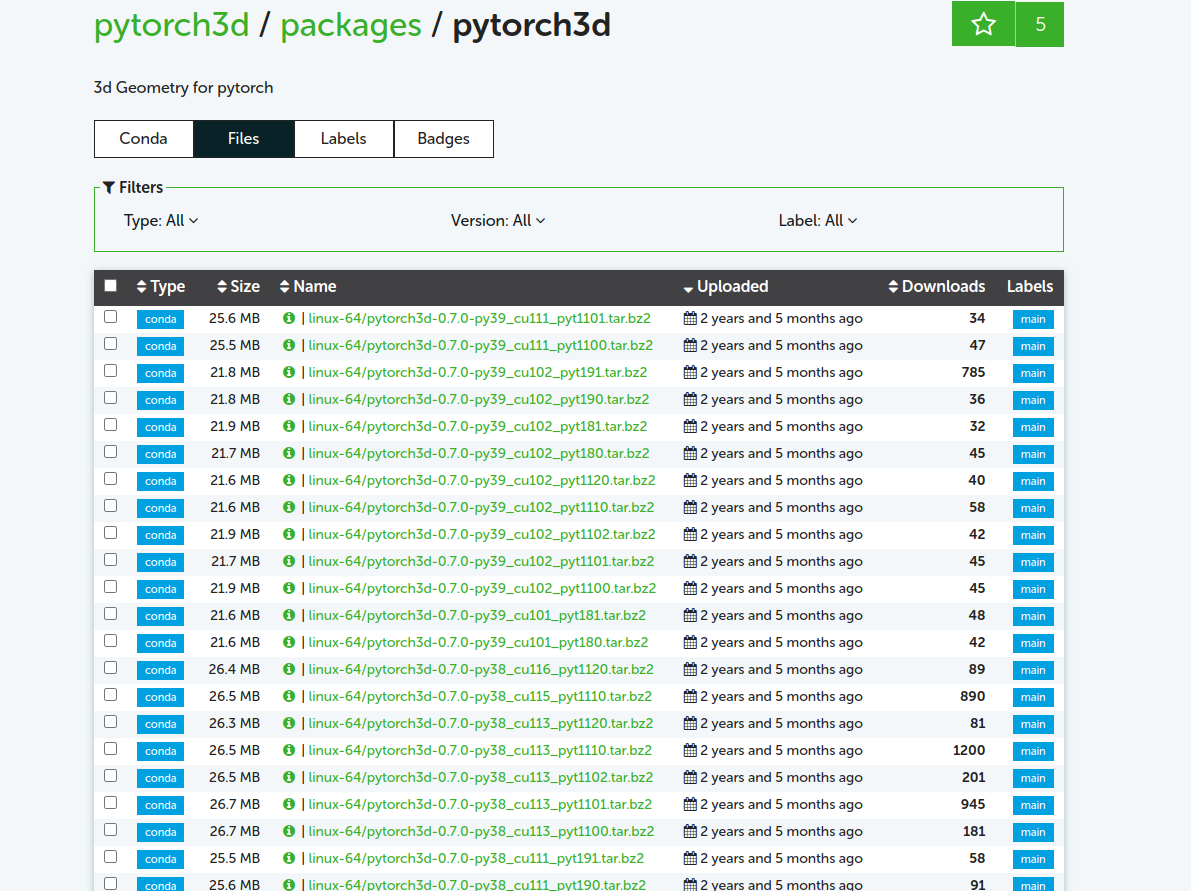
然后使用conda install安装就好啦
conda install pytorch3d-0.7.0-py38_cu111_pyt181.tar.bz2安装效果如下图所示:

4、指定版本安装numpy
这时如果直接进行模型推理,会报错的:
- AttributeError: module 'numpy' has no attribute 'object'.
- `np.object` was a deprecated alias for the builtin `object`. To avoid this error in existing code, use `object` by itself. Doing this will not modify any behavior and is safe.
- The aliases was originally deprecated in NumPy 1.20; for more details and guidance see the original release note at:
- https://numpy.org/devdocs/release/1.20.0-notes.html#deprecations
这个小问题啦,指定numpy版本1.21.3就可以啦
pip install numpy==1.21.3 -i https://pypi.tuna.tsinghua.edu.cn/simple
然后执行:
- export PYTHONPATH=${PYTHONPATH}:${PWD}
- WANDB_MODE="disabled"
5、模型推理
首先下载预训练的模型权重,解压后放到SceneGrasp-master目录中
https://github.com/SamsungLabs/SceneGrasp/releases/download/v1.0/checkpoints.zip
然后执行命令进行推理(官方默认的demo)
python scripts/demo.py下面是我添加了中文注释和修改了参数的demo
- import cv2
- import numpy as np
- import open3d as o3d
- from pathlib import Path
- import sys
- from common.utils.nocs_utils import load_depth
- from common.utils.misc_utils import (
- convert_realsense_rgb_depth_to_o3d_pcl, # 将RealSense的RGB和深度图转换为Open3D点云
- get_o3d_pcd_from_np, # 将NumPy数组转换为Open3D点云
- get_scene_grasp_model_params, # 获取场景抓取模型的参数
- )
- from common.utils.scene_grasp_utils import (
- SceneGraspModel, # 场景抓取模型
- get_final_grasps_from_predictions_np, # 从预测中获取最终抓取点
- get_grasp_vis, # 获取抓取可视化
- )
-
-
- def get_demo_data_generator(demo_data_path):
- """
- 数据生成器,从给定路径加载RGB图像、深度图和相机内参。
- :param demo_data_path: 示例数据的路径
- :yield: RGB图像、深度图和相机内参
- """
- camera_k = np.loadtxt(demo_data_path / "camera_k.txt") # 加载相机内参矩阵
-
- for color_img_path in demo_data_path.rglob("*_color.png"): # 遍历所有颜色图像
- depth_img_path = color_img_path.parent / (
- color_img_path.stem.split("_")[0] + "_depth.png"
- )
- color_img = cv2.imread(str(color_img_path)) # 加载RGB图像
- depth_img = load_depth(str(depth_img_path)) # 加载深度图
- yield color_img, depth_img, camera_k # 返回生成器结果
-
-
- def main(hparams):
- """
- 主函数,加载抓取模型并处理示例数据。
- :param hparams: 模型的超参数
- """
- TOP_K = 10 # 选择前200个抓取点,可以通过贪心NMS改进
- # 加载模型
- print("Loading model from checkpoint: ", hparams.checkpoint)
- scene_grasp_model = SceneGraspModel(hparams) # 初始化场景抓取模型
-
- # 加载演示数据
- demo_data_path = Path("outreach/demo_data")
- data_generator = get_demo_data_generator(demo_data_path)
-
- for rgb, depth, camera_k in data_generator:
- print("------- Showing results ------------")
- pred_dp = scene_grasp_model.get_predictions(rgb, depth, camera_k) # 获取预测结果
- if pred_dp is None:
- print("No objects found.") # 如果没有检测到物体
- continue
-
- all_gripper_vis = [] # 存储所有抓取的可视化结果
- for pred_idx in range(pred_dp.get_len()): # 遍历每个预测
- (
- pred_grasp_poses_cam_final, # 抓取点的最终相机坐标系姿态
- pred_grasp_widths, # 抓取点宽度
- _,
- ) = get_final_grasps_from_predictions_np(
- pred_dp.scale_matrices[pred_idx][0, 0], # 缩放矩阵
- pred_dp.endpoints, # 预测端点
- pred_idx, # 当前预测索引
- pred_dp.pose_matrices[pred_idx], # 姿态矩阵
- TOP_K=TOP_K, # 前K个抓取点
- )
-
- # 为抓取点设置颜色,红色表示抓取点
- grasp_colors = np.ones((len(pred_grasp_widths), 3)) * [1, 0, 0]
- all_gripper_vis += [
- get_grasp_vis(
- pred_grasp_poses_cam_final, pred_grasp_widths, grasp_colors
- )
- ]
-
- # 获取预测的点云
- pred_pcls = pred_dp.get_camera_frame_pcls()
- pred_pcls_o3d = []
- for pred_pcl in pred_pcls: # 转换为Open3D点云
- pred_pcls_o3d.append(get_o3d_pcd_from_np(pred_pcl))
-
- # 将RGB和深度图转换为Open3D点云
- o3d_pcl = convert_realsense_rgb_depth_to_o3d_pcl(rgb, depth / 1000, camera_k)
-
- # 显示预测的形状
- print(">Showing predicted shapes:")
- o3d.visualization.draw( # type:ignore
- [o3d_pcl] + pred_pcls_o3d
- )
- # 显示预测的抓取点
- print(">Showing predicted grasps:")
- o3d.visualization.draw( # type:ignore
- pred_pcls_o3d + all_gripper_vis
- )
-
-
- if __name__ == "__main__":
- # 如果有命令行参数,获取参数列表
- args_list = None
- if len(sys.argv) > 1:
- args_list = sys.argv[1:]
- # 获取抓取模型参数
- hparams = get_scene_grasp_model_params(args_list)
- # 调用主函数
- main(hparams)
看看3D点云的效果(左侧),右侧是彩色图
再看看物体重建的效果、抓取估计(红色框)
补充:解一下SceneGrasp
相关文章推荐:
【机器人】Graspness 端到端抓取点估计 | 环境搭建 | 模型推理测试_graspness使用-CSDN博客
【机器人】Graspness 端到端 抓取点估计 | 论文解读_graspness discovery in clutters for fast and accur-CSDN博客
分享完成~
评论记录:
回复评论: