
RGB-D相机(Azure Kinect DK)RGB图、深度图的获取,配准与保存
前提:官方apt安装Azure Kinect 传感器 SDK
代码AcquiringImages将原始深度图转换到RGB摄像头坐标系下,得到的配准后的深度图,并将转换后的depth图,原始RGB图、原始IR图保存在本地,采集格式仿照TUM数据集,图片的命名格式为时间戳+.png后缀。
1.C++代码:
// C++
#include 
- 1
- 2
- 3
- 4
- 5
- 6
- 7
- 8
- 9
- 10
- 11
- 12
- 13
- 14
- 15
- 16
- 17
- 18
- 19
- 20
- 21
- 22
- 23
- 24
- 25
- 26
- 27
- 28
- 29
- 30
- 31
- 32
- 33
- 34
- 35
- 36
- 37
- 38
- 39
- 40
- 41
- 42
- 43
- 44
- 45
- 46
- 47
- 48
- 49
- 50
- 51
- 52
- 53
- 54
- 55
- 56
- 57
- 58
- 59
- 60
- 61
- 62
- 63
- 64
- 65
- 66
- 67
- 68
- 69
- 70
- 71
- 72
- 73
- 74
- 75
- 76
- 77
- 78
- 79
- 80
- 81
- 82
- 83
- 84
- 85
- 86
- 87
- 88
- 89
- 90
- 91
- 92
- 93
- 94
- 95
- 96
- 97
- 98
- 99
- 100
- 101
- 102
- 103
- 104
- 105
- 106
- 107
- 108
- 109
- 110
- 111
- 112
- 113
- 114
- 115
- 116
- 117
- 118
- 119
- 120
- 121
- 122
- 123
- 124
- 125
- 126
- 127
- 128
- 129
- 130
- 131
- 132
- 133
- 134
- 135
- 136
- 137
- 138
- 139
- 140
- 141
- 142
- 143
- 144
- 145
- 146
- 147
- 148
- 149
- 150
- 151
- 152
- 153
- 154
- 155
- 156
- 157
- 158
- 159
- 160
- 161
- 162
- 163
- 164
- 165
- 166
- 167
- 168
- 169
- 170
- 171
- 172
- 173
- 174
- 175
- 176
- 177
- 178
- 179
- 180
- 181
- 182
- 183
- 184
- 185
- 186
- 187
- 188
- 189
- 190
- 191
- 192
- 193
- 194
- 195
- 196
- 197
- 198
- 199
- 200
- 201
- 202
- 203
- 204
- 205
- 206
- 207
- 208
- 209
- 210
- 211
- 212
- 213
- 214
- 215
- 216
- 217
- 218
- 219
- 220
- 221
- 222
- 223
- 224
- 225
- 226
- 227
- 228
- 229
- 230
- 231
- 232
- 233
- 234
- 235
- 236
- 237
- 238
- 239
- 240
- 241
- 242
- 243
- 244
- 245
- 246
- 247
- 248
- 249
- 250
2. CMakeLists
# Enable C++11
set(CMAKE_CXX_FLAGS "-std=c++11")
set(CMAKE_CXX_STANDARD_REQUIRED TRUE)

# Define project name
project(AcquiringImages)

# Kinect DK相机
find_package(k4a REQUIRED)# 后面的target_link_libraries中用到了k4a::k4a
# Find OpenCV
find_package(OpenCV REQUIRED)

# Add includes
include_directories( ${OpenCV_INCLUDE_DIRS} )

# Declare the executable target built from your sources
add_executable(AcquiringImages main.cpp)

# Link your application with other libraries
target_link_libraries(AcquiringImages k4a::k4a ${OpenCV_LIBS})
- 1
- 2
- 3
- 4
- 5
- 6
- 7
- 8
- 9
- 10
- 11
- 12
- 13
- 14
- 15
- 16
- 17
- 18
- 19
- 20
3. 编译运行:
进入源码目录:
mkdir build

cd build

mkdir rgb depth ir//未创建rgb depth ir文件夹

cmake .. -GNinja

ninja

./AcquiringImages
- 1
- 2
- 3
- 4
- 5
- 6
- 7
- 8
- 9
- 10
- 11
- 12
- 13
闭终端或终止程序即可结束图像的采集。
结束图像采集后,将RGB图和深度图相关联:
进入源码目录:
cd build

python associate.py rgb.txt depth.txt > ./associations.txt
- 1
- 2
- 3
- 4
- 5
4. 采集示例
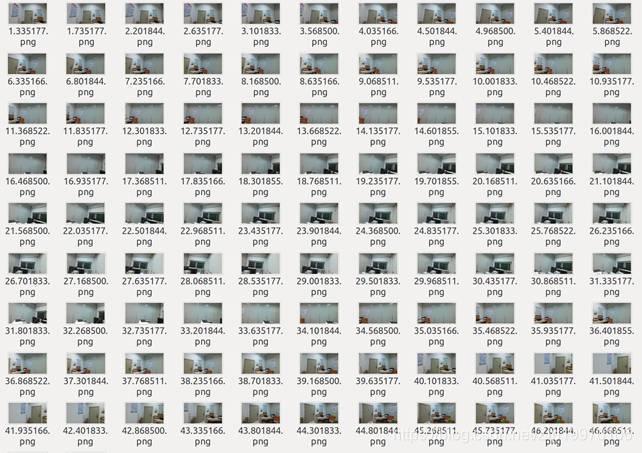
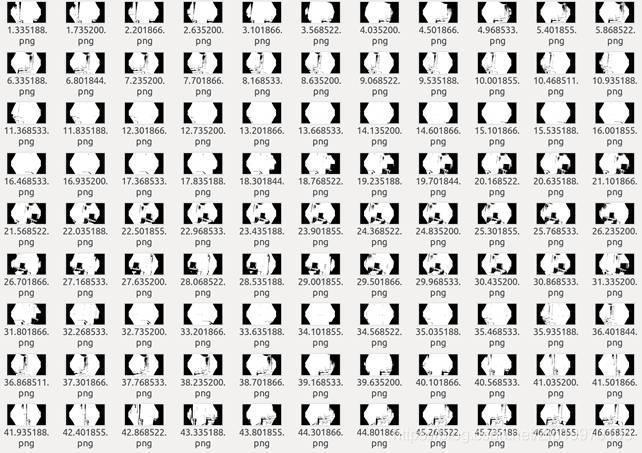
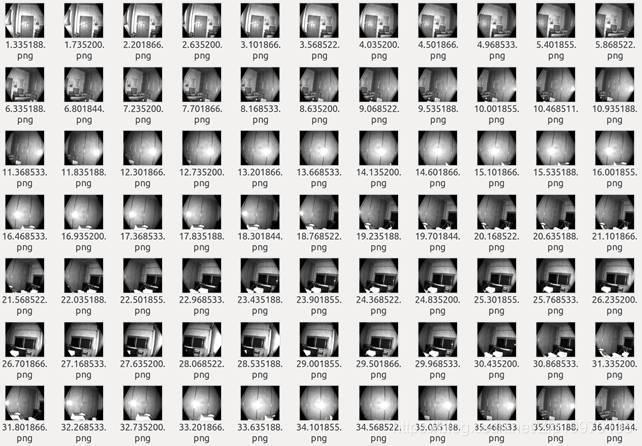
以下为409实验室采集的图片示例:
RGB图:
深度图:
IR图:
5. 参考
http://iyenn.com/index/link?url=https://cloud.tencent.com/developer/column/81192
评论记录:
回复评论: