
数字图像处理中,其数据类型一般为无符号类型,实际计算过程中会经常出现数据溢出现象,在无符号数据中如果其值出现小于0 则称之为向下溢出underflow,当计算结果大于其该数据类型能表示的最大值时称之为overflow时,比如 当为符号8位一个字节时,如果计算结果出现小于0 则称为underfow,计算结果大于0,称为overflow.
在实际的C/C++语言中,对于无符号类型,其出现反转时,将会按照循环处理反转重新计数。
比如一个 uchar类型 设Vxy 为10 则表达式((10 - 128) * 2 + 128) 中(10 - 128)会被重新认为是有符号,最终结果为-108,如果将其结果重新赋值给uchar将会发生反转,从0开始反转重新计算其结果为(-108+256)=148.
如果Vxy+255重新反转计算结果还是10.
- uchar Vxy = 10;
-
- uchar result = ((10 - 128) * 2 + 128);
- char result3 = (Vxy + 256);
-
- printf("result: %d
", result);
- printf("result2: %d
", result2);
- printf("result3: %d
", result3);
结果为:
- result: 148
- result3: 10
上述场景在opencv中称之为saturation casting,在图像算法结果中数值的结果溢出造成反转会对实际结果造成影响,比如会造成图像过亮影响实际计算结果。
opencv支持cv::saturate_cast<>(),来解决数据溢出问题,当数据出现underflow时,其结果不反转直接取该数据类型支持的最小值,当数据出现overflow时,结果直接去该数据类型最大值,比如:
- uchar Vxy = 10;
-
- uchar result2 = cv::saturate_cast
((Vxy - 128) * 2 + 128); - uchar result4 = cv::saturate_cast
((Vxy + 256)); -
- printf("result2: %d
", result2);
- printf("result4: %d
", result4);
结果:
- result2: 0
- result4: 255
saturate_cast在算法中都非常有用,比如改变图像的亮度和对比度,其公式如下:
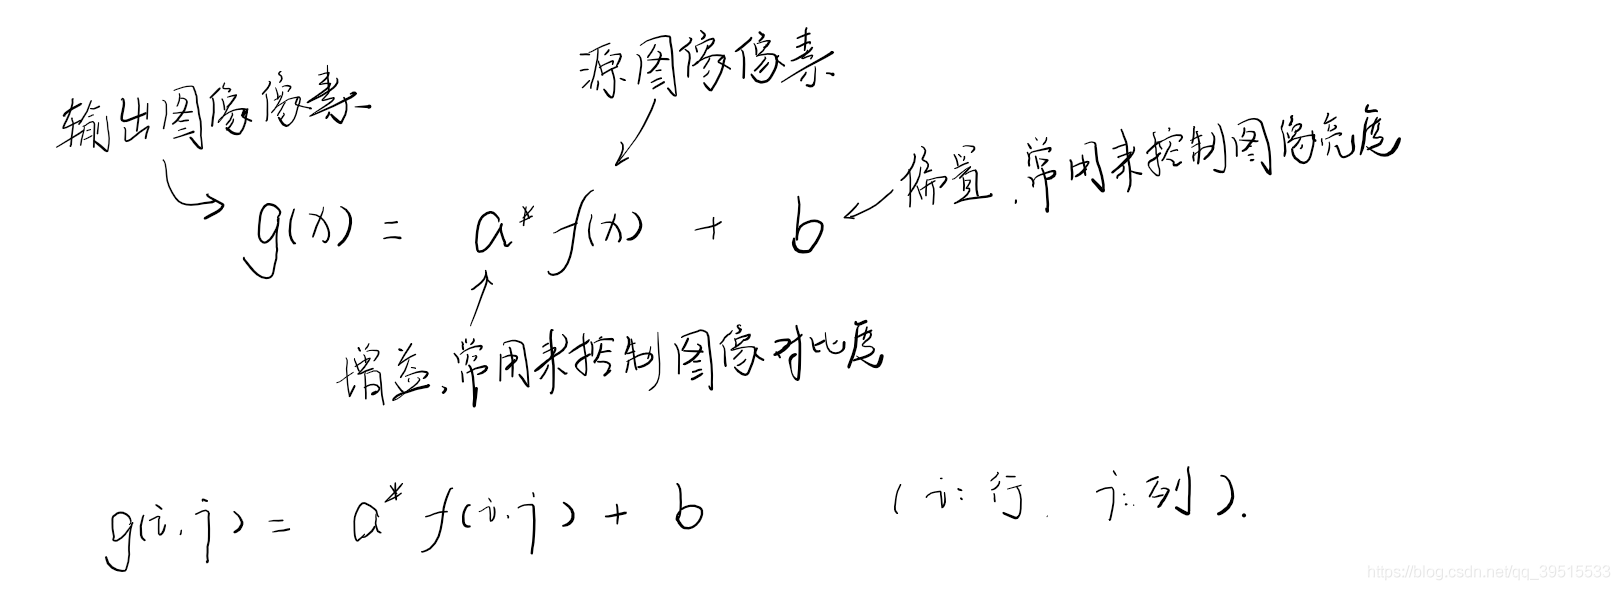
当a和b过大时很容易造成其计算结果溢出,造成图像过亮:
用例,使用lena图像,通过调整对比度和亮度:
- #include
- #include "opencv2/opencv.hpp"
- #include "opencv2/highgui/highgui.hpp"
- #include "opencv2/imgproc/imgproc.hpp"
-
- using namespace cv;
- using namespace std;
-
- int g_nContrastValue;
- int g_nBrightValue;
- Mat g_srcImage, g_dstImage;
-
- static void on_ContrastAndBright(int, void*) {
- namedWindow("【原始图像窗口】", 1);
- for (int y = 0; y < g_srcImage.rows; y++)
- {
- for (int x = 0; x < g_srcImage.cols; x++)
- {
- for (int c = 0; c < 3; c++)
- {
- g_dstImage.at
(y, x)[c] = saturate_cast((g_nContrastValue*0.01)*(g_srcImage.at(y, x)[c]) + g_nBrightValue); - }
- }
- }
- imshow("【原始图像窗口】", g_srcImage);
- imshow("【效果图窗口】", g_dstImage);
- }
-
- void main()
- {
- g_srcImage = imread("len_top.jpg");
- int alpha = 10;
- int gama = 10;
-
- //imshow("Src", g_srcImage);
- //waitKey(0);
- g_dstImage = Mat::zeros(g_srcImage.size(), g_srcImage.type());
-
- g_nContrastValue = 80;
- g_nBrightValue = 80;
- namedWindow("【效果图窗口】", 1);
- createTrackbar("对比度:", "【效果图窗口】", &g_nContrastValue, 300, on_ContrastAndBright);
- createTrackbar("亮 度:", "【效果图窗口】", &g_nBrightValue, 200, on_ContrastAndBright);
-
- on_ContrastAndBright(g_nContrastValue, 0);
- on_ContrastAndBright(g_nBrightValue, 0);
-
- while (char(waitKey(1)) != 'q') {}
- }

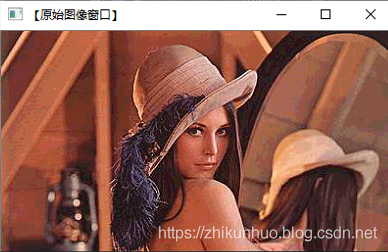
原图为:
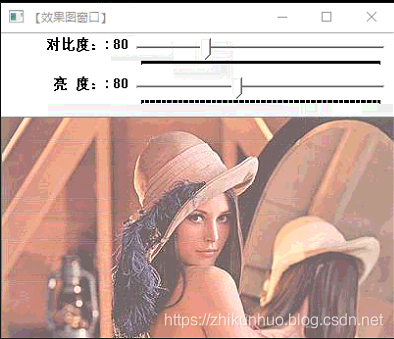
默认对比度和亮度都是80,其效果图:
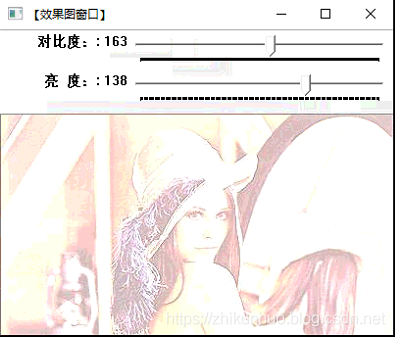
对比度为163和亮度为138时,可以看到很多部分都已经变白,其实很多数据有已经溢出,其值变为了255,达到了最亮
不使用 saturate_cast功能对数据溢出进行截取时,其用例为:
- #include
- #include "opencv2/opencv.hpp"
- #include "opencv2/highgui/highgui.hpp"
- #include "opencv2/imgproc/imgproc.hpp"
-
- using namespace cv;
- using namespace std;
-
- int g_nContrastValue;
- int g_nBrightValue;
- Mat g_srcImage, g_dstImage;
-
- static void on_ContrastAndBright(int, void*) {
- namedWindow("【原始图像窗口】", 1);
- for (int y = 0; y < g_srcImage.rows; y++)
- {
- for (int x = 0; x < g_srcImage.cols; x++)
- {
- for (int c = 0; c < 3; c++)
- {
- g_dstImage.at
(y, x)[c] = ((g_nContrastValue*0.01)*(g_srcImage.at(y, x)[c]) + g_nBrightValue); - }
- }
- }
- imshow("【原始图像窗口】", g_srcImage);
- imshow("【效果图窗口】", g_dstImage);
- }
-
- void main()
- {
- g_srcImage = imread("len_top.jpg");
- int alpha = 10;
- int gama = 10;
-
- //imshow("Src", g_srcImage);
- //waitKey(0);
- g_dstImage = Mat::zeros(g_srcImage.size(), g_srcImage.type());
-
- g_nContrastValue = 80;
- g_nBrightValue = 80;
- namedWindow("【效果图窗口】", 1);
- createTrackbar("对比度:", "【效果图窗口】", &g_nContrastValue, 300, on_ContrastAndBright);
- createTrackbar("亮 度:", "【效果图窗口】", &g_nBrightValue, 200, on_ContrastAndBright);
-
- on_ContrastAndBright(g_nContrastValue, 0);
- on_ContrastAndBright(g_nBrightValue, 0);
-
- while (char(waitKey(1)) != 'q') {}
- }
对比度为123和亮度为80时,其数据已经出现溢出,此时图形已经不对:
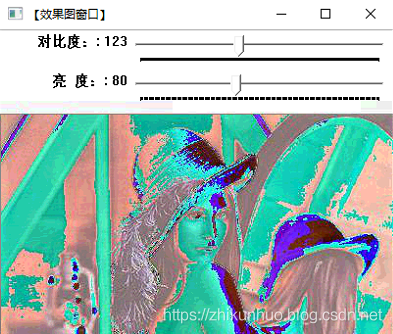
可以看到使用cv::saturate_cast<>()对数据进行截取,可以有效防止数据溢出造成图像显示失真问题
评论记录:
回复评论: