
FLUX 作为 AI 绘画界的新秀,最近火的不行:
FLUX.1 实测,堪比 Midjourney 的开源 AI 绘画模型,无需本地显卡,带你免费实战
社区给它的标签是:一个比 SD 更强的 AI 绘画模型。
不过根据猴哥的实测来看,FLUX 尽管在细节处理方面的功力了得,但在写实摄影还比不过 SD 的专业选手,而专业的背后是各种 LoRA 模型的加持。
仅过去一周,FLUX 版 LoRA 也出来了,比如 XLabs AI Realism 这款 LoRA,可以让你生成的图片更加写实。
今天就带大家实操一番,给你的 FLUX,装上 LoRA,让生图不再抽卡!
1. 环境准备
首先,git 下载 camenduru/ComfyUI 项目的 totoro4 分支:
git clone -b totoro4 https://github.com/camenduru/ComfyUI
cd ComfyUI
- 1
- 2
为了方便环境管理,我们新建一个虚拟环境:
conda create -p envs/flux python=3.10
conda activate envs/flux/
- 1
- 2
然后,新建 requirements.txt,填入如下环境依赖:
torchsde
einops
diffusers
accelerate
xformers==0.0.27
gradio==4.40.0
transformers
fastapi
- 1
- 2
- 3
- 4
- 5
- 6
- 7
- 8
一键安装:pip install -r requirements.txt,上述 xformers 依赖 2.3.1版本的torch。如果遇到如下报错:
libtorch_cuda.so: undefined symbol: ncclCommRegister
- 1
这是 PyTorch 和 NCCL 版本与 CUDA 版本不兼容的问题,建议重新使用 conda 重新安装对应 CUDA 版本的 Pytorch,比如我这里用的是 CUDA 12.1 的镜像:
# 安装指定版本:https://pytorch.org/get-started/previous-versions/
conda install pytorch==2.3.1 torchvision==0.18.1 torchaudio==2.3.1 pytorch-cuda=12.1 -c pytorch -c nvidia
- 1
- 2
2. 模型下载
Huggingface 这个仓库中,集成了 FLUX 底模和各种 LoRA 模型,我们可以按需下载。
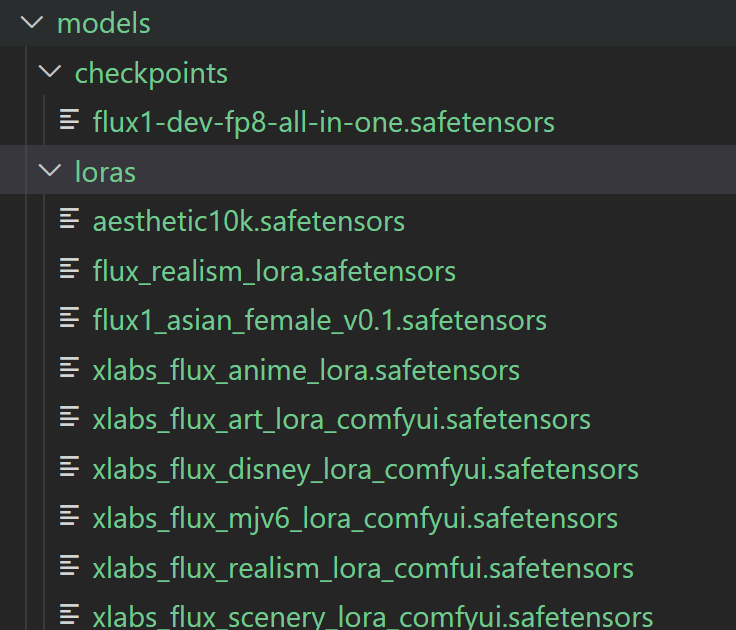
下载好的模型存放在根目录 models 文件夹下:
# 存放底模
mkdir -p models/checkpoints
# 存放 LoRA
mkdir -p models/loras
- 1
- 2
- 3
- 4
3. WebUI 部署
环境和模型准备好之后,我们可以编写代码,首先本地测试下加载 LoRA 模型的生成效果:
为方便展示,这里只贴出了核心实现,完整代码较长,感兴趣的小伙伴可以拉到文末自取。
lora_models = os.listdir('models/loras')
lora_models = [lora for lora in lora_models if not lora.startswith('flux1-dev')]
with torch.inference_mode():
unet, clip, vae = CheckpointLoaderSimple.load_checkpoint("flux1-dev-fp8-all-in-one.safetensors")
print('load model successfully')
@torch.inference_mode()
def generate(positive_prompt='a cat',
width=1024,
height=1024,
seed=0,
steps=20,
sampler_name="euler",
scheduler="simple",
guidance=3.5,
lora_strength_model=1.0,
lora_strength_clip=1.0,
lora_model="flux_realism_lora.safetensors"):
global unet, clip
if seed == 0:
seed = random.randint(0, 18446744073709551615)
unet_lora, clip_lora = LoraLoader.load_lora(unet, clip, lora_model, lora_strength_model, lora_strength_clip)
cond, pooled = clip_lora.encode_from_tokens(clip_lora.tokenize(positive_prompt), return_pooled=True)
cond = [[cond, {"pooled_output": pooled}]]
cond = FluxGuidance.append(cond, guidance)[0]
noise = RandomNoise.get_noise(seed)[0]
guider = BasicGuider.get_guider(unet_lora, cond)[0]
sampler = KSamplerSelect.get_sampler(sampler_name)[0]
sigmas = BasicScheduler.get_sigmas(unet_lora, scheduler, steps, 1.0)[0]
latent_image = EmptyLatentImage.generate(closestNumber(width, 16), closestNumber(height, 16))[0]
sample, sample_denoised = SamplerCustomAdvanced.sample(noise, guider, sampler, sigmas, latent_image)
decoded = VAEDecode.decode(vae, sample)[0].detach()
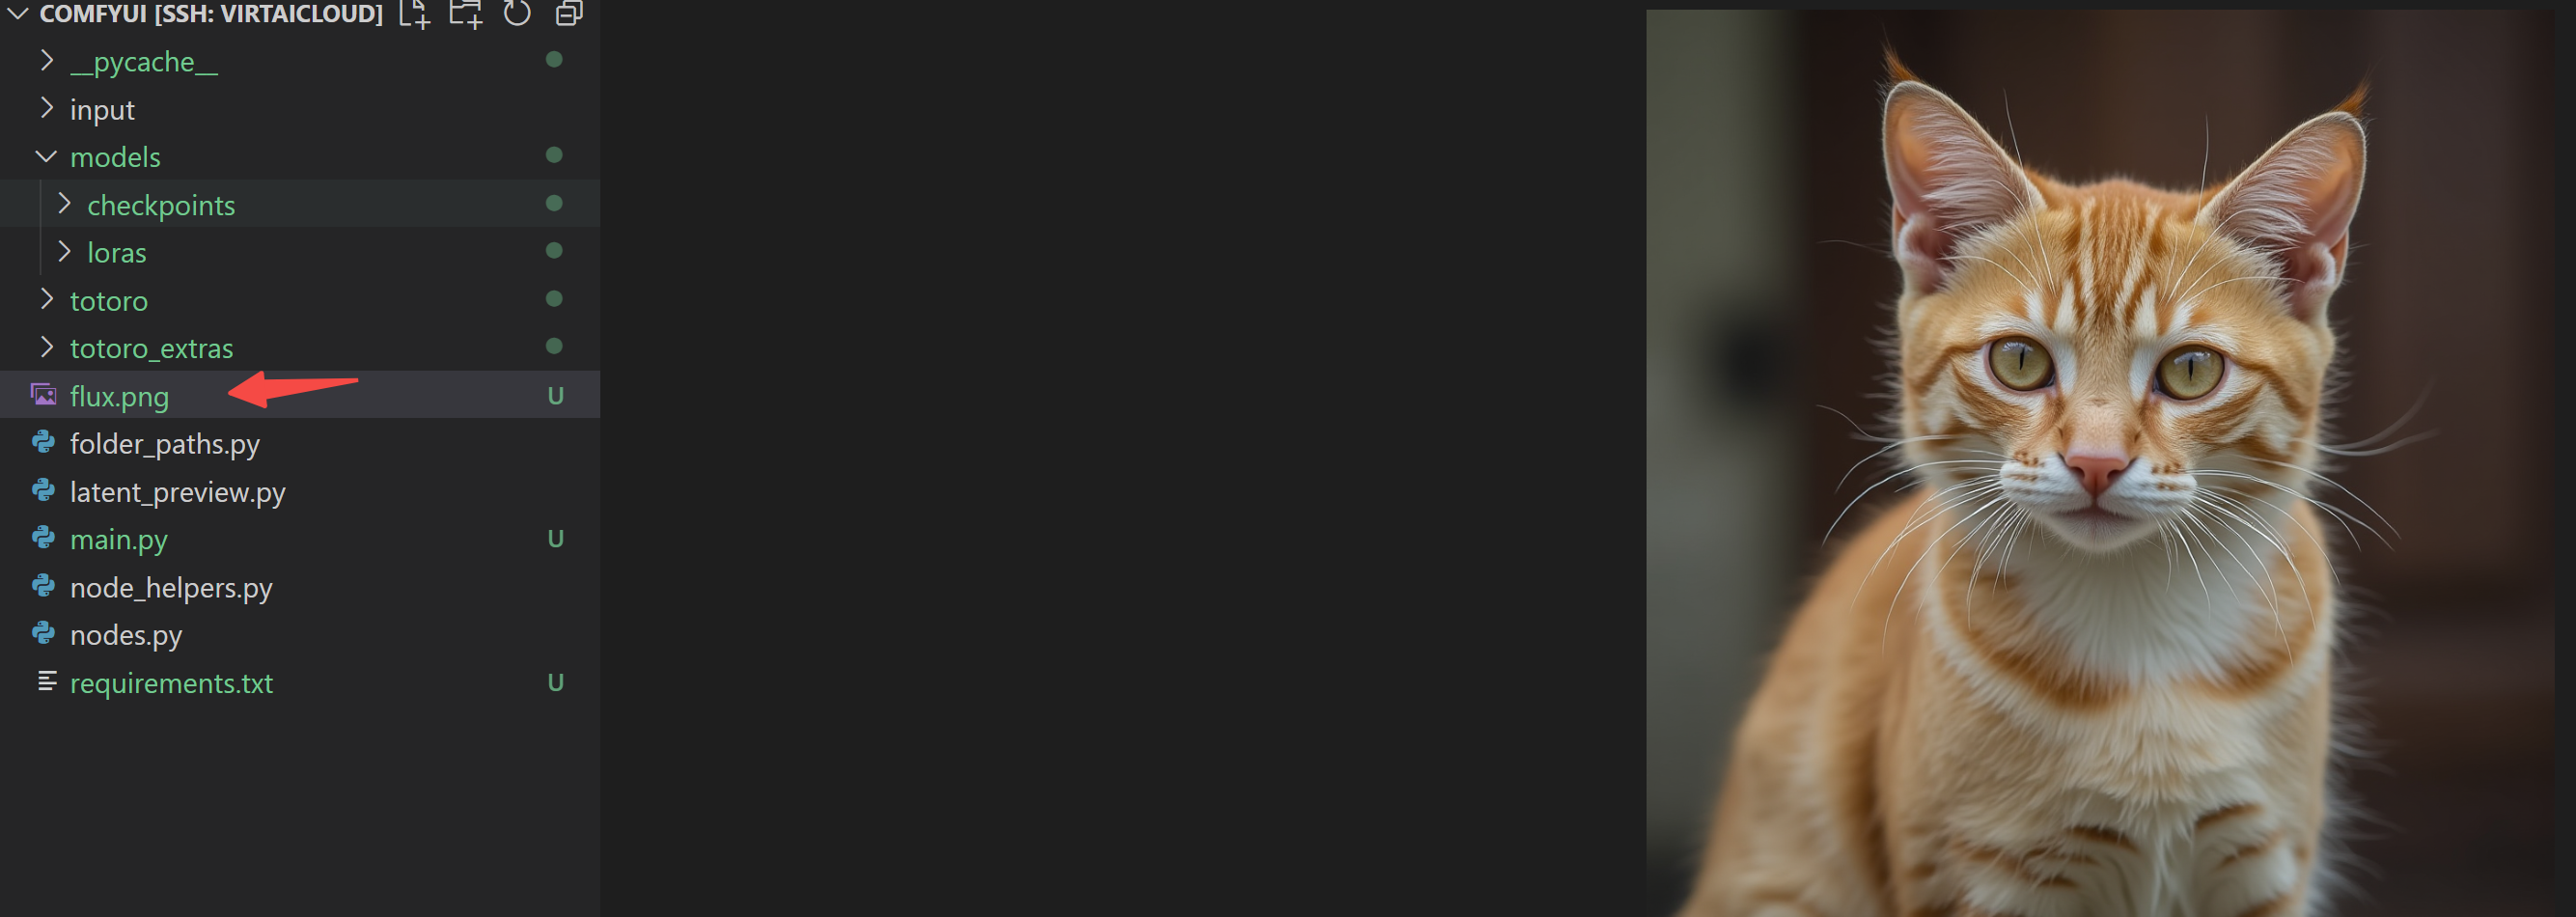
Image.fromarray(np.array(decoded*255, dtype=np.uint8)[0]).save("flux.png")
return "flux.png"

- 1
- 2
- 3
- 4
- 5
- 6
- 7
- 8
- 9
- 10
- 11
- 12
- 13
- 14
- 15
- 16
- 17
- 18
- 19
- 20
- 21
- 22
- 23
- 24
- 25
- 26
- 27
- 28
- 29
- 30
- 31
- 32
- 33
- 34
- 35
生成结果保存在本地图片:
然后,我们采用 Gradio 编写一个简单的 UI 界面:
with gr.Blocks(analytics_enabled=False) as demo:
        with gr.Row():
            with gr.Column():
                positive_prompt = gr.Textbox(lines=3, interactive=True, value="a cat", label="Prompt")
                loras = gr.Dropdown(lora_models, label="LORA Model", value="flux_realism_lora.safetensors")
                with gr.Row():
                    width = gr.Slider(minimum=256, maximum=2048, value=1024, step=16, label="width")
                    height = gr.Slider(minimum=256, maximum=2048, value=1024, step=16, label="height")
                with gr.Row():
                    seed = gr.Slider(minimum=0, maximum=18446744073709551615, value=0, step=1, label="seed (0=random)")
                    steps = gr.Slider(minimum=4, maximum=50, value=20, step=1, label="steps")
                with gr.Row():
                    guidance = gr.Slider(minimum=0, maximum=20, value=3.5, step=0.5, label="guidance")
                    lora_strength_model = gr.Slider(minimum=0, maximum=1, value=1.0, step=0.1, label="lora_strength_model")
                    lora_strength_clip = gr.Slider(minimum=0, maximum=1, value=1.0, step=0.1, label="lora_strength_clip")
                with gr.Row():
                    sampler_name = gr.Dropdown(["euler", "heun", "heunpp2", "dpm_2", "lms", "dpmpp_2m", "ipndm", "deis", "ddim", "uni_pc", "uni_pc_bh2"], label="sampler_name", value="euler")
                    scheduler = gr.Dropdown(["normal", "sgm_uniform", "simple", "ddim_uniform"], label="scheduler", value="simple")
                generate_button = gr.Button("Generate")
            with gr.Column():
                output_image = gr.Image(label="Generated", interactive=False)
        generate_button.click(fn=generate, inputs=[positive_prompt, width, height, seed, steps, sampler_name, scheduler, guidance, lora_strength_model, lora_strength_clip, loras], outputs=output_image)
    demo.queue().launch(inline=False, share=False, debug=True, server_name='0.0.0.0')
- 1
- 2
- 3
- 4
- 5
- 6
- 7
- 8
- 9
- 10
- 11
- 12
- 13
- 14
- 15
- 16
- 17
- 18
- 19
- 20
- 21
- 22
- 23
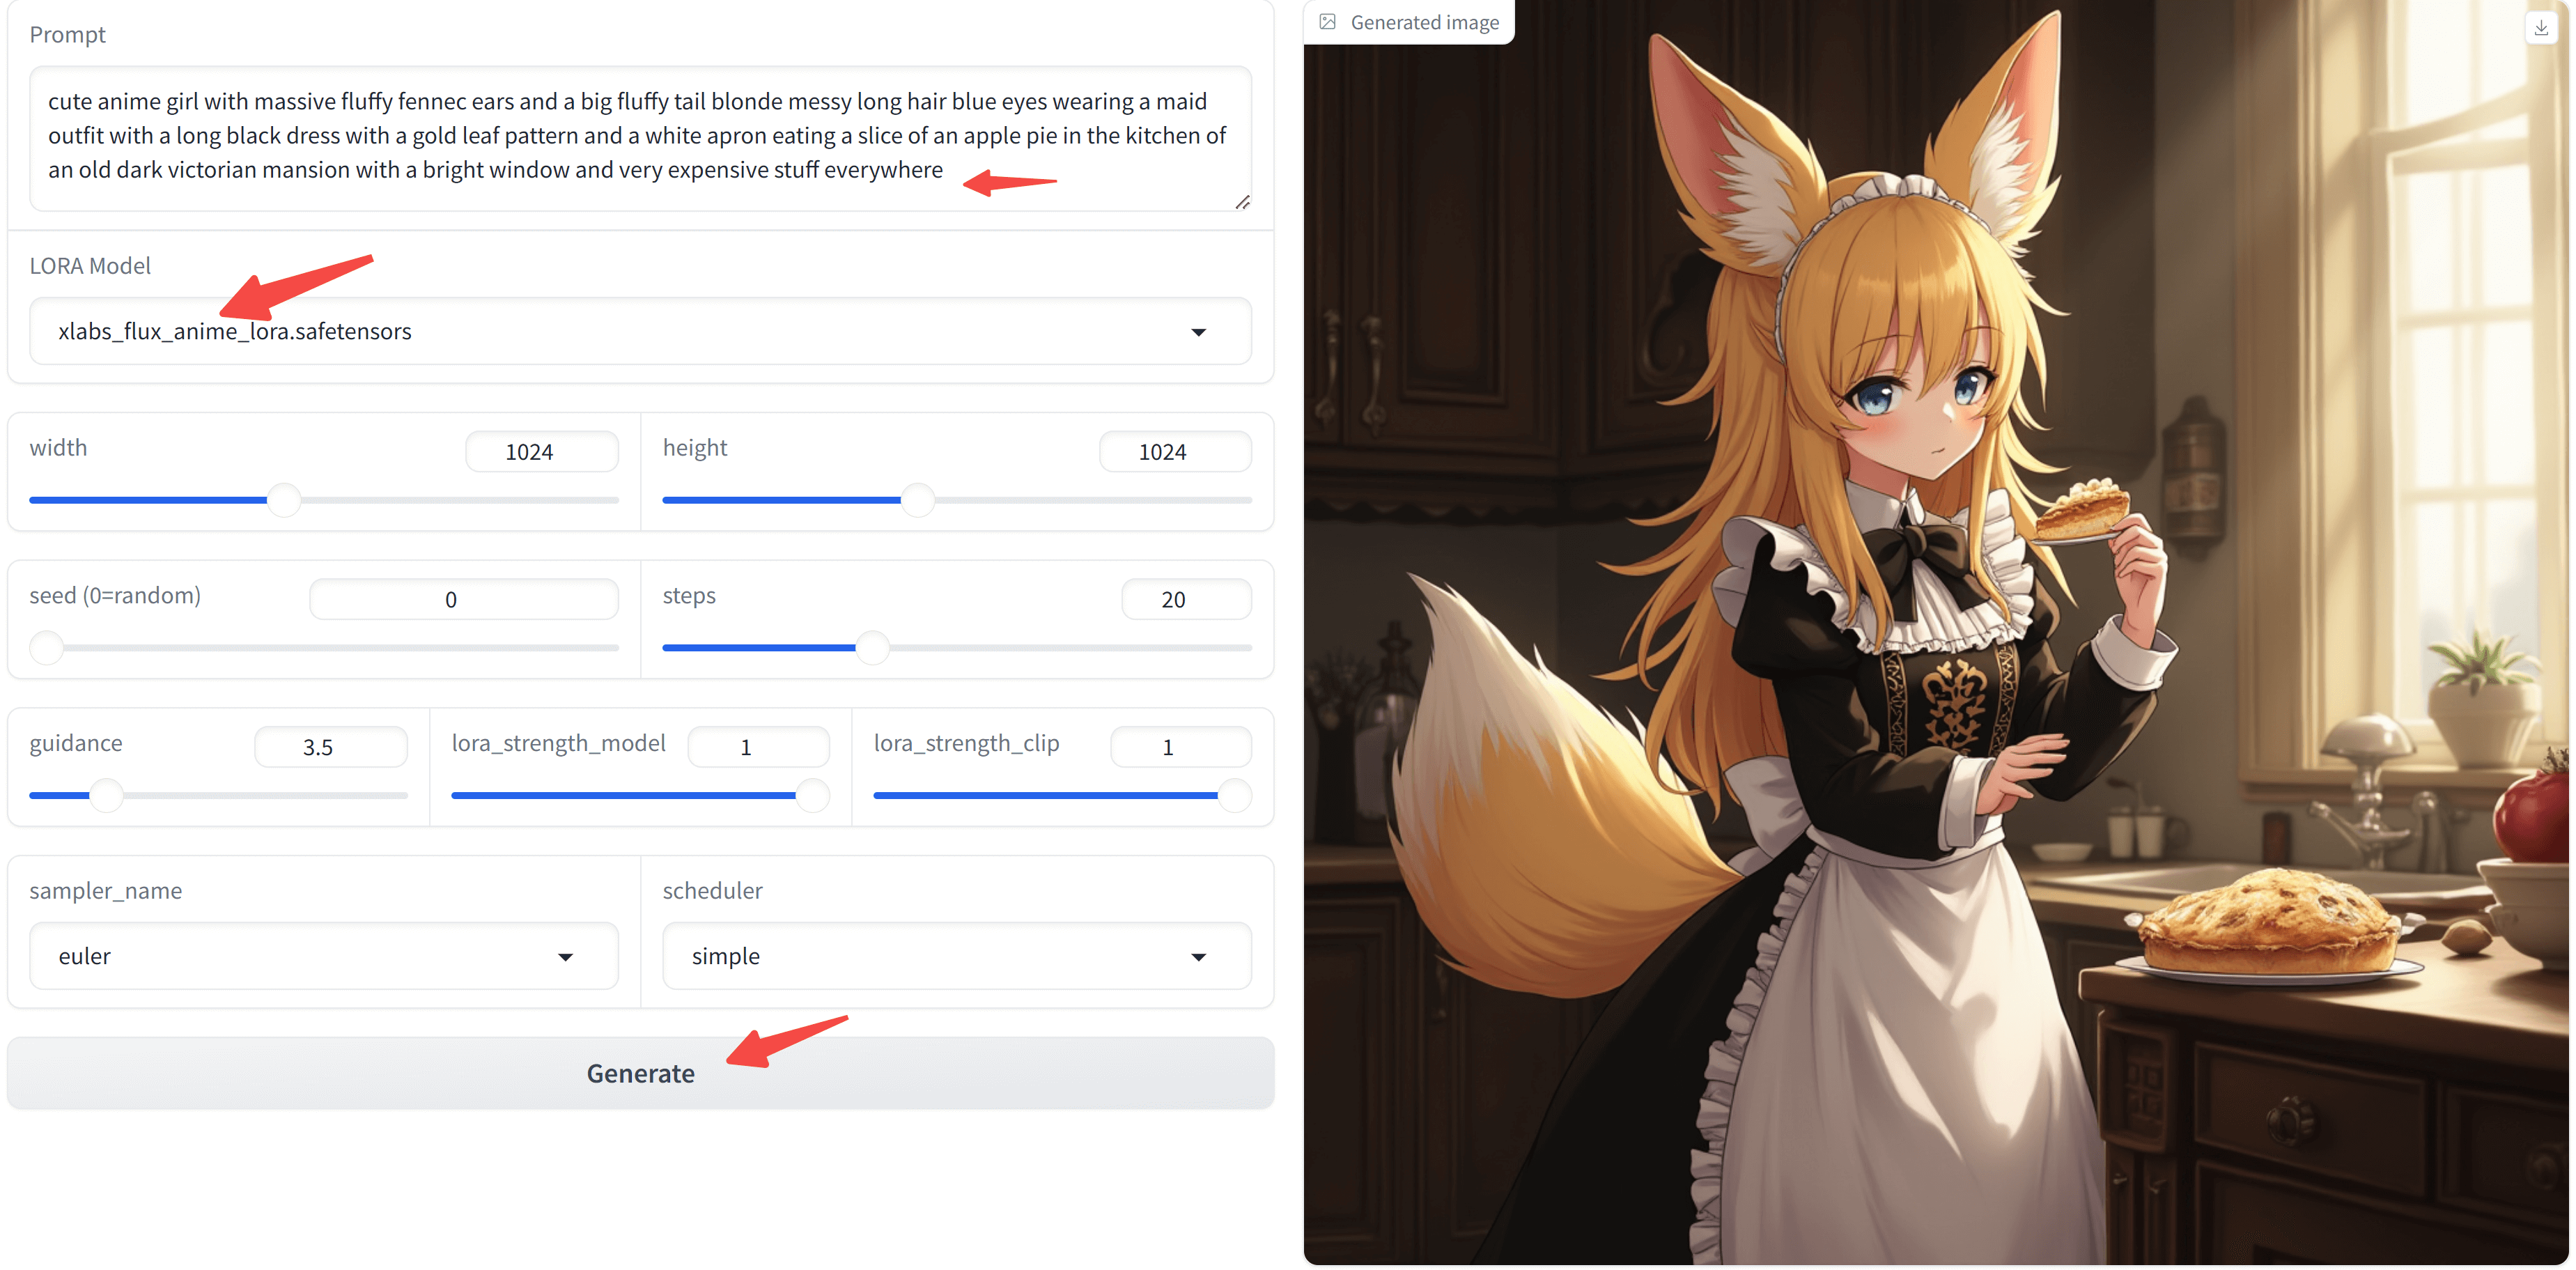
启动成功后,浏览器直达:localhost:7860~
左上角输入提示词,先选一个 漫画 风格的 LoRA 看看:
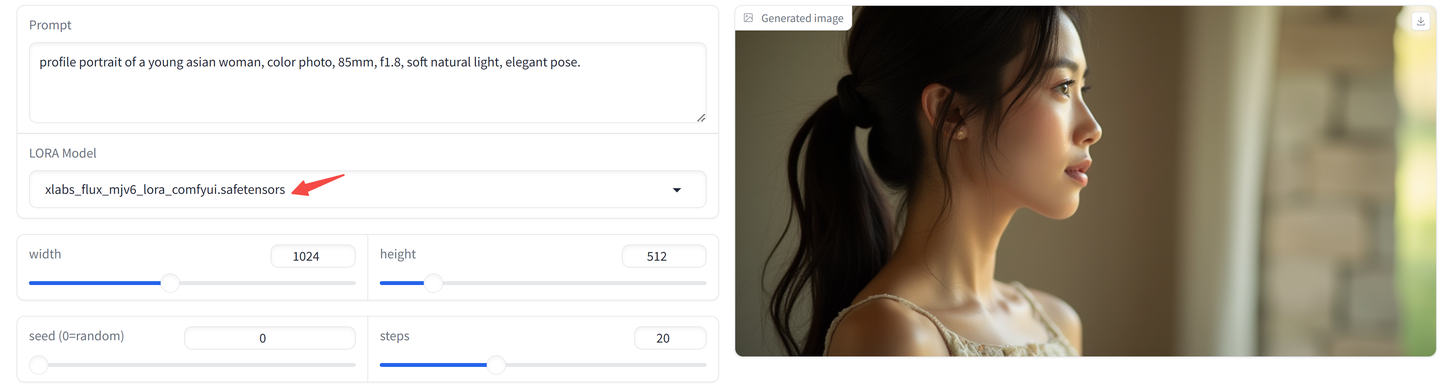
再来看看 xlab 提供的 midjourney v6 的 LoRA 怎么样?
Disney 风格的 LoRA ?
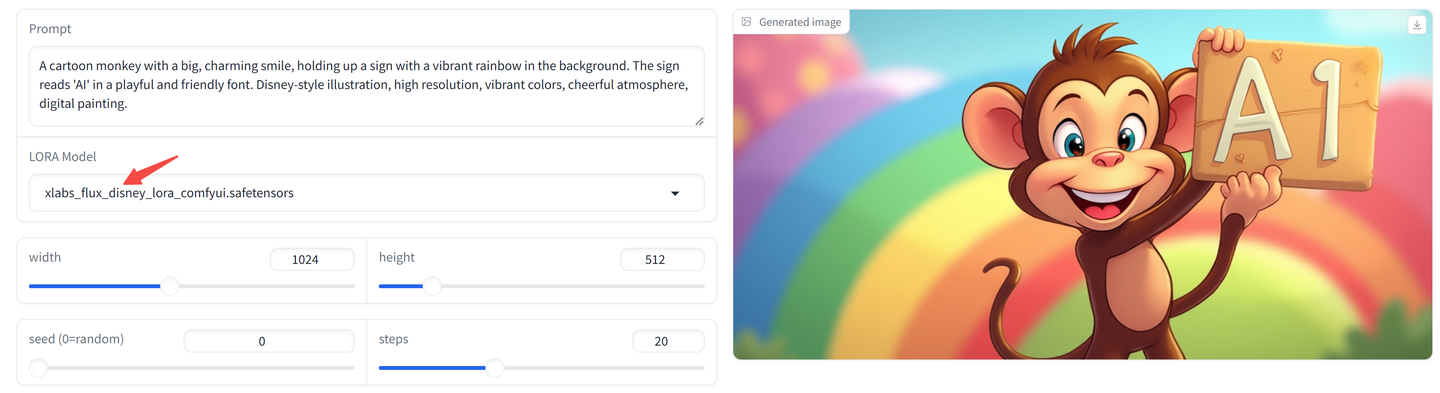
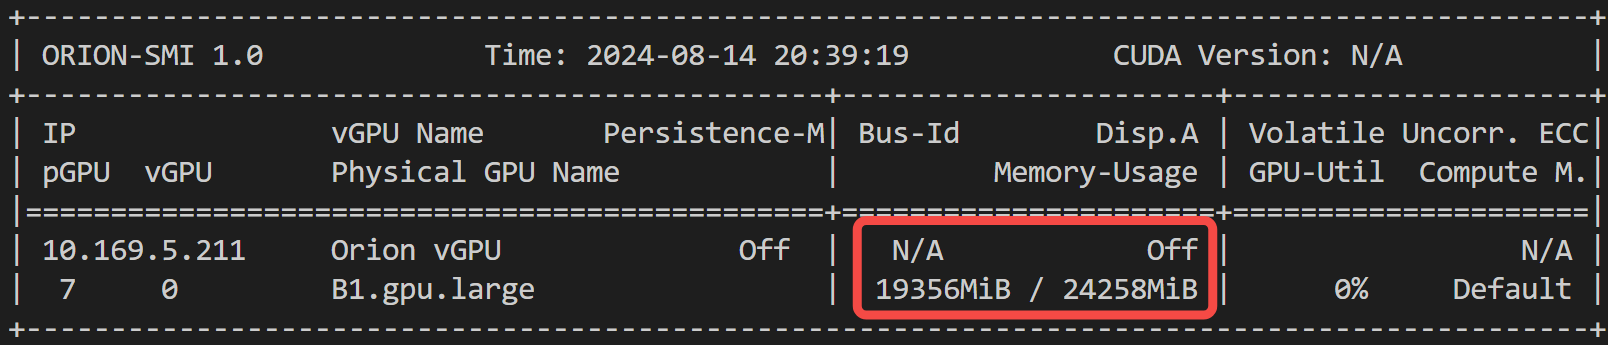
最后来看下显存占用情况,供大家参考:
4. 服务部署
对于爱折腾的开发者而言,自然要把服务部署好,方便任性调用~
4.1 服务端
我们采用 FastAPI 把模型部署成一个服务,首先准备好服务端代码 server.py:
# 定义数据模型,用于接收POST请求中的数据,默认值后面不能加逗号,否则会是一个 tuple
class Item(BaseModel):
    positive_prompt: str = "a cat"
    width: int = 512
    height: int = 512
    seed: int = 0
    steps: int = 20
    sampler_name: str = "euler"
    scheduler: str = "simple"
    guidance: float = 3.5
    lora_strength_model: float = 1.0
    lora_strength_clip: float = 1.0
    lora_model: str = "flux_realism_lora.safetensors"

app = FastAPI()
@app.post("/txt2img")
async def txt2img(item: Item):
    try:
        image_array = generate(positive_prompt=item.positive_prompt)
        image = Image.fromarray(image_array.astype('uint8')).convert('RGB')
        # 将PIL图像对象转换为二进制数据
        with io.BytesIO() as output:
            image.save(output, format="PNG")
            image_binary = output.getvalue()
        response = JSONResponse(content={"image": base64.b64encode(image_binary).decode()})
    except Exception as e:
        response = JSONResponse(content={"error": str(e)})
    return response

if __name__ == '__main__':
    uvicorn.run(app, host='0.0.0.0', port=2002)
- 1
- 2
- 3
- 4
- 5
- 6
- 7
- 8
- 9
- 10
- 11
- 12
- 13
- 14
- 15
- 16
- 17
- 18
- 19
- 20
- 21
- 22
- 23
- 24
- 25
- 26
- 27
- 28
- 29
- 30
- 31
python server.py 一键启动,成功后会看到如下提示:
load model successfully
INFO:     Started server process [735]
INFO:     Waiting for application startup.
INFO:     Application startup complete.
INFO:     Uvicorn running on http://0.0.0.0:2002 (Press CTRL+C to quit)
- 1
- 2
- 3
- 4
- 5
4.2 客户端
服务启动后,我们来编写客户端代码:
# 发送GET请求获取图像数据
headers = {'Content-Type': 'application/json'}
data = {'positive_prompt': 'a cat'}
response = requests.post('http://localhost:2002/txt2img/', headers=headers, json=data)

# 检查请求是否成功
if response.status_code == 200:
    data = response.json()
    img_base64 = data['image']
    image_binary = base64.b64decode(img_base64)
    # 将二进制数据保存为本地文件
    with open('image.png', 'wb') as file:
        file.write(image_binary)
else:
    print("请求失败,状态码:", response.status_code)
- 1
- 2
- 3
- 4
- 5
- 6
- 7
- 8
- 9
- 10
- 11
- 12
- 13
- 14
- 15
我们用同一套提示词生成三张图片,只有中间一张正确添加了 Logo CVLab。
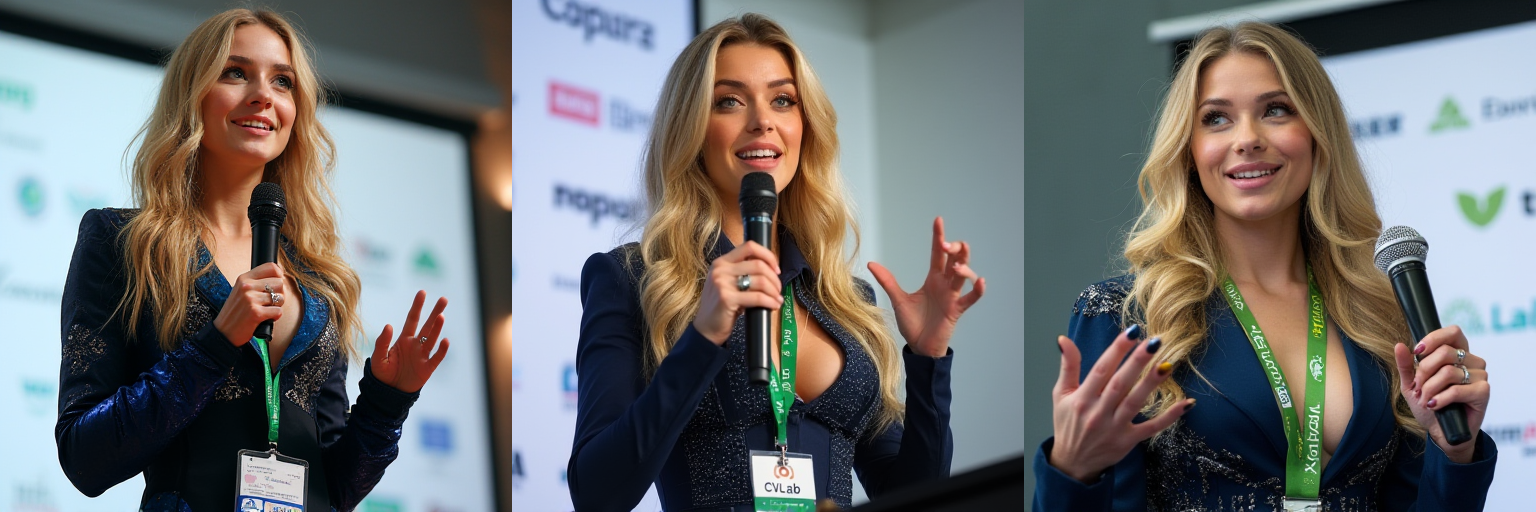
这么看,抽卡还是难免啊~
写在最后
本文是 FLUX AI绘画系列的续篇,介绍了如何为FLUX添加LoRA模型来增强其生成效果,更多内容正在不断填坑中……
希望能激发你的更多创作灵感,让 FLUX 插上 LoRA 的翅膀带你飞向艺术新天地!
如果本文有帮助,不妨点个免费的赞和收藏备用。
本文所有源码+模型已打包,有需要的小伙伴,可以前往免费下载。
新朋友欢迎关注,下次更新不迷路。

 微信公众号
微信公众号

评论记录:
回复评论: