
1. 源由
分类和目标识别基本上都是像素级别的卷积应用,并非整个图像范围。语义分割基于图像识别,对于环境感知尤其有用,它可以对场景中的许多不同潜在对象进行密集的逐像素分类,包括场景的前景和背景。
2. segNet
segNet 接受二维图像作为输入,并输出带有逐像素分类掩码叠加的第二张图像。掩码的每个像素对应于被分类的对象类别。
以下是可用的各种预训练分割模型,它们使用具有 Jetson 实时性能的 FCN-ResNet18 网络。这些模型适用于各种环境和主题,包括城市、越野小径以及室内办公空间和家庭。
下表列出了可用的预训练语义分割模型以及用于加载它们的 segnet 的相关 --network 参数。它们基于 21 类 FCN-ResNet18 网络,并使用 PyTorch 在各种数据集和分辨率上进行了训练,并将其导出为 ONNX 格式以便与 TensorRT 加载。
| Dataset | Resolution | CLI Argument | Accuracy | Jetson Nano | Jetson Xavier |
|---|---|---|---|---|---|
| Cityscapes | 512x256 | fcn-resnet18-cityscapes-512x256 | 83.3% | 48 FPS | 480 FPS |
| Cityscapes | 1024x512 | fcn-resnet18-cityscapes-1024x512 | 87.3% | 12 FPS | 175 FPS |
| Cityscapes | 2048x1024 | fcn-resnet18-cityscapes-2048x1024 | 89.6% | 3 FPS | 47 FPS |
| DeepScene | 576x320 | fcn-resnet18-deepscene-576x320 | 96.4% | 26 FPS | 360 FPS |
| DeepScene | 864x480 | fcn-resnet18-deepscene-864x480 | 96.9% | 14 FPS | 190 FPS |
| Multi-Human | 512x320 | fcn-resnet18-mhp-512x320 | 86.5% | 34 FPS | 370 FPS |
| Multi-Human | 640x360 | fcn-resnet18-mhp-640x360 | 87.1% | 23 FPS | 325 FPS |
| Pascal VOC | 320x320 | fcn-resnet18-voc-320x320 | 85.9% | 45 FPS | 508 FPS |
| Pascal VOC | 512x320 | fcn-resnet18-voc-512x320 | 88.5% | 34 FPS | 375 FPS |
| SUN RGB-D | 512x400 | fcn-resnet18-sun-512x400 | 64.3% | 28 FPS | 340 FPS |
| SUN RGB-D | 640x512 | fcn-resnet18-sun-640x512 | 65.1% | 17 FPS | 224 FPS |
2.1 命令选项
$ segnet --help
usage: segnet [--help] [--network NETWORK] ...
              input_URI [output_URI]

Segment and classify a video/image stream using a semantic segmentation DNN.
See below for additional arguments that may not be shown above.

positional arguments:
    input_URI       resource URI of input stream  (see videoSource below)
    output_URI      resource URI of output stream (see videoOutput below)

segNet arguments:
  --network=NETWORK    pre-trained model to load, one of the following:
                           * fcn-resnet18-cityscapes-512x256
                           * fcn-resnet18-cityscapes-1024x512
                           * fcn-resnet18-cityscapes-2048x1024
                           * fcn-resnet18-deepscene-576x320
                           * fcn-resnet18-deepscene-864x480
                           * fcn-resnet18-mhp-512x320
                           * fcn-resnet18-mhp-640x360
                           * fcn-resnet18-voc-320x320 (default)
                           * fcn-resnet18-voc-512x320
                           * fcn-resnet18-sun-512x400
                           * fcn-resnet18-sun-640x512
  --model=MODEL        path to custom model to load (caffemodel, uff, or onnx)
  --prototxt=PROTOTXT  path to custom prototxt to load (for .caffemodel only)
  --labels=LABELS      path to text file containing the labels for each class
  --colors=COLORS      path to text file containing the colors for each class
  --input-blob=INPUT   name of the input layer (default: 'input_0')
  --output-blob=OUTPUT name of the output layer (default: 'output_0')
  --alpha=ALPHA        overlay alpha blending value, range 0-255 (default: 150)
  --visualize=VISUAL   visualization flags (e.g. --visualize=overlay,mask)
                       valid combinations are:  'overlay', 'mask'
  --profile            enable layer profiling in TensorRT


videoSource arguments:
    input                resource URI of the input stream, for example:
                             * /dev/video0               (V4L2 camera #0)
                             * csi://0                   (MIPI CSI camera #0)
                             * rtp://@:1234              (RTP stream)
                             * rtsp://user:pass@ip:1234  (RTSP stream)
                             * webrtc://@:1234/my_stream (WebRTC stream)
                             * file://my_image.jpg       (image file)
                             * file://my_video.mp4       (video file)
                             * file://my_directory/      (directory of images)
  --input-width=WIDTH    explicitly request a width of the stream (optional)
  --input-height=HEIGHT  explicitly request a height of the stream (optional)
  --input-rate=RATE      explicitly request a framerate of the stream (optional)
  --input-save=FILE      path to video file for saving the input stream to disk
  --input-codec=CODEC    RTP requires the codec to be set, one of these:
                             * h264, h265
                             * vp8, vp9
                             * mpeg2, mpeg4
                             * mjpeg
  --input-decoder=TYPE   the decoder engine to use, one of these:
                             * cpu
                             * omx  (aarch64/JetPack4 only)
                             * v4l2 (aarch64/JetPack5 only)
  --input-flip=FLIP      flip method to apply to input:
                             * none (default)
                             * counterclockwise
                             * rotate-180
                             * clockwise
                             * horizontal
                             * vertical
                             * upper-right-diagonal
                             * upper-left-diagonal
  --input-loop=LOOP      for file-based inputs, the number of loops to run:
                             * -1 = loop forever
                             *  0 = don't loop (default)
                             * >0 = set number of loops


videoOutput arguments:
    output               resource URI of the output stream, for example:
                             * file://my_image.jpg       (image file)
                             * file://my_video.mp4       (video file)
                             * file://my_directory/      (directory of images)
                             * rtp://:1234    (RTP stream)
                             * rtsp://@:8554/my_stream   (RTSP stream)
                             * webrtc://@:1234/my_stream (WebRTC stream)
                             * display://0               (OpenGL window)
  --output-codec=CODEC   desired codec for compressed output streams:
                            * h264 (default), h265
                            * vp8, vp9
                            * mpeg2, mpeg4
                            * mjpeg
  --output-encoder=TYPE  the encoder engine to use, one of these:
                            * cpu
                            * omx  (aarch64/JetPack4 only)
                            * v4l2 (aarch64/JetPack5 only)
  --output-save=FILE     path to a video file for saving the compressed stream
                         to disk, in addition to the primary output above
  --bitrate=BITRATE      desired target VBR bitrate for compressed streams,
                         in bits per second. The default is 4000000 (4 Mbps)
  --headless             don't create a default OpenGL GUI window


logging arguments:
  --log-file=FILE        output destination file (default is stdout)
  --log-level=LEVEL      message output threshold, one of the following:
                             * silent
                             * error
                             * warning
                             * success
                             * info
                             * verbose (default)
                             * debug
  --verbose              enable verbose logging (same as --log-level=verbose)
  --debug                enable debug logging   (same as --log-level=debug)

- 1
- 2
- 3
- 4
- 5
- 6
- 7
- 8
- 9
- 10
- 11
- 12
- 13
- 14
- 15
- 16
- 17
- 18
- 19
- 20
- 21
- 22
- 23
- 24
- 25
- 26
- 27
- 28
- 29
- 30
- 31
- 32
- 33
- 34
- 35
- 36
- 37
- 38
- 39
- 40
- 41
- 42
- 43
- 44
- 45
- 46
- 47
- 48
- 49
- 50
- 51
- 52
- 53
- 54
- 55
- 56
- 57
- 58
- 59
- 60
- 61
- 62
- 63
- 64
- 65
- 66
- 67
- 68
- 69
- 70
- 71
- 72
- 73
- 74
- 75
- 76
- 77
- 78
- 79
- 80
- 81
- 82
- 83
- 84
- 85
- 86
- 87
- 88
- 89
- 90
- 91
- 92
- 93
- 94
- 95
- 96
- 97
- 98
- 99
- 100
- 101
- 102
- 103
- 104
- 105
- 106
- 107
- 108
- 109
- 110
- 111
注:关于照片、视频等基本操作,详见: 《Linux 36.3 + JetPack v6.0@jetson-inference之视频操作》
2.2 下载模型
两种方式:
- 创建 对象时,初始化会自动下载
- 通过手动将模型文件放置到
data/networks/目录下
国内,由于“墙”的存在,对于我们这种处于起飞阶段的菜鸟来说就是“障碍”。有条件的朋友可以参考《apt-get通过代理更新系统》进行设置网络。
不过,NVIDIA还是很热心的帮助我们做了“Work around”,所有的模型都已经预先存放在中国大陆能访问的位置:Github - model-mirror-190618
  --network=NETWORK    pre-trained model to load, one of the following:
                           * fcn-resnet18-cityscapes-512x256
                           * fcn-resnet18-cityscapes-1024x512
                           * fcn-resnet18-cityscapes-2048x1024
                           * fcn-resnet18-deepscene-576x320
                           * fcn-resnet18-deepscene-864x480
                           * fcn-resnet18-mhp-512x320
                           * fcn-resnet18-mhp-640x360
                           * fcn-resnet18-voc-320x320 (default)
                           * fcn-resnet18-voc-512x320
                           * fcn-resnet18-sun-512x400
                           * fcn-resnet18-sun-640x512
  --model=MODEL        path to custom model to load (caffemodel, uff, or onnx)
- 1
- 2
- 3
- 4
- 5
- 6
- 7
- 8
- 9
- 10
- 11
- 12
- 13
根据以上Model方面信息,该命令支持:
- fcn-resnet18-cityscapes-512x256
- fcn-resnet18-cityscapes-1024x512
- fcn-resnet18-cityscapes-2048x1024
- fcn-resnet18-deepscene-576x320
- fcn-resnet18-deepscene-864x480
- fcn-resnet18-mhp-512x320
- fcn-resnet18-mhp-640x360
- fcn-resnet18-voc-320x320 (default)
- fcn-resnet18-voc-512x320
- fcn-resnet18-sun-512x400
- fcn-resnet18-sun-640x512
- 支持定制模型(需要用到通用的模型文件caffemodel, uff, or onnx)
作为示例,就下载一个fcn-resnet18-voc-320x320 (default)模型
$ mkdir model-mirror-190618
$ cd model-mirror-190618
$ wget https://github.com/dusty-nv/jetson-inference/releases/download/model-mirror-190618/FCN-ResNet18-Pascal-VOC-320x320.tar.gz
$ tar -zxvf FCN-ResNet18-Pascal-VOC-320x320.tar.gz -C ../data/networks
$ cd ..
- 1
- 2
- 3
- 4
- 5
注:这个模型文件下载要注意,将解压缩文件放置到FCN-ResNet18-Pascal-VOC-320x320目录下。
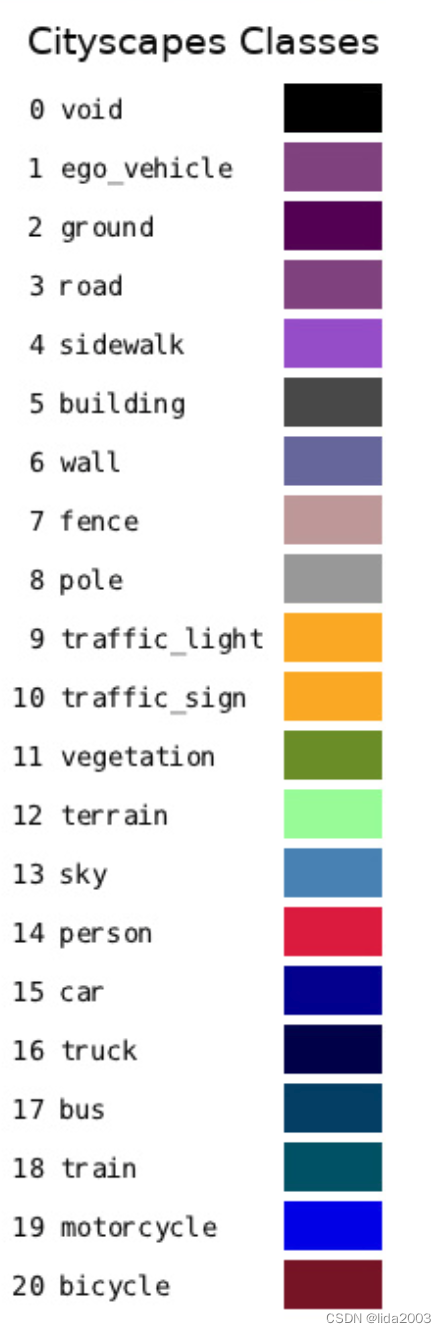
2.2.1 Cityscapes
Cityscapes数据集专注于对城市街景的语义理解。
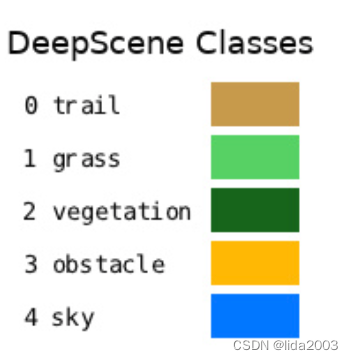
2.2.2 DeepScene
DeepScene包含了在各种数据集上训练的单模态AdapNet++和多模态SSMA模型。
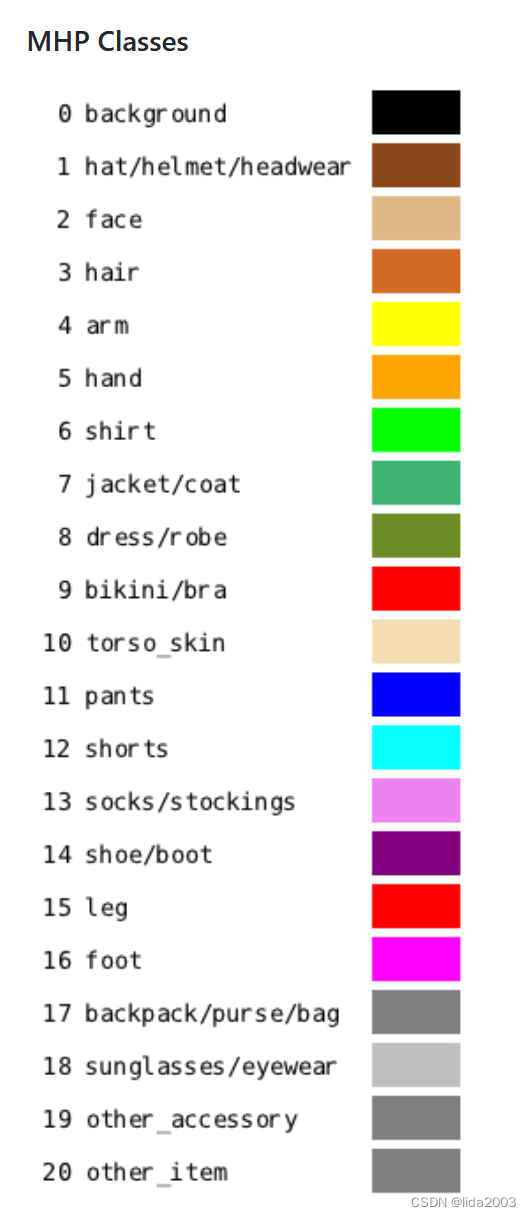
2.2.3 MHP
Multi-Human Parsing,新加坡国立大学 (NUS) 学习与视觉 (LV) 小组的多人体解析项目旨在推进人群场景中对人类的细粒度视觉理解。多人体解析与传统的定义明确的对象识别任务(如仅提供对象位置粗略预测的目标检测、仅预测实例级掩码而不提供身体部位和时尚类别详细信息的实例分割、以及不区分不同身份的类别级像素预测的人体解析)有显著不同。在现实世界中,多人互动的场景更为现实和普遍。
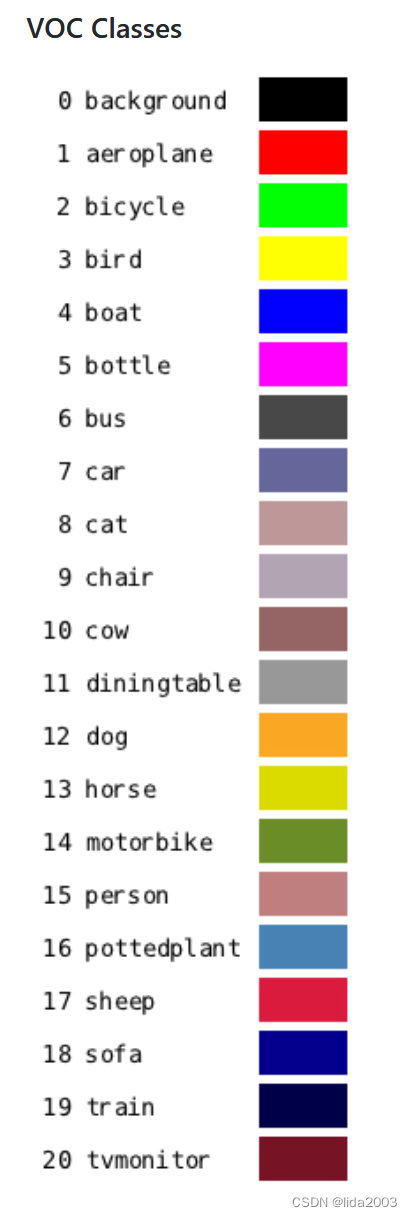
2.2.4 VOC
PASCAL VOC项目:
- 提供用于对象类别识别的标准化图像数据集
- 提供一套通用工具来访问数据集和注释
- 使不同方法的评估和比较成为可能
- 举办了对象类别识别性能评估的挑战赛(2005-2012年,现已结束)
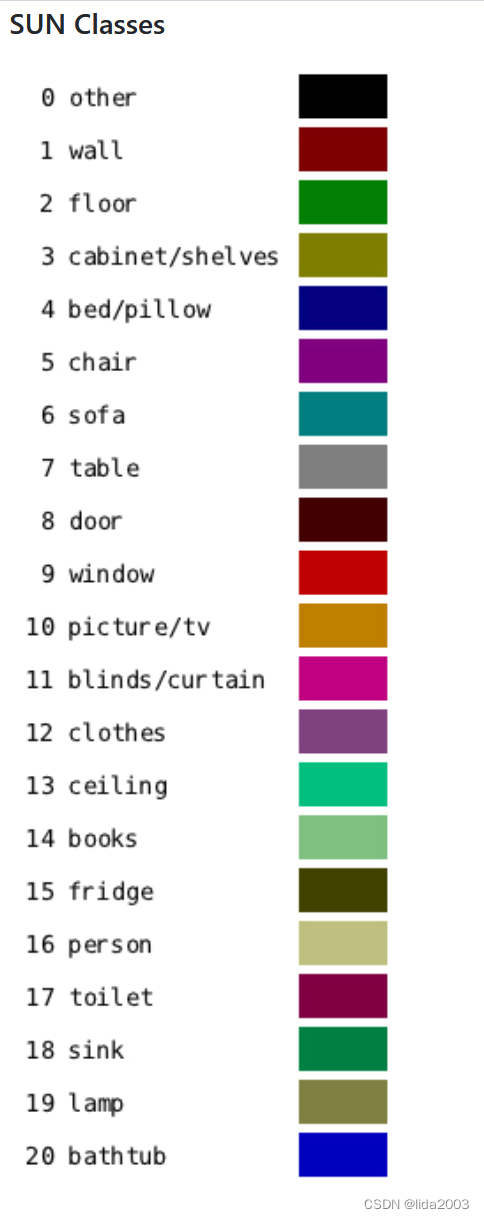
2.2.5 SUN
SUNRGB-D四种不同的传感器捕捉,包含10,000张RGB-D图像,规模类似于PASCAL VOC。整个数据集密集注释,包括146,617个2D多边形和58,657个带有准确物体方向的3D边界框,以及场景的3D房间布局和类别。这个数据集使我们能够为场景理解任务训练需要大量数据的算法,使用直接且有意义的3D指标进行评估,避免在小型测试集上过拟合,并研究跨传感器偏差。
2.3 操作示例
$ cd build/aarch64/bin/
- 1
2.3.1 单张照片
# C++
$ ./segnet --network=<model> input.jpg output.jpg                  # overlay segmentation on original
$ ./segnet --network=<model> --alpha=200 input.jpg output.jpg      # make the overlay less opaque
$ ./segnet --network=<model> --visualize=mask input.jpg output.jpg # output the solid segmentation mask
- 1
- 2
- 3
- 4
# Python
$ ./segnet.py --network=<model> input.jpg output.jpg                  # overlay segmentation on original
$ ./segnet.py --network=<model> --alpha=200 input.jpg output.jpg      # make the overlay less opaque
$ ./segnet.py --network=<model> --visualize=mask input.jpg output.jpg # output the segmentation mask
- 1
- 2
- 3
- 4
举例:
# C++
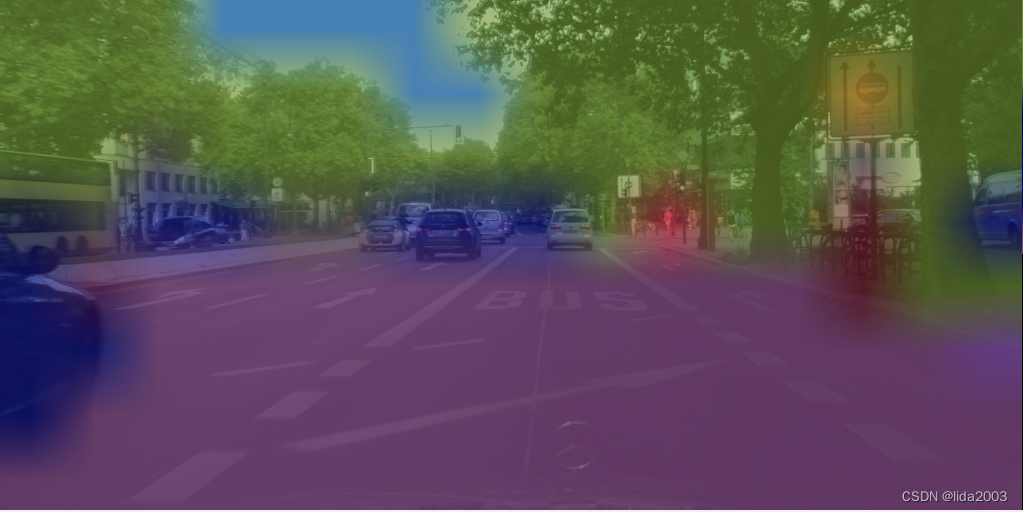
$ ./segnet --network=fcn-resnet18-cityscapes images/city_0.jpg images/test/output.jpg
# Python
$ ./segnet.py --network=fcn-resnet18-cityscapes images/city_0.jpg images/test/output.jpg
- 1
- 2
- 3
- 4
- 5
2.3.2 多张照片
# C++
$ ./segnet --network=fcn-resnet18-sun "images/room_*.jpg" images/test/room_output_%i.jpg
- 1
- 2
# Python
$ ./segnet.py --network=fcn-resnet18-sun "images/room_*.jpg" images/test/room_output_%i.jpg
- 1
- 2
2.3.3 视频
# Download test video
wget https://nvidia.box.com/shared/static/veuuimq6pwvd62p9fresqhrrmfqz0e2f.mp4 -O pedestrians.mp4
- 1
- 2
# C++
$ ./segnet --network=fcn-resnet18-cityscapes ../../../pedestrians.mp4 images/test/pedestrians_ssd_segnet_cpp.mp4
- 1
- 2
# Python
$ ./segnet.py --network=fcn-resnet18-cityscapes ../../../pedestrians.mp4 images/test/pedestrians_ssd_segnet_python.mp4
- 1
- 2
pedestrians
注:从远距离视频的分析结果看,并不是非常理想,因此,实际还是取决于应用场景。
3. 代码
3.1 Python
- Import Statements:
  ├── import sys
  ├── import argparse
  ├── from jetson_inference import segNet
  ├── from jetson_utils import videoSource, videoOutput, cudaOverlay, cudaDeviceSynchronize, Log
  └── from segnet_utils import *

- Parse Command Line:
  ├── parser = argparse.ArgumentParser(...)
  ├── parser.add_argument("input", ...)
  ├── parser.add_argument("output", ...)
  ├── parser.add_argument("--network", ...)
  ├── parser.add_argument("--filter-mode", ...)
  ├── parser.add_argument("--visualize", ...)
  ├── parser.add_argument("--ignore-class", ...)
  ├── parser.add_argument("--alpha", ...)
  ├── parser.add_argument("--stats", ...)
  └── args = parser.parse_known_args()[0]

- Load Segmentation Network:
  ├── net = segNet(args.network, sys.argv)

- Set Alpha Blending Value:
  └── net.SetOverlayAlpha(args.alpha)

- Create Video Output:
  └── output = videoOutput(args.output, argv=sys.argv)

- Create Buffer Manager:
  └── buffers = segmentationBuffers(net, args)

- Create Video Source:
  └── input = videoSource(args.input, argv=sys.argv)

- Process Frames Loop:
  └── while True:
      ├── img_input = input.Capture()
      ├── if img_input is None:
      │   └── continue
      ├── buffers.Alloc(img_input.shape, img_input.format)
      ├── net.Process(img_input, ignore_class=args.ignore_class)
      ├── if buffers.overlay:
      │   └── net.Overlay(buffers.overlay, filter_mode=args.filter_mode)
      ├── if buffers.mask:
      │   └── net.Mask(buffers.mask, filter_mode=args.filter_mode)
      ├── if buffers.composite:
      │   └── cudaOverlay(buffers.overlay, buffers.composite, 0, 0)
      │       └── cudaOverlay(buffers.mask, buffers.composite, buffers.overlay.width, 0)
      ├── output.Render(buffers.output)
      ├── output.SetStatus("{:s} | Network {:.0f} FPS".format(args.network, net.GetNetworkFPS()))
      ├── cudaDeviceSynchronize()
      ├── net.PrintProfilerTimes()
      ├── if args.stats:
      │   └── buffers.ComputeStats()
      └── if not input.IsStreaming() or not output.IsStreaming():
          └── break
- 1
- 2
- 3
- 4
- 5
- 6
- 7
- 8
- 9
- 10
- 11
- 12
- 13
- 14
- 15
- 16
- 17
- 18
- 19
- 20
- 21
- 22
- 23
- 24
- 25
- 26
- 27
- 28
- 29
- 30
- 31
- 32
- 33
- 34
- 35
- 36
- 37
- 38
- 39
- 40
- 41
- 42
- 43
- 44
- 45
- 46
- 47
- 48
- 49
- 50
- 51
- 52
- 53
- 54
- 55
- 56
3.2 C++
#include statements
├── "videoSource.h"
├── "videoOutput.h"
├── "cudaOverlay.h"
├── "cudaMappedMemory.h"
├── "segNet.h"
└── <signal.h>

Global variables
└── bool signal_recieved = false;

Function definitions
├── void sig_handler(int signo)
│   └── if (signo == SIGINT)
│       └── LogVerbose("received SIGINT\n");
│           └── signal_recieved = true;
└── int usage()
    ├── printf("usage: segnet [--help] [--network NETWORK] ...\n");
    ├── printf("              input_URI [output_URI]\n\n");
    ├── printf("Segment and classify a video/image stream using a semantic segmentation DNN.\n");
    ├── printf("See below for additional arguments that may not be shown above.\n\n");
    ├── printf("positional arguments:\n");
    ├── printf("    input_URI       resource URI of input stream  (see videoSource below)\n");
    ├── printf("    output_URI      resource URI of output stream (see videoOutput below)\n\n");
    ├── printf("%s\n", segNet::Usage());
    ├── printf("%s\n", videoSource::Usage());
    ├── printf("%s\n", videoOutput::Usage());
    └── printf("%s\n", Log::Usage());

segmentation buffers
├── pixelType* imgMask = NULL;
├── pixelType* imgOverlay = NULL;
├── pixelType* imgComposite = NULL;
├── pixelType* imgOutput = NULL;
├── int2 maskSize;
├── int2 overlaySize;
├── int2 compositeSize;
└── int2 outputSize;

allocate buffers
└── bool allocBuffers(int width, int height, uint32_t flags)
    ├── if (imgOverlay != NULL && width == overlaySize.x && height == overlaySize.y)
    ├── CUDA_FREE_HOST(imgMask);
    ├── CUDA_FREE_HOST(imgOverlay);
    ├── CUDA_FREE_HOST(imgComposite);
    ├── overlaySize = make_int2(width, height);
    ├── if (!cudaAllocMapped(&imgOverlay, overlaySize))
    ├── imgOutput = imgOverlay;
    ├── outputSize = overlaySize;
    ├── maskSize = (flags & segNet::VISUALIZE_OVERLAY) ? make_int2(width/2, height/2) : overlaySize;
    ├── if (!cudaAllocMapped(&imgMask, maskSize))
    ├── imgOutput = imgMask;
    ├── outputSize = maskSize;
    ├── compositeSize = make_int2(overlaySize.x + maskSize.x, overlaySize.y);
    ├── if (!cudaAllocMapped(&imgComposite, compositeSize))
    └── imgOutput = imgComposite;
        └── outputSize = compositeSize;

main function
├── parse command line
├── attach signal handler
├── create input stream
├── create output stream
├── create segmentation network
├── set alpha blending value
├── get overlay/mask filtering mode
├── get visualization flags
├── get object class to ignore
└── processing loop
    ├── capture next image
    │   └── if (!input->Capture(&imgInput, &status))
    ├── allocate buffers for this size frame
    │   └── if (!allocBuffers(input->GetWidth(), input->GetHeight(), visualizationFlags))
    ├── process the segmentation network
    │   └── if (!net->Process(imgInput, input->GetWidth(), input->GetHeight(), ignoreClass))
    ├── generate overlay
    │   └── if (visualizationFlags & segNet::VISUALIZE_OVERLAY)
    ├── generate mask
    │   └── if (visualizationFlags & segNet::VISUALIZE_MASK)
    ├── generate composite
    │   └── if ((visualizationFlags & segNet::VISUALIZE_OVERLAY) && (visualizationFlags & segNet::VISUALIZE_MASK))
    ├── render outputs
    │   └── if (output != NULL)
    └── wait for the GPU to finish
- 1
- 2
- 3
- 4
- 5
- 6
- 7
- 8
- 9
- 10
- 11
- 12
- 13
- 14
- 15
- 16
- 17
- 18
- 19
- 20
- 21
- 22
- 23
- 24
- 25
- 26
- 27
- 28
- 29
- 30
- 31
- 32
- 33
- 34
- 35
- 36
- 37
- 38
- 39
- 40
- 41
- 42
- 43
- 44
- 45
- 46
- 47
- 48
- 49
- 50
- 51
- 52
- 53
- 54
- 55
- 56
- 57
- 58
- 59
- 60
- 61
- 62
- 63
- 64
- 65
- 66
- 67
- 68
- 69
- 70
- 71
- 72
- 73
- 74
- 75
- 76
- 77
- 78
- 79
- 80
- 81
- 82
- 83
- 84
评论记录:
回复评论: