
目录
前言:
这部分是挺有难度的,因为套了好几层关系,涉及到关系层大概有4层左右,但是呢,多花点时间即可,更重要的还是细心部分,其次就是逐个的去捋清楚每层的关系即可,细心 + 耐心,这里就通关了。
1 正确认识关系层
本章是基于红黑树封装的map + set,和以往不同的是,我们之前实现链表部分,可以创建了一个迭代器类然后直接进行使用,但是这里不可以,这里的大体的关系是,节点类 -> 迭代器类 -> 红黑树本体 -> map + set。
也就是说,我们想要实现封装,就应该从节点类分析。因为这里的关系较为复杂,所以就关系图是比较难画的,我们就从源码入手,分别看stl_map stl_set stl_tree的源码:
- template <class Key, class Value, class KeyOfValue, class Compare, class Alloc = alloc>
- class rb_tree
- {
- protected:
- typedef __rb_tree_node
rb_tree_node; - public:
- typedef Key key_type;
- typedef Value value_type;
- typedef rb_tree_node* link_type;
- };
-
- template <class Value>
- struct __rb_tree_node : public __rb_tree_node_base
- {
- typedef __rb_tree_node
* link_type; - Value value_field;
- };

这是源码里面红黑树的部分代码,我们从节点开始看,节点的模板参数只有一个,数据类型即是该模板参数,link_type就是节点指针。
那么我们思考,为什么数据类型只有一个参数?map + set来说,不应该是key或者是key-value模型吗?我们上文介绍的红黑树就很单纯了,单纯到只能写一种模型,因为我们写死了数据类型只能是pair。
这里其实也是对模板的一种真正进阶,我们以往学习的模板是说,一个模型能存多种数据类型,这是泛型编程的一种思想,但是在这里,我们虽然使用了模板,但是解决不了数据类型不同的情况,在这里源码就提供了解决方案,在此之前我们看清了红黑树的模板参数有5个,我们真正实现的时候,最后两个是用不到的,一个是仿函数,一个是空间配置器,所以只有前面三个。
- template <class Key, class T, class Compare = less
, class Alloc = alloc> - class map
- {
- public:
- typedef Key key_type;
- typedef T data_type;
- typedef pair<const Key, T> value_type;
-
- private:
- typedef rb_tree
- select1st
, key_compare, Alloc> rep_type; - rep_type t;
- };
-
- template <class Key, class Compare = less
, class Alloc = alloc> - class set
- {
- public:
- typedef Key key_type;
- typedef Key value_type;
- private:
- typedef rb_tree
, key_compare, Alloc> rep_type; - rep_type t;
- };
这是stl_map stl_set的源码,成员变量不出意外的只有一个,那么这个成员变量的类型是什么?
是typedef之后的一个类型,typedef之前是什么?是红黑树本体,此刻展示了部分封装,即map + set是基于红黑树实现的结构,所以在set + map 使用函数的时候,就是使用的红黑树的函数,那么我们想要搞清楚红黑树节点数据类型的原因,就应该看这段typedef,对于set来说,key被typedef两次了,一次是key_type,一次是value_type,传参的时候,相当于传了两个key进去。
这是为什么?
再看map那一层,传的参数分别是key,键值对,看起来是没有什么问题的,但是对于set来说为什么要传两个一样的?
这里我们返回去看tree的这段代码:
typedef __rb_tree_node rb_tree_node;
可以看到树的数据类型由模板参数value确定,value是模板的第二个参数,而map + set层传给RBTree层的时候,第二个参数分别是键值对,key,此时,树节点的类型就确定了!
这里利用的是多层关系的调用 + 模板,使得map + set使用同一种结构的时候,编译器可以实例化两种不同的模型。
简单捋一下就是:
map + set这一层传两个数据参数过去,第二个参数用来确定树的节点类型,但不是直接map +set这一层确定,而是通过树本体这一层,确定树的节点类型,树节点的模板参数的来源是树本体,树本体的多个模板参数都是来源于map + set这一层。
于此,除了迭代器,其他部分的关系已经梳理完毕!
那么,迭代器和其他层次的关系应该是什么样的?
迭代器是控制节点行为的类,即迭代器需要复用节点类,所以节点类是最底层的类,往上一点就是迭代器,再迭代器之上就是树本体的调用,迭代器的参数和链表部分几乎就是一样的,三个参数,一个数据类型,一个数据类型的引用,一个数据类型的指针,其次就没有什么特别要注意的了,除了他的函数。
此时,所有的关系就捋清了!
2 节点类
由关系层的分析可以知道,节点类的模板参数只有一个,该模板参数用来确定数据类型,成员变量就是固定的左指针,右指针,父节点指针,数据类型变量,以及颜色,知道这些,我们就可以开始写代码了:
- enum Colour
- {
- BLACK,RED
- };
- template<class Value>
- struct RBTreeNode
- {
- RBTreeNode
* _left; - RBTreeNode
* _right; - RBTreeNode
* _parent; - Colour _col;
- Value _data;
-
- RBTreeNode(const Value& data)
- :_left(nullptr)
- , _right(nullptr)
- , _parent(nullptr)
- , _data(data)
- , _col(RED)
- {}
- };
那么,节点类的代码我们就写完了,不用管了。
3 迭代器类
迭代器类是基于节点类实现的一个类,成员变量只有一个节点指针,成员函数用来实现每个节点的行为,分别有 ”++ -- * -> !=“,一共有5个函数,其中,需要单独介绍的只有++ -- 函数,其他的在list部分已经介绍过了,这里就跳过了,++ 和 -- 是完全相反的是,所以介绍一个即可:
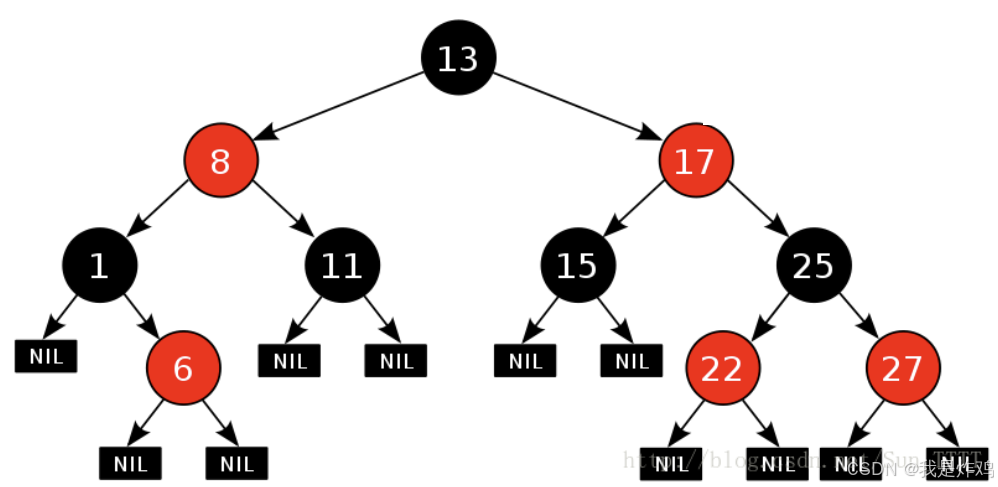
对于++来说,树是按照中序遍历的,所以遍历顺序应该是左子树 根 右子树。
当节点在17的时候,下一个应该遍历的是22,即右子树的最左节点,这是一种情况,因为它的右子树不为空,即右子树还可以遍历,这里应该结合中序遍历来思考。
当节点在15的时候,右子树为空,说明这个节点应该是某个父节点的最左节点了,那么也就代表,该父节点左子树已经遍历完了,应该轮到遍历根节点了,这个时候,我们就应该找祖先的左节点是父节点的那个祖先,这里其实是包含了两种情况,比如节点为15,我们可以把15直接看成它既是父节点也是子节点,那么祖先就是17,对于一般情况,比如6的下下面还有类似的节点,我们下一个访问就是8,因为该节点访问结束,即8的左子树已经访问完了,我们就应该访问8,所以需要找到8这个祖先,这就是++的大体逻辑,--同理,代码如下:
- Self& operator++()
- {
- //右子树不为空 直接走最左边的
- if (_node->_right)
- {
- Node* leftMin = _node->_right;
- while (leftMin->_left)
- {
- leftMin = leftMin->_left;
- }
- _node = leftMin;
- }
- else
- {
- //右边不为空
- //找到左子树是父节点的祖先
- ///两种情况结合
- Node* parent = _node->_parent;
- //根节点的情况 —> 最后节点++ 则会到_root的parent节点 -> 空节点
- while (parent && parent->_right == _node)
- {
- _node = parent;
- parent = parent->_parent;
- }
- _node = parent;
- }
- return *this;
- }
- Self& operator--()
- {
- //左子树不为空
- if (_node->_left)
- {
- Node* rightMax = _node->_left;
- while (rightMax->_right)
- {
- rightMax = rightMax->_right;
- }
- _node = rightMax;
- }
- else
- {
- Node* parent = _node->_parent;
- while (parent && parent->_left == _node)
- {
- _node = parent;
- parent = parent->_parent;
- }
- _node = parent;
- }
- return *this;
- }
迭代器类里面最复杂的结果已经实现了,所以这里就可以直接给剩下代码了:
- template<class T,class Ref, class Ptr>
- struct RBTreeIterator
- {
- typedef RBTreeNode
Node; - typedef RBTreeIterator
Self; -
- Node* _node;
-
- RBTreeIterator(Node* node)
- :_node(node)
- {}
-
- Ref operator*()
- {
- return _node->_data;
- }
-
- Ptr operator->()
- {
- return &_node->_data;
- }
-
- bool operator!=(const Self& s)
- {
- return _node != s._node;
- }
-
- };
4 红黑树本体
由关系层的分析可以知道,红黑树本体的模板参数有3个:
template<class T, class V, class Kot>
我们从插入函数入手,就可以知道Kot这个类的作用了,都知道,在map + set的封装里面,插入函数返回的是pair,这也是为什么我们优先实现迭代器的理由,那么问题来了,插入需要比较吧?我们能直接比较pair类型吗?
在库里面是支持比较的,但是比较方式不是我们希望的,我们希望只按照key去比较,所以现在的问题是,如果要比较,我们应该怎么去实现这个比较?
重载函数吗?重载的定义是函数名相同,参数顺序不同,参数类型不同,参数数目不同,可是我们要比较的都是第二个模板参数,也就代表了类型是一样的,那顺序,数目什么的,根本就用不上了。
所以重载是不可以的,这里我们就用到仿函数了,即我们虽然不能直接实现比较,我们可以返回我们想要的比较的值,日期类的仿函数是重载(),返回的就是一个比较结果,从而实现更好的比较。
我们这里的问题只是,数据类型不同,那么我们实现一个仿函数,返回我们想要的数据类型即可,同样也重载()即可。
那么仿函数这个类我们应该写在哪里呢?毫无疑问肯定是写在map + set这一层,因为成员变量的确定就是要传仿函数过去,所以就有:
- template <class T>
- class set
- {
- public:
- struct SetKeyOfT
- {
- const T& operator()(const T& key)
- {
- return key;
- }
- };
- //typedef typename RBTreeIterator
iterator; - //typedef typename RBTreeIterator
const_iterator; - typedef typename RBTree
const T, SetKeyOfT>::iterator iterator; - typedef typename RBTree
const T, SetKeyOfT>::Const_iterator const_iterator; -
-
-
- pair
bool > insert(const T& data) - {
- return _t.Insert(data);
- }
-
- const_iterator begin() const
- {
- return _t.Begin();
- }
-
- const_iterator end() const
- {
- return _t.End();
- }
-
- iterator begin()
- {
- return _t.Begin();
- }
-
- iterator end()
- {
- return _t.End();
- }
-
- private:
- RBTree
const T, SetKeyOfT> _t; -
- };
-
- template <class T,class V>
- class map
- {
- public:
- struct MapKeyOfT
- {
- const T& operator()(const pair
& kv) - {
- return kv.first;
- }
- };
-
- //typedef typename RBTreeIterator
&, pair*> iterator; - //typedef typename RBTreeIterator
&, const pair*> const_iterator; - typedef typename RBTree
const T, V>, MapKeyOfT>::iterator iterator; - typedef typename RBTree
const T, V>, MapKeyOfT>::Const_iterator const_iterator; -
- pair
bool > insert(const pair& data) - {
- return _t.Insert(data);
- }
-
- const_iterator begin() const
- {
- return _t.Begin();
- }
-
- const_iterator end() const
- {
- return _t.End();
- }
-
- iterator begin()
- {
- return _t.Begin();
- }
-
- iterator end()
- {
- return _t.End();
- }
-
- private:
- RBTree
const T,V>, MapKeyOfT> _t; -
- };
此时比较的准备工作才算是完全做好了,剩下要做的就是在比较里面讲比较的部分改动一下即可:
- pair
bool > Insert(const V& data) - {
- if (_root == nullptr)
- {
- _root = new Node(data);
- //根节点必须为黑色
- _root->_col = BLACK;
- return make_pair(_root, true);
- }
-
- Node* root = _root;
- Node* parent = nullptr;
- Kot kot;
- //判断部分
- while (root)
- {
- if (kot(data) > kot(root->_data))
- {
- parent = root;
- root = root->_right;
- }
- else if (kot(data) < kot(root->_data))
- {
- parent = root;
- root = root->_left;
- }
- else
- {
- return make_pair(root, false);
- }
- }
- Node* cur = new Node(data);
- Node* newnode = cur;
- //连接部分 开始判断大小关系
- if (kot(parent->_data) > kot(data))
- {
- parent->_left = cur;
- }
- else
- {
- parent->_right = cur;
- }
- cur->_parent = parent;
- //颜色更替
- //parent的颜色是黑色就结束
- while (parent && parent->_col == RED)
- {
-
- Node* grandfather = parent->_parent;
- //父节点在左边
- if (parent == grandfather->_left)
- {
- Node* uncle = grandfather->_right;
- //uncle存在且为红色
- if (uncle && uncle->_col == RED)
- {
- parent->_col = uncle->_col = BLACK;
- grandfather->_col = RED;
-
- //一层一层的遍历 father层遍历完了所以直接到grandparent层
- cur = grandfather;
- parent = grandfather->_parent;
- }
- //uncle不存在或者是为黑色
- else
- {
- //旋转 -> 通过判断 cur的位置来判断是单旋还是双旋
- if (cur == parent->_left)
- {
- RotateR(grandfather);
- //即原位置变为黑色
- parent->_col = BLACK;
- //如果不变红,导致黑色节点多出来一个
- grandfather->_col = RED;
- }
- //双旋
- else
- {
- RotateL(parent);
- RotateR(grandfather);
- cur->_col = BLACK;
- grandfather->_col = RED;
- }
- break;
- }
- }
- //父节点在右边
- else
- {
- //存在 且 为红
- Node* uncle = grandfather->_left;
- if (uncle && uncle->_col == RED)
- {
- parent->_col = uncle->_col = BLACK;
- grandfather->_col = RED;
-
- //一层一层的遍历 father层遍历完了所以直接到grandparent层
- cur = grandfather;
- parent = grandfather->_parent;
- }
- //不存在 或 为黑色
- else
- {
- //旋转 -> 通过判断 cur的位置来判断是单旋还是双旋
- if (cur == parent->_right)
- {
- RotateL(grandfather);
- //即原位置变为黑色
- parent->_col = BLACK;
- //如果不变红,导致黑色节点多出来一个
- grandfather->_col = RED;
- }
- //双旋
- else
- {
- RotateR(parent);
- RotateL(grandfather);
- cur->_col = BLACK;
- grandfather->_col = RED;
- }
- break;
- }
- }
- }
- _root->_col = BLACK;
- return make_pair(newnode, true);
- }
于此,插入函数结束,那么整体部分我们已经梳理的差不多了,接下来就是部分函数的补充以及部分细节的梳理了。
5 部分函数补充
除了插入函数之外,还有的函数是:析构函数 + 拷贝构造函数 + 构造函数 + map的operator[]重载。
5.1 析构函数
析构函数,即是让每个节点销毁即可,这里我们使用递归析构,一棵树析构,左右子树都析构了,然后再析构根节点,因为是递归,所以模式和前面的中序遍历是一样的:
- public:
- ~RBTree()
- {
- Destroy(_root);
- _root = nullptr;
- }
- private:
- void Destroy(Node* root)
- {
- if (root == nullptr)
- return;
-
- Destroy(root->_left);
- Destroy(root->_right);
-
- delete root;
- root = nullptr;
- }
使用的是后序遍历。
5.2 拷贝构造函数
拷贝构造函数也简单,就是拷贝每个节点的值,但是注意这里是没有包括颜色的,拷贝了之后还要注意连接的问题,只要不是空节点,那么就要进行连接:
- public:
- RBTree(const RBTree
& t) - {
- _root = Copy(t._root);
- }
- private:
- Node* Copy(Node* root)
- {
- if (root == nullptr)
- return nullptr;
-
- Node* newroot = new Node(root->_data);
- newroot->_col = root->_col;
-
- newroot->_left = Copy(root->_left);
- if (newroot->_left)
- newroot->_left->_parent = newroot;
-
- newroot->_right = Copy(root->_right);
- if (newroot->_right)
- newroot->_right->_parent = newroot;
-
- return newroot;
- }
但是呢,这里只写拷贝构造函数不写构造函数就会出问题了:
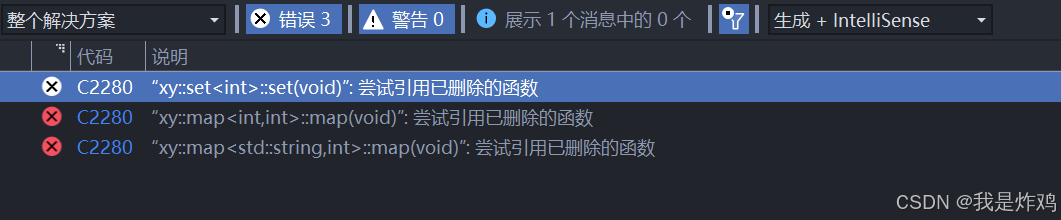
因为实现拷贝构造函数之前编译器一直都调用的是默认构造函数,拷贝构造函数也是构造函数,所以就没有调用默认构造函数,这里我们就需要强行调用默认构造函数。
5.3 构造函数
- //构造函数
- RBTree() = default;
没错,这就是强行调用,,
5.4 map的operator[]重载
重载也简单,注意返回值是iterator变量里面的first元素的second值就可以;
- V& operator[](const T& key)
- {
- pair
bool> ret = _t.Insert(make_pair(key, V())); - return ret.first->second;
- }
6 部分细节梳理
-
节点的创建 数据类型由谁确定?
数据类型在set + map这一层,由传入的第二个参数确定-> 键值对还是key模型 所以节点的模板参数只有一个
-
构造函数为什么加default?
因为创建了拷贝构造,创建拷贝构造之前,编译器一直默认调用的是默认构造,有了拷贝构造之后,就不会调用默认构造,所以需要强制调用默认构造
-
模板传参的时候应该注意什么?
类型 迭代器里面数据类型的确定等大多数都是传的第二个参数,第一个参数用到的地方只有set + map那一层的成员变量需要传第一个变量,find数据的时候,用T,其他部分基本上都是用的V或者是T+ V的组合
-
如何保证key模型的key 和 key - value模型的key不被修改?
在set这一层,传参就是传的const key,在map这一层,传的就是 pair,迭代器部分同理
-
为什么迭代器要写下面的迭代器而不是直接typedef迭代器类为迭代器呢
迭代器类只是一个类而已,基于红黑树封装的map + set来说,我们使用的迭代器应该是基于红黑树实现的, 如果莫名使用一个类来当作迭代器,就少了红黑树这层关系,即实例化都实例化不了
-
为什么两个迭代器的样子都是一样的?
因为在RBTree这一层,真正封装迭代器的其实是RBTree,RB那一层的里面已经有了cons tmap + set这一层就没有必要在加const了,调用的时候直接调用即可。
感谢阅读!
评论记录:
回复评论: