
很多小伙伴都在抱怨,python安装第三方库太慢,往往要挂机一晚上才下载好,运气不好的下载到一半就出错中断了。笔者自己也有这样的疑虑,今天就带大家来加速Pip下载,享受飞一样的感觉!
Pip下载慢的原因
Pip是Python的包安装程序。您可以使用pip安装来自Python包索引和其他索引的包[2]。在命令行中只需要输入
pip install package_name
- 1
Pip是一个非常流行的python包管理工具,在命令行中只需要输入
pip install package_name
- 1
就可以自动安装第三方库。然Pip是从pypi中下载库文件的,
它用的是国外的服务器,下载速度自然很慢。
目前国内有很多的镜像站(内容与官方源一样,只不过服务器在国内),通过镜像站来下载速度自然而然就很快了。下面给大家普及一下如何修改pip的下载源来提高下载速度。
临时加速
在不修改配置信息的情况下,我们可以临时使用国内的镜像站来提高下载速度,以使用清华源为例子:
pip install -i https://pypi.tuna.tsinghua.edu.cn/simple package_name
- 1
-i选项解释:
  -i, --index-url        Base URL of the Python Package Index (default https://pypi.tuna.tsinghua.edu.cn/simple). This should point to a repository compliant with PEP 503 (the simple
                              repository API) or a local directory laid out in the same format.
  --extra-index-url      Extra URLs of package indexes to use in addition to --index-url. Should follow the same rules as --index-url.
- 1
- 2
- 3
清华的镜像源每五分钟更新一次,大而全,推荐大家使用。国内还有其他镜像源可供选择[3]:
清华:https://pypi.tuna.tsinghua.edu.cn/simple
阿里云:http://mirrors.aliyun.com/pypi/simple/
中国科技大学 https://pypi.mirrors.ustc.edu.cn/simple/
华中理工大学:http://pypi.hustunique.com/
山东理工大学:http://pypi.sdutlinux.org/
豆瓣:http://pypi.douban.com/simple/
- 1
- 2
- 3
- 4
- 5
- 6
永久加速
临时加速不太方便,每次安装库时必须带上镜像源的网址。若想减少麻烦,那就要修改配置信息,默认使用镜像源,配置好后只要输入pip install package_name,就可以快速安装库了。
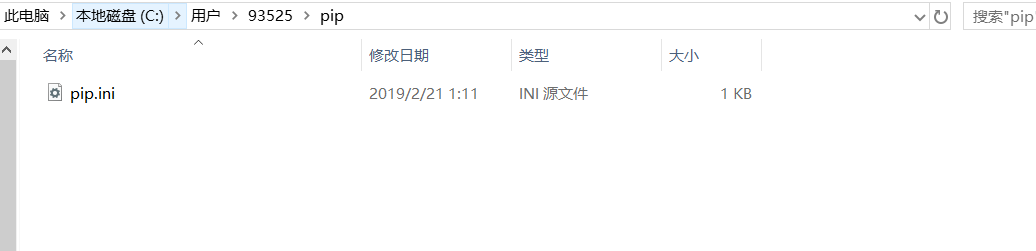
windows下,方法1:
- 打开cmd输入set命令查看用户目录USERPROFILE;


- 在user目录中创建一个pip目录,如C:\Users\lenovo\pip,在其中新建文件pip.ini,内容如下:
[global]
index-url = https://pypi.tuna.tsinghua.edu.cn/simple
- 1
- 2
windows下,方法2:
命令行输入:
pip config set global.index-url https://pypi.tuna.tsinghua.edu.cn/simple
- 1
执行后就配置好了。
windows下,方法3:
添加清华的源:
conda config --add channels https://mirrors.tuna.tsinghua.edu.cn/anaconda/pkgs/free/
conda config --add channels https://mirrors.tuna.tsinghua.edu.cn/anaconda/cloud/conda-forge
conda config --add channels https://mirrors.tuna.tsinghua.edu.cn/anaconda/cloud/msys2/
# 设置搜索时显示通道地址
conda config --set show_channel_urls yes
- 1
- 2
- 3
- 4
- 5
添加中科大的源:
conda config --add channels https://mirrors.ustc.edu.cn/anaconda/pkgs/main/
conda config --add channels https://mirrors.ustc.edu.cn/anaconda/pkgs/free/
conda config --add channels https://mirrors.ustc.edu.cn/anaconda/cloud/conda-forge/
conda config --add channels https://mirrors.ustc.edu.cn/anaconda/cloud/msys2/
conda config --add channels https://mirrors.ustc.edu.cn/anaconda/cloud/bioconda/
conda config --add channels https://mirrors.ustc.edu.cn/anaconda/cloud/menpo/
conda config --set show_channel_urls yes
- 1
- 2
- 3
- 4
- 5
- 6
- 7
源之间的切换:
如果你先添加的中科大的源,想切换回清华的源,可以先输入conda config --show命令来查看具体信息。
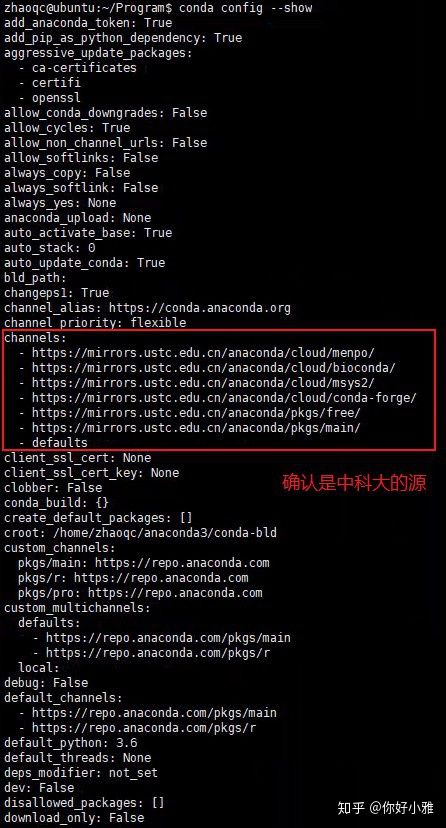
我们发现确实是使用的中科大的源,我们使用命令conda config --remove-key channels来删除掉之前添加的中科大的源,然后再添加清华的源,就可以了。
Pycharm中使用镜像源
有些小伙伴们使用的是Pycharm构建了项目,然后采用了虚拟的环境配置(一个项目一个环境),从而避免了系统中环境混乱。下面教大家如何在Pycharm中通过镜像源来下载第三方库。
- 点击File→Settings;
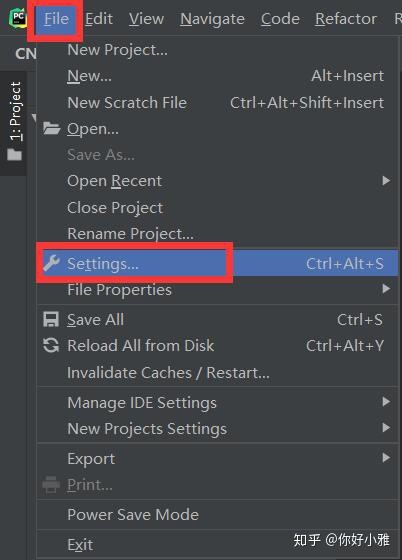
- 点击Python Interpreter→+;
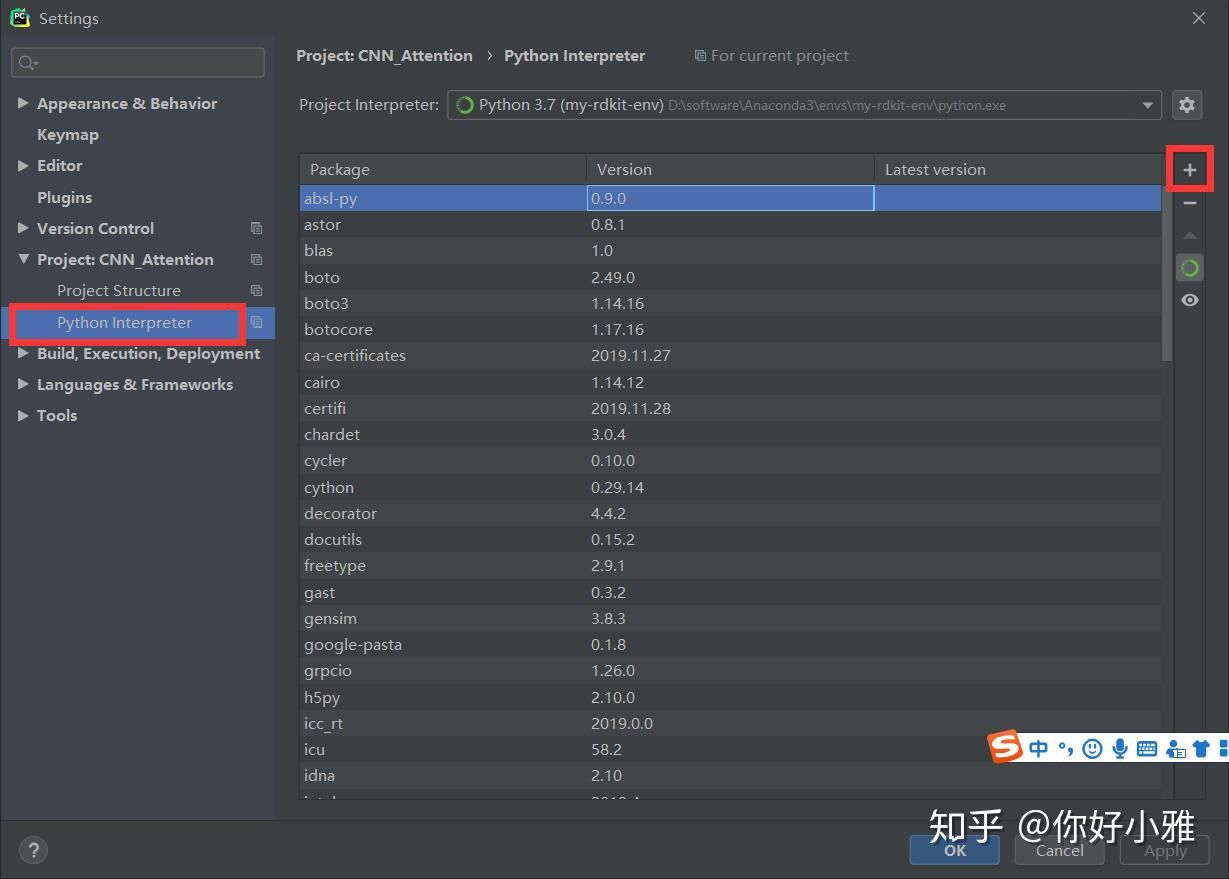
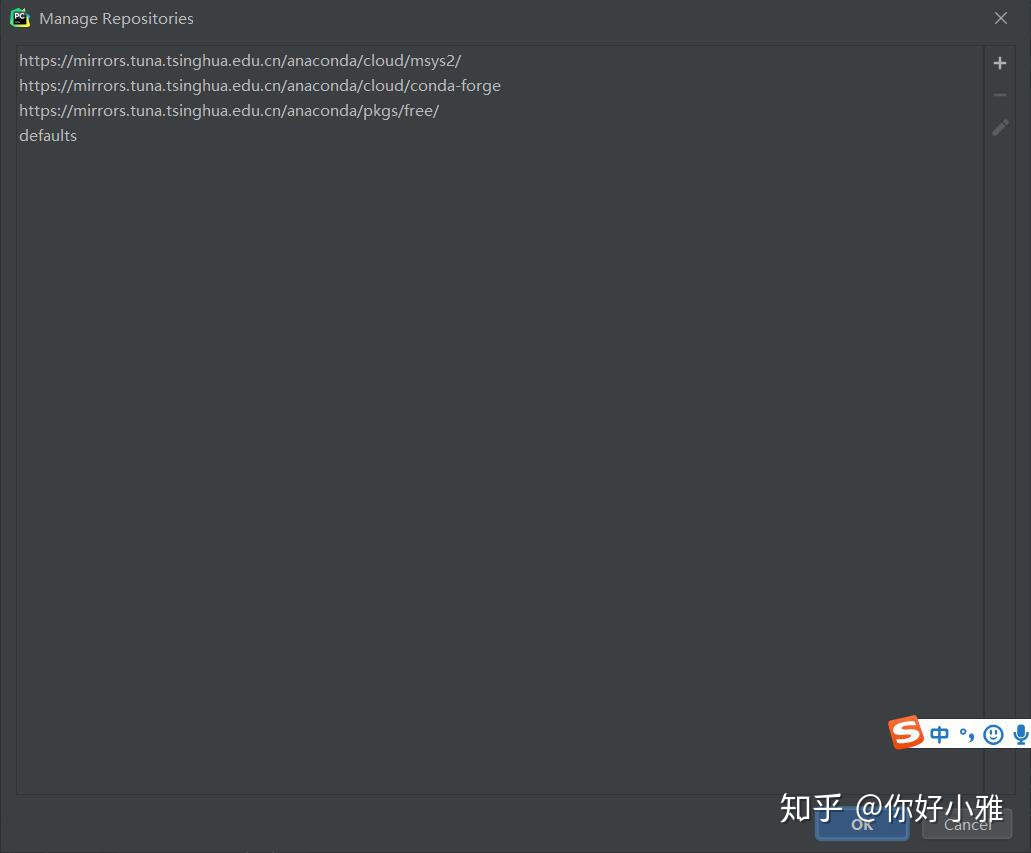
- 点击Manage Repositories;
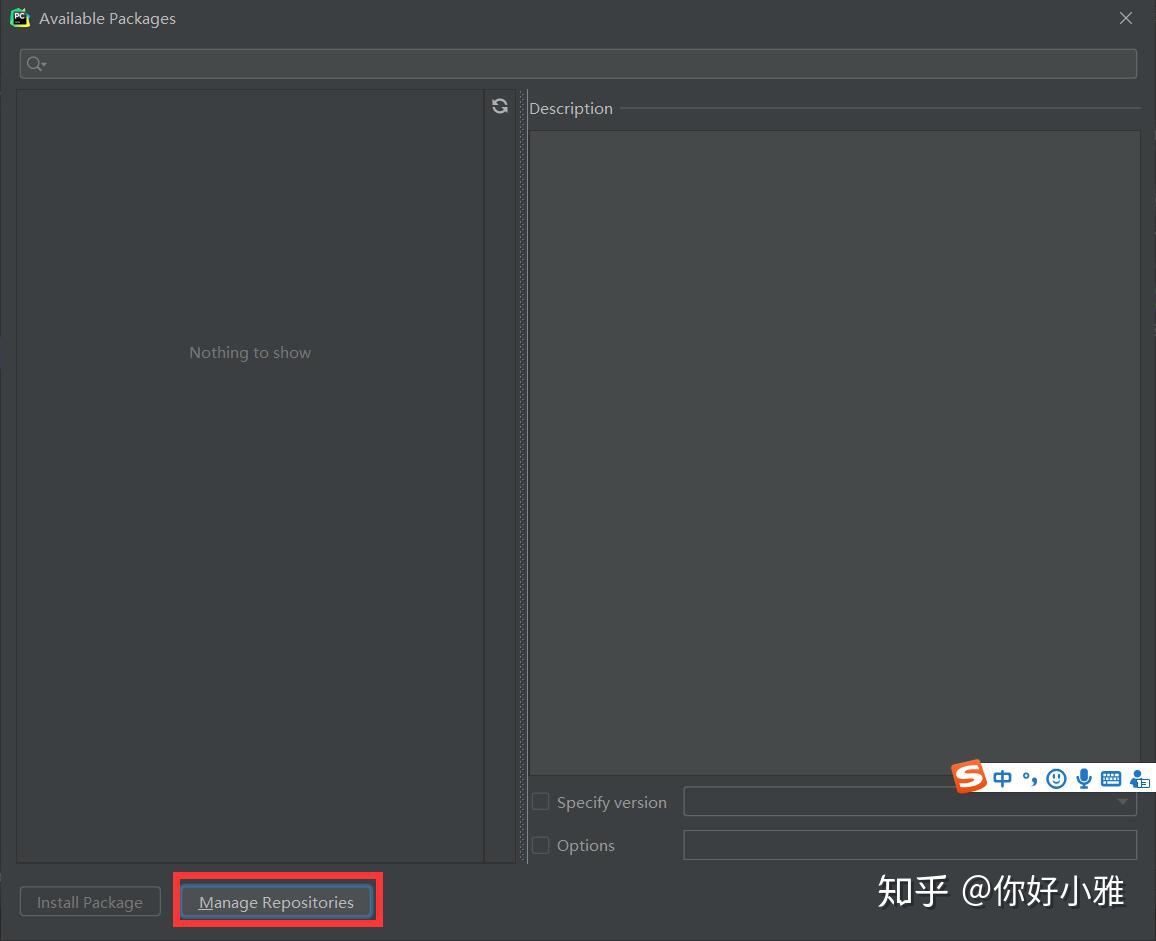
- 点击+就可以进行添加,或者选中已存在条目进行修改,点击OK进行保存。
Linux下
pip.conf 是 Python 包管理工具 pip 的配置文件,它用于配置 pip 的行为和设置。这个配置文件允许你自定义 pip 的各种选项,以满足你的需求。以下是一些常见的配置选项以及它们的解释:
index-url:指定包索引的 URL。你可以将其设置为一个自定义的包索引,以便从特定的源获取软件包。trusted-host:用于信任的主机名。如果你从非官方源安装软件包,你可以将这些主机名列为信任的,以避免 SSL 验证错误。extra-index-url:额外的包索引 URL。你可以在这里添加其他的包索引源。
linux下,修改 ~/.pip/pip.conf (没有就创建一个,如果系统系统级生效,则修改/etc/pip.conf), 修改 index-url 至镜像源地址,内容如下:
-
cd ~
-
mkdir .pip
-
cd .pip
-
vi pip.conf
-
在pip.conf中,添加配置内容
[global] timeout = 60 index-url = https://pypi.tuna.tsinghua.edu.cn/simple trusted-host = pypi.douban.com- 1
- 2
- 3
- 4
[global] 是一个特殊的配置节(section),用于设置全局配置选项(此全局非下文的全局)。这意味着在 [global] 部分定义的选项将会影响到整个 pip 工具的行为,而不仅仅是针对特定项目或环境的配置。
例如,你可以在 [global] 部分中设置全局的包索引 URL、代理服务器、缓存路径等选项,这些设置将会应用于所有的 pip 操作,而不需要在每个项目的配置中重复定义。
这种全局配置的好处在于,你可以统一管理 pip 工具的行为,而不需要在每个项目中都进行配置,这对于在多个项目中共享相同的配置选项非常有用。
当然我们也可以通过pip config命令的方式进行配置:
$ pip config --help                                                                                                                                         1

Usage:
  pip config [] list
  pip config [] [--editor ] edit

  pip config [] get name
  pip config [] set name value
  pip config [] unset name
  pip config [] debug


Description:
  Manage local and global configuration.

  Subcommands:

  - list: List the active configuration (or from the file specified)
  - edit: Edit the configuration file in an editor
  - get: Get the value associated with name
  - set: Set the name=value
  - unset: Unset the value associated with name
  - debug: List the configuration files and values defined under them

  If none of --user, --global and --site are passed, a virtual
  environment configuration file is used if one is active and the file
  exists. Otherwise, all modifications happen to the user file by
  default.

Config Options:
  --editor            Editor to use to edit the file. Uses VISUAL or EDITOR environment variables if not provided.
  --global                    Use the system-wide configuration file only
  --user                      Use the user configuration file only
  --site                      Use the current environment configuration file only
...
- 1
- 2
- 3
- 4
- 5
- 6
- 7
- 8
- 9
- 10
- 11
- 12
- 13
- 14
- 15
- 16
- 17
- 18
- 19
- 20
- 21
- 22
- 23
- 24
- 25
- 26
- 27
- 28
- 29
- 30
- 31
- 32
- 33
- 34
- 35
配置通常分用户级和系统级,即作用的范围。
$ sudo pip config --global set global.index-url https://pypi.tuna.tsinghua.edu.cn/simple                                                                    1
[sudo] password for syrius:
Writing to /etc/pip.conf
$
$ cat /etc/pip.conf
[global]
index-url = https://pypi.tuna.tsinghua.edu.cn/simple
- 1
- 2
- 3
- 4
- 5
- 6
- 7
注意配置系统级需要使用sudo权限。
结语
以上就是这篇文章的全部内容了,希望本文提供的这个方法对大家的学习或者工作能带来一定的帮助,如果有疑问大家可以留言交流。请各位大侠帮忙点赞转发收藏!
评论记录:
回复评论: